Optional Recipients & Conditional Fields
Not every document is one size fits all. Some answers are optional, some questions only matter if an earlier answer was "Yes", and some templates have a second signer only some of the time. This guide covers the settings that make one document or template handle all of those cases.
Where to find it
Step 1: Choose required, hidden or read only
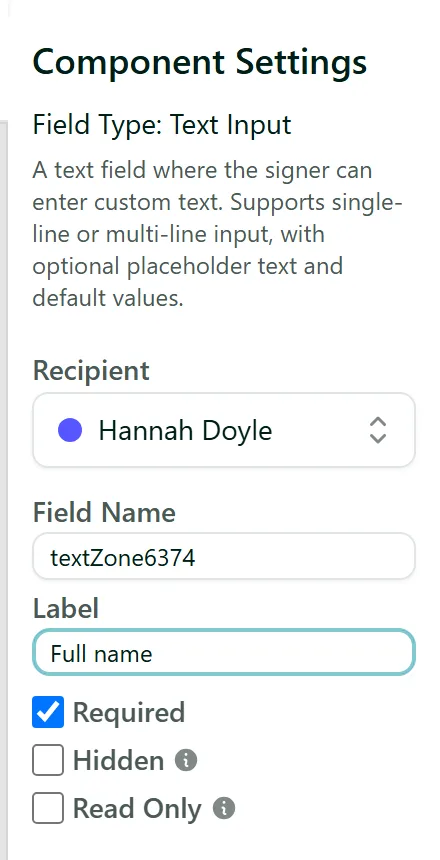
Click a field you have placed. Under its Label are three checkboxes:
- Required - on by default. Untick it and the signer can finish without filling the field in (Sign Next Field skips it).
- Hidden - the signer does not see the field at all. Hidden wins over required and read only, and is mostly used as the starting point for a conditional rule (Step 2).
- Read Only - the signer sees the value but cannot change it, handy with a Default Value. Read only fields are automatically optional.
Checkboxes work a little differently: choose Must select - All, One or More or None required (the default, so a single tick box is optional unless you change it).
Step 2: Show a field only when it is needed
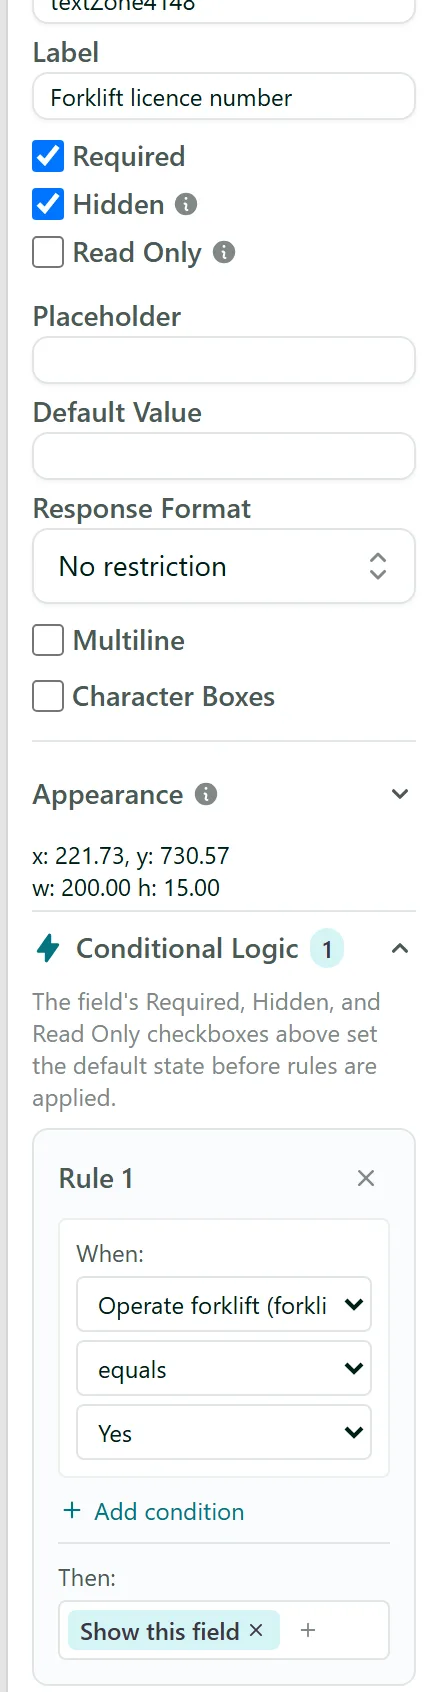
Example: a workshop form asks "Will you operate the forklift?" and only wants a licence number from people who answer Yes.
- Click the licence number field and tick Hidden so it starts out of sight.
- Open Conditional Logic and click Add Rule.
- Under When: pick the forklift question, the comparison (equals) and the value (Yes).
- Under Then: keep Show this field.
The signer only sees the licence field after choosing Yes, and it is only required then. Fields hidden when the signer finishes are left off the signed PDF.
What rules can do
A rule can look at a text field, drop-down, radio button, checkbox, signature, initials, file upload or approve / decline field, and compare with equals, does not equal, contains, does not contain, is empty or is not empty (the choices depend on the field type). Use Add condition to combine checks with ALL conditions (AND) or ANY condition (OR). The Then: actions are Show this field, Hide this field, Make required, Make optional, Disable this field, Enable this field and Clear this field. A field can have up to five rules, each with up to five conditions.
Step 3: Make a template recipient optional
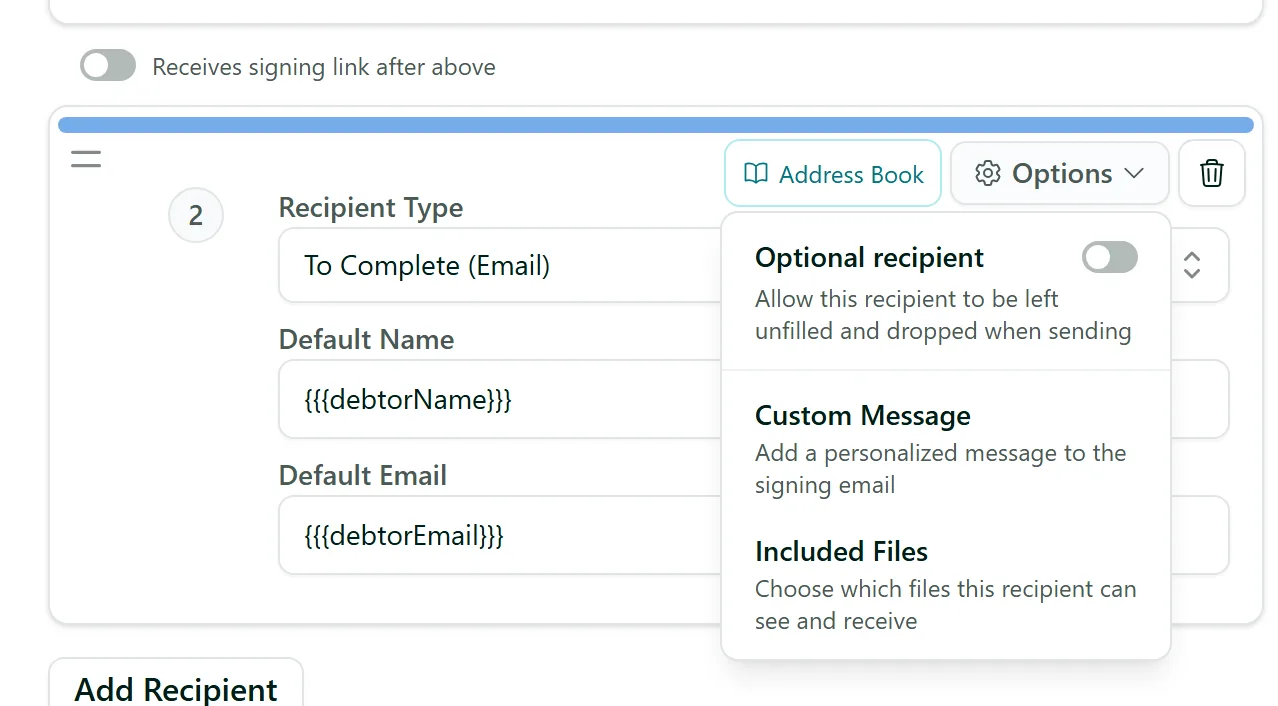
In a template, open a recipient's Options menu and switch on Optional recipient. When a session is sent from the template and nobody has filled in that recipient's email (or mobile, for text message recipients), the recipient is dropped - along with all of their fields and any witness attached to them. The classic use is a "Second director" who only signs for some clients. Drafts keep the optional recipient so you can still fill it in before sending.
Tips
- Use Test Signing Flow on the last step to try your rules as a signer before you send.
- A rule with no field picked shows in red, and AirSign will not let you save or send until it is finished or deleted.
- Make sure at least one recipient on the template is not optional, so a session always has someone to send to.
- Optional recipients work with bulk send too - leave the cells blank on rows that do not need them.
Need More Help?
Related guides: Placing Signatures And Inputs, Creating Your First Template, Signing a Document. See our FAQ section or email support at [email protected].