Adding a Custom Domain
By default, AirSign sends signing request emails on your behalf. Adding a verified custom domain lets those emails come from your own domain instead - so recipients recognise the sender, trust the email, and can reply straight to you. This guide walks through adding a domain, setting up the DNS records, and verifying it.
Before you start
Verified domains are available on plans that include the feature - if you do not see the section, you may need to upgrade. You will also need access to your domain's DNS settings (usually at your domain registrar or DNS host) to add a few records.
Step 1: Open Sender Profiles in Settings
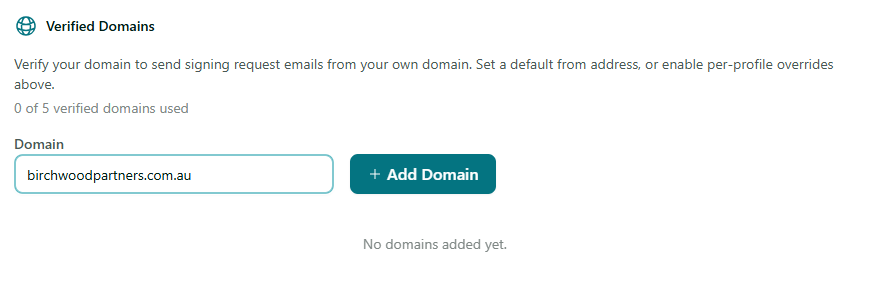
Go to Settings → Sender Profiles and scroll to the Verified Domains section. You will see how many verified domains your plan allows and how many you have used.

Step 2: Add your domain
Type your domain into the Domain field (for example, example.com - just the domain, no www or https) and click Add Domain. It is added with a Pending status, and AirSign generates the DNS records you need to add.
Step 3: Add the DNS records
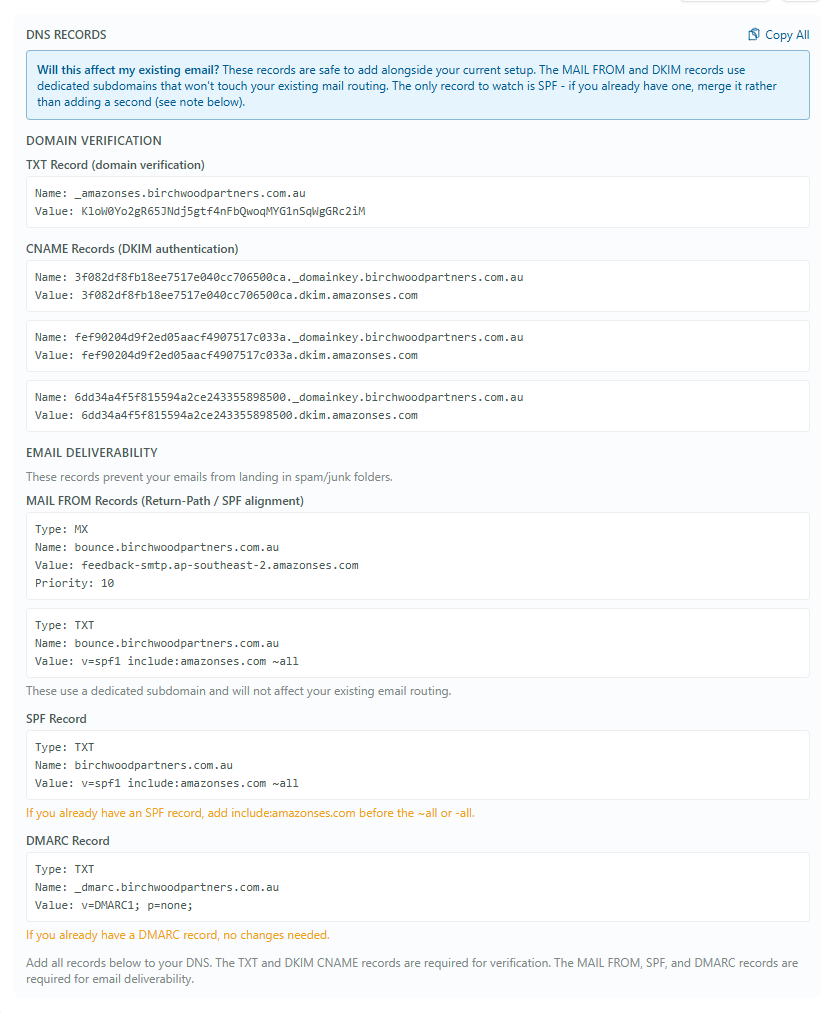
The pending domain shows a list of DNS Records. Copy each one into your DNS host. Every record lists the Type, Name and Value (and a Priority for the MX record). The records are:
- TXT record (domain verification) - proves you own the domain.
- CNAME records (DKIM authentication) - sign your emails so mailboxes trust them. There are usually a few of these.
- MAIL FROM records (MX + SPF) - set on a dedicated subdomain, so they do not affect your existing email routing.
- DMARC record - recommended for the best deliverability and protection.
Will this affect my existing email?
No. These records are safe to add alongside your current setup - the MAIL FROM and DKIM records use dedicated subdomains that do not touch your existing mail. The one to watch is SPF: if your domain already has an SPF record, merge the new values into it rather than adding a second SPF record.
Step 4: Verify the domain
DNS changes can take anywhere from a few minutes to a few hours to take effect. Once you have added the records, come back to the Verified Domains section and click Check on the domain. When all the records are detected, the status changes to Verified. If it still shows pending, give DNS a little longer and check again.

Step 5: Choose your from address
Once verified, you can set the domain as your default sending domain and choose a default from address (for example, [email protected]). From then on, your signing requests, reminders and completion emails are sent from your own domain. You can also set specific from addresses per sender profile.
Tips
- Use a real, monitored mailbox as your from address so you see any replies from signers.
- Keep your domain lowercase and enter only the domain itself, without www or a path.
- If you removed the DNS records later, your domain would stop verifying and emails would fall back to the default sender - leave the records in place.
Need More Help?
Want the bigger picture on why this matters? See our overview of custom domain emails. For anything else, check our FAQ section or contact our support team at [email protected].