Bulk Sending a Template
When the same document has to go to a lot of people - a policy update for every employee, a photo release for every client - bulk send turns one template and a list into a separate signing session for each person, created and emailed in the background.
Where to find it
Step 1: Open Bulk Send on the template
Only active templates show Bulk Send in their menu. Each row you add becomes its own session from that template, sent immediately.
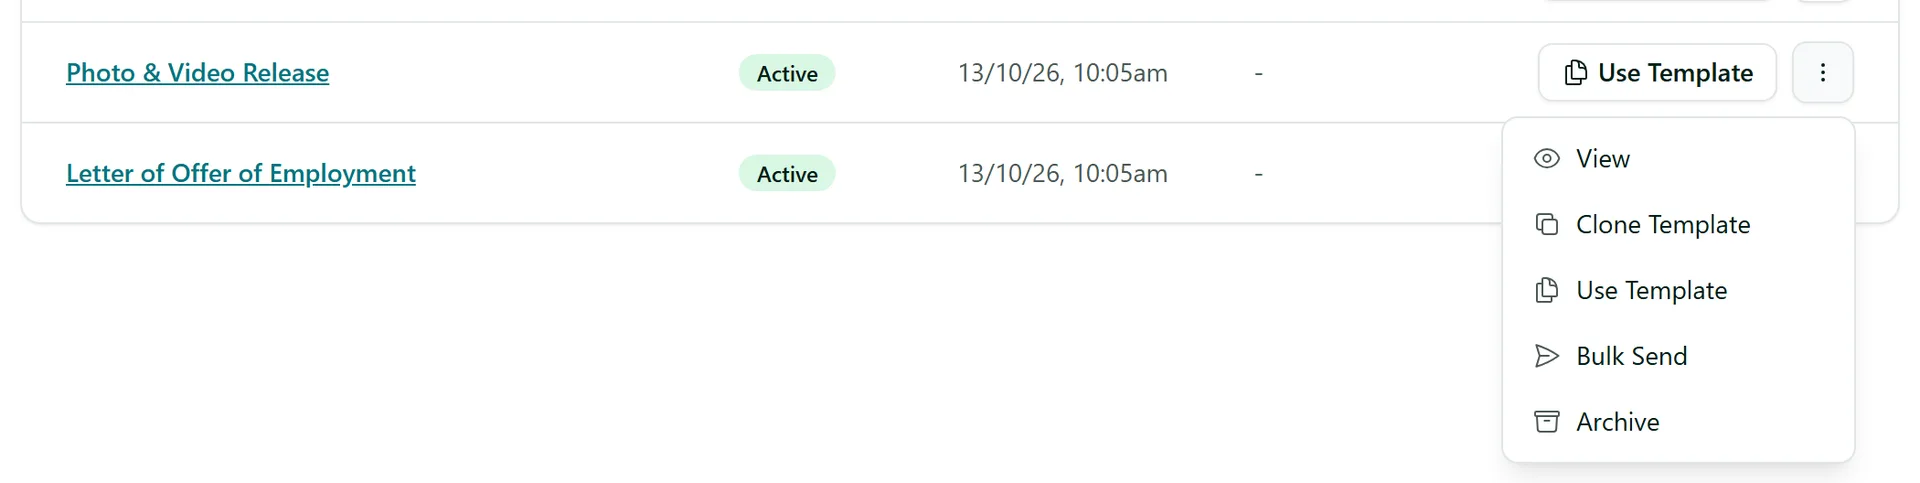
Step 2: Check the session name
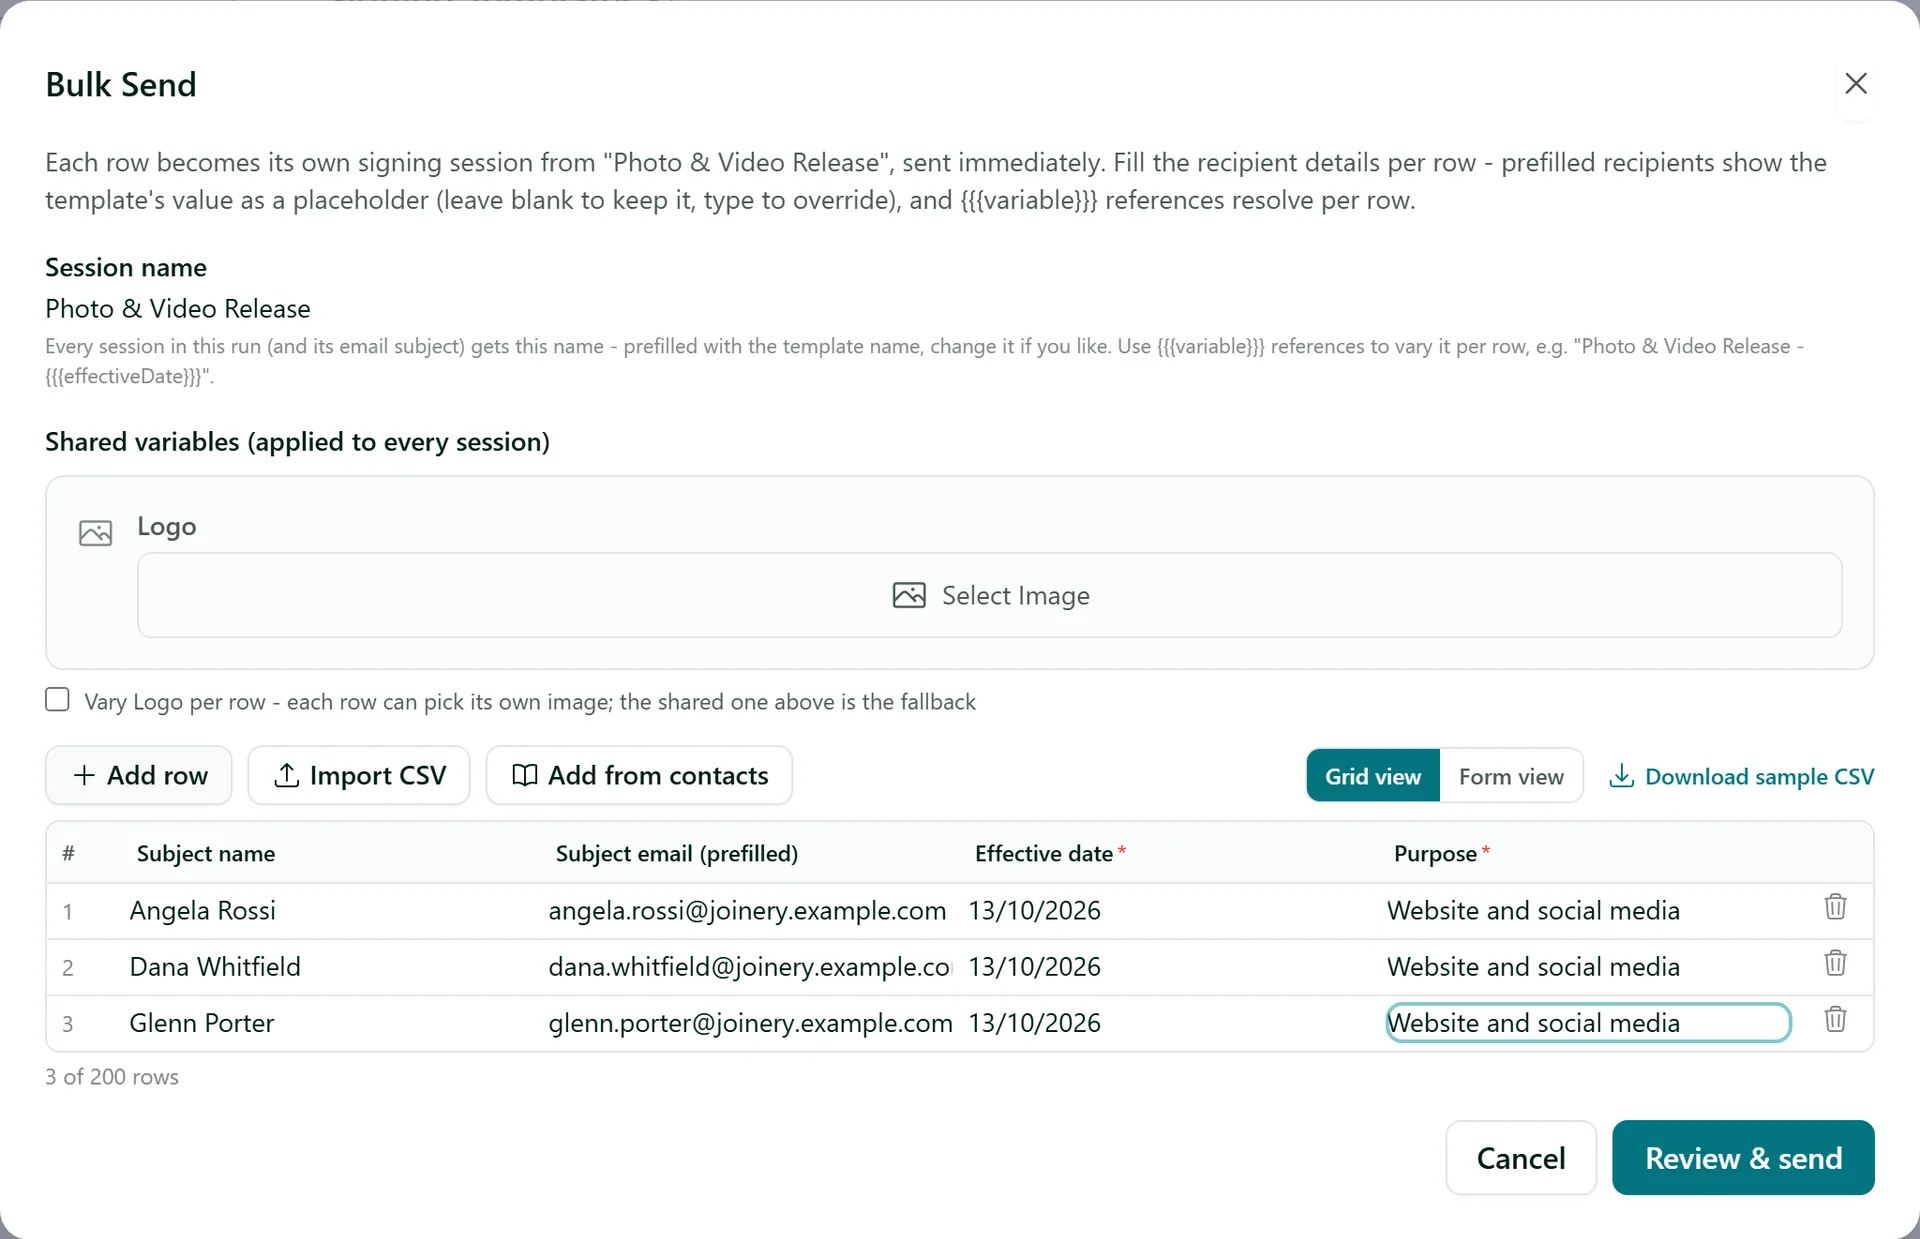
Session name starts as the template name and is used for every session and its email subject. To make each one different, add a template variable such as {{{effectiveDate}}} - it is filled from each row.
Step 3: Add your people
The grid has a name and email column for each recipient role in the template, plus a column for each text variable (required ones are marked with a red star). Fill it in any of three ways:
- Add row - type each person in.
- Import CSV - upload a spreadsheet, then match its columns to the grid (AirSign guesses from the headings). Download sample CSV gives you a file with the right headings.
- Add from contacts - tick people from your address book and CRM.
A recipient the template already fills in shows that value greyed out - leave the cell blank to keep it or type to override it. Images, tables and rich text cannot come from a spreadsheet cell, so they go once in Shared variables and apply to every session (tick Vary ... per row to pick a different image per row). Grid view and Form view show the same rows - use Form view when there are many columns.
Step 4: Review and send
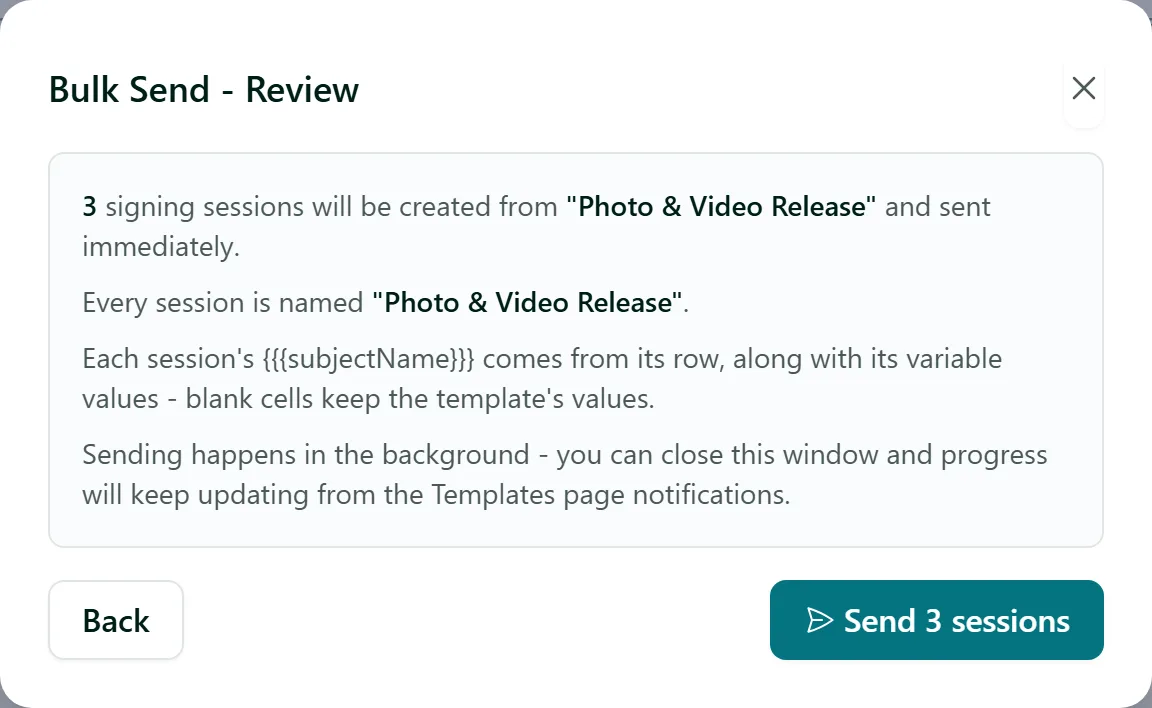
Click Review & send. AirSign checks every row first (missing required values, invalid emails) and highlights anything to fix. The review shows how many sessions will be created and what they will be called. Click Send N sessions to start.
Step 5: Watch the progress
A progress bar lists each row as sent or failed (with the reason). Sending carries on if you click Close (keeps sending), and a message pops up in AirSign when the run finishes. Cancel remaining stops the rows not yet sent. Every session then appears in Send & Sign > Sent Sessions to track like any other.
Tips
- You can send to up to 200 rows in one run.
- One failed row (say, a mistyped email) never stops the others - fix it and send that person on their own.
- Set reminders and an expiry on the template first so every session in the run chases itself. See Setting a Deadline & Reminders.
- Roles marked as optional on the template can be left blank per row - they are simply left off that session. See Optional Recipients & Conditional Fields.
Need More Help?
Related guides: Creating Your First Template, How to Use Template Variables, Tracking & Completed Documents. See our FAQ section or email support at [email protected].