Creating Your First Signing Session
Follow this step-by-step guide to create and send your first signing session with AirSign. The process is simple and takes just a few minutes to complete.
Before You Begin
Make sure you have your document ready (PDF) and the name and email addresses of the people who need to sign it.
Step 1: Access Your Dashboard
- Log in to your AirSign account at app.airsign.com.au
- You'll see your main dashboard with options to create new sessions, view existing ones, and manage templates
- Click the "New Session" button to start creating your first signing session

Step 2: Set Up Your Session
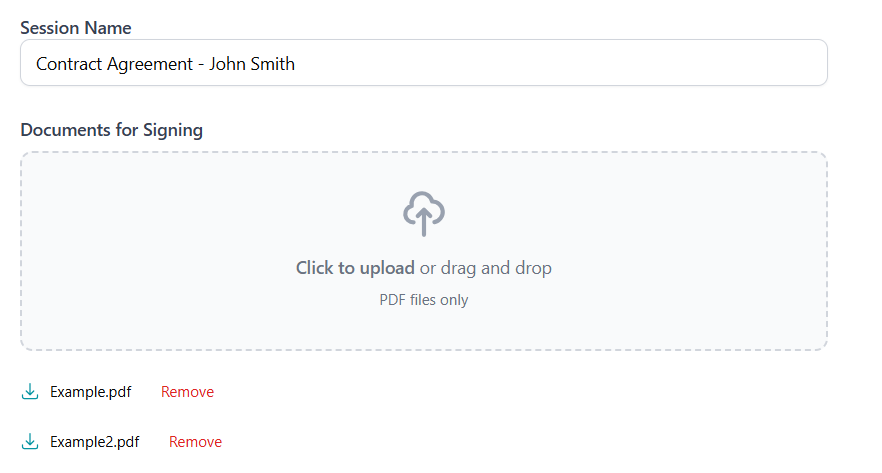
- Give your session a descriptive name (e.g., "Contract Agreement - John Smith")
- Upload your document:
- Drag and drop your file directly onto the upload area, or click to browse
- Supported formats: PDF (DOC, DOCX coming soon)
- Maximum file size: 40MB
- You can upload more than one document per signing session (max 5)
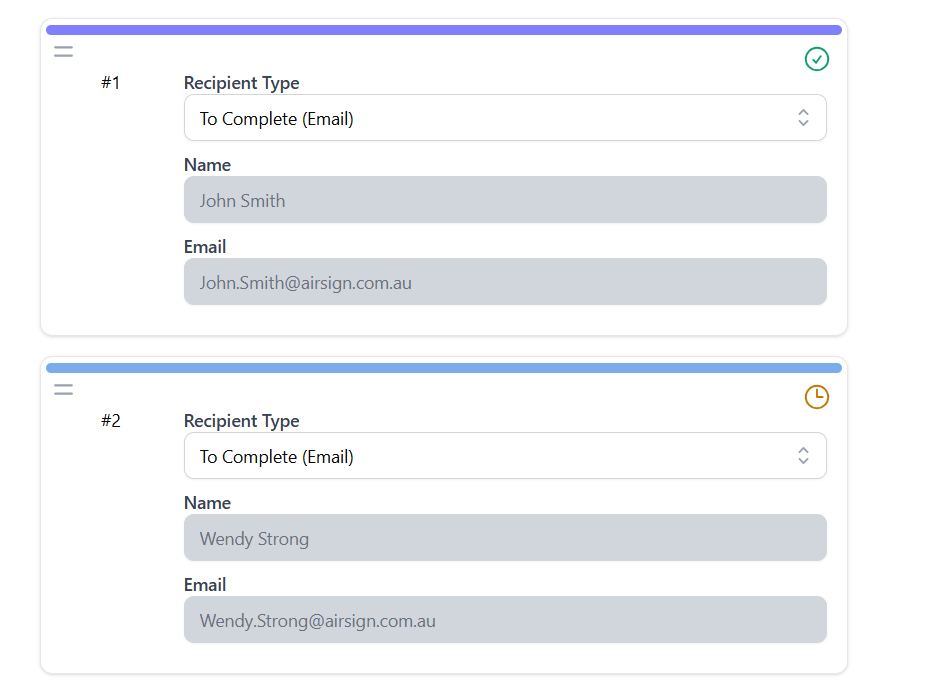
Step 3: Add Recipients
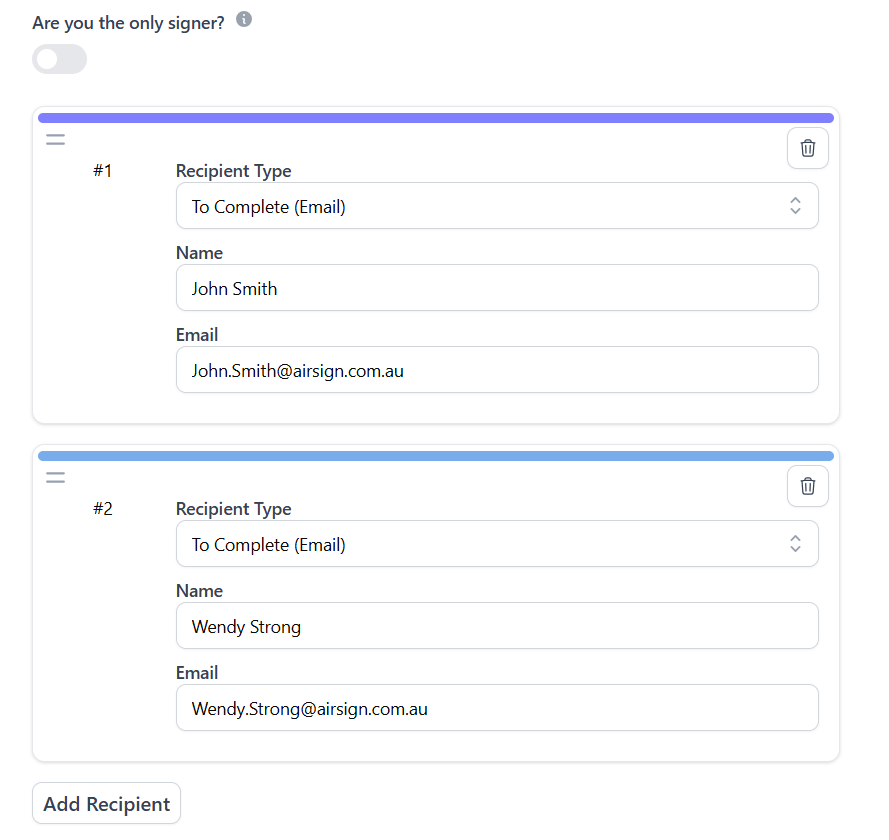
- If you're the only person signing, check the "I'm the only signer" box - otherwise leave it unchecked
- Fill in the name and email of your recipient
- If you have other/multiple signers, click "Add Recipient" and enter their information:
- Name: Full name of the person signing
- Email: Their email address (they'll receive the signing invitation here)
- Add more recipients as needed
Step 4: Add Fields
For detailed information on each field type and its settings, see our Placing Signatures And Inputs guide.
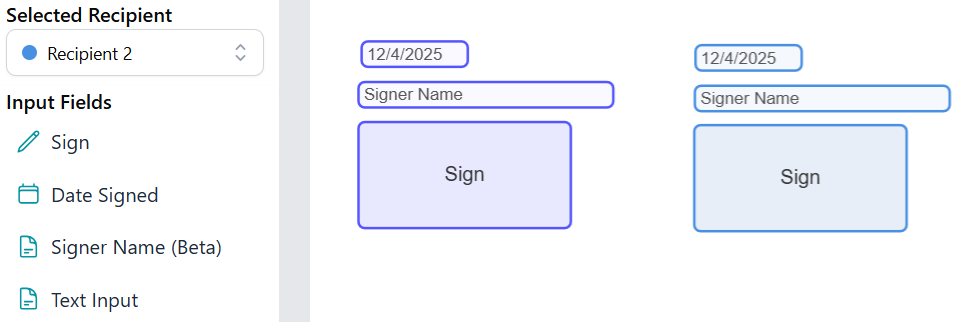
- Once your document is uploaded, you'll see the document editor with a toolbar on the left
- Select a field type from the toolbar:
- Signature: For free-form or text-based signatures
- Signer Name: Automatically displays the signer's name
- Date Signed: Automatically captures the signing date
- Text: For custom text input
- Checkbox: For yes/no questions or agreements
- Dropdown: For selection menus
- Radio Buttons: For multiple choice options
- Click on the document where you want to place the field
- Drag to reposition or resize the field, or adjust its settings in the right panel
- To add more fields, click on a tool again and repeat the process
- If you have multiple recipients, select the appropriate signer before placing each field
Step 5: Repeat for Additional Documents
- If you uploaded multiple documents, click "Next" to move to the next document and repeat the field placement process
- Continue until all documents have their required fields in place
- If you only uploaded one document, you won't see the Next button - simply proceed to the final step
Step 6: Send for Signing
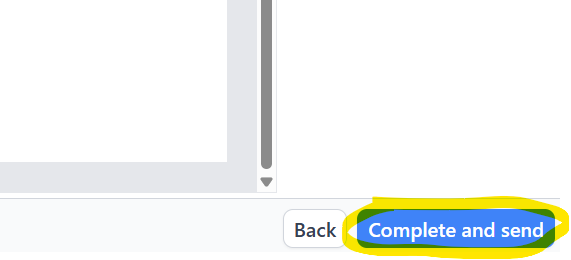
- Review your document one final time to ensure all fields are properly placed
- Click the "Complete and Send" button
- Your recipients will receive email invitations with secure links to sign the document
Step 7: Wait for Signatures
- Now you wait - your recipients will receive their signing invitations via email
- You'll receive an email notification each time a signer completes their signature
- To check progress, go to the Sessions page and click on your session to view its status
- Once all signers have completed, you can download the fully signed document
Congratulations!
You've successfully created your first signing session! The process gets even easier with practice, and you can save time by creating reusable templates for frequently used documents.
Pro Tips
Save as Template
After creating your first session, save it as a template to reuse for similar documents in the future.
Use Placeholders
Add text fields with placeholder text to guide signers on what information to provide.
Auto-Fill Fields
Use Date Signed and Signer Name fields to automatically capture details at the moment of signing - no manual entry required.
Mobile Friendly
Recipients can sign documents on any device - desktop, tablet, or mobile phone.
Need More Help?
If you encounter any issues or have questions about creating signing sessions, check our FAQ section or contact our support team at [email protected].