The AirSign Apps
AirSign is more than signing. Alongside sending documents there is a set of apps for the people you work with, the customers you serve, the assets you look after and the work you schedule - all sharing the same people, documents and settings. This guide shows you around the Apps home and how the apps fit together.
Where to find it
Step 1: Pick an app
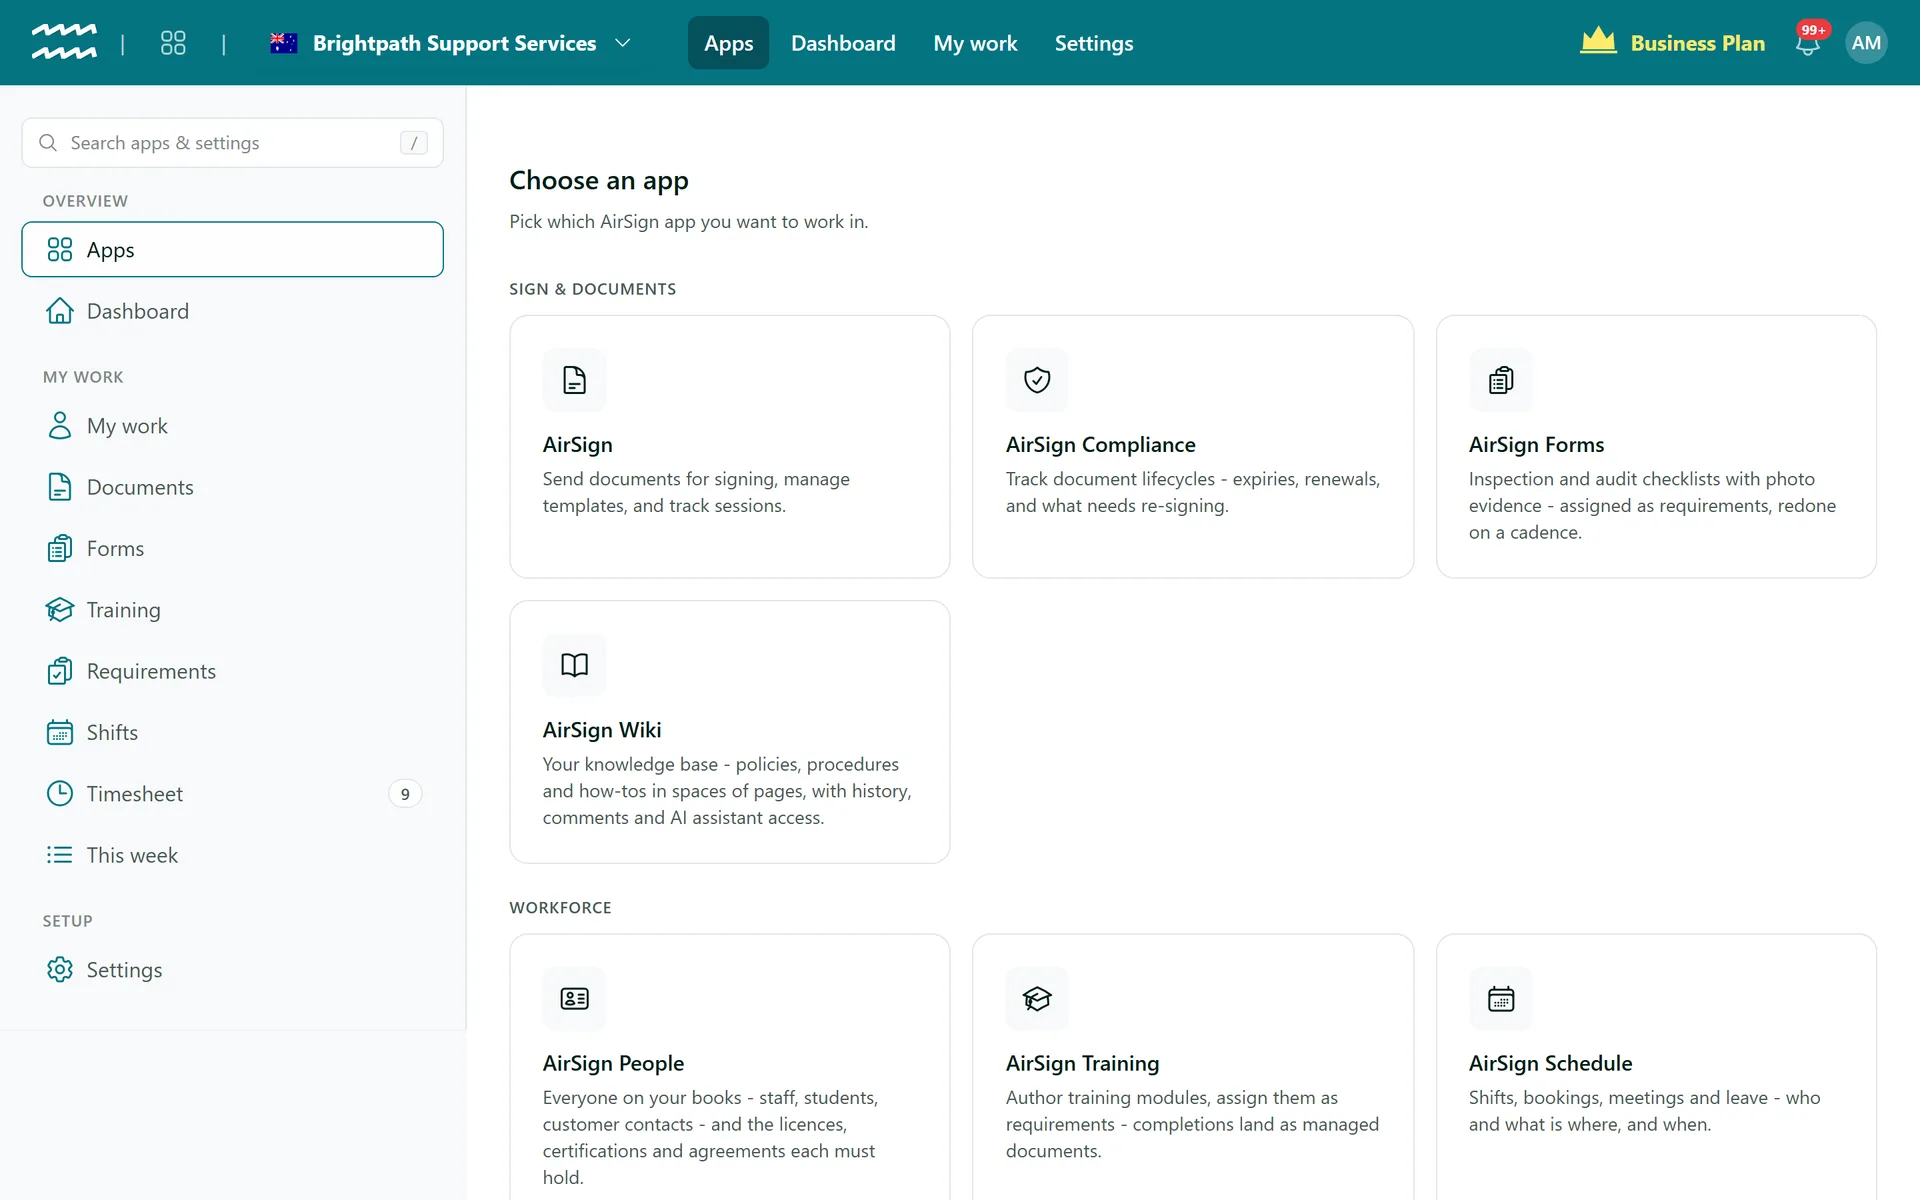
The Apps page lists every app you can open, grouped by what it is for. Select a card to open that app - each one has its own top bar and left menu, and the apps grid icon always brings you back here.
How the apps fit together:
- Sign & Documents - AirSign sends documents for signing; AirSign Compliance tracks every signed or uploaded document over its life (expiry, renewal, re-signing); AirSign Forms runs inspection and audit checklists; AirSign Wiki holds your policies and procedures.
- Workforce - AirSign People is everyone on your books and what each person must hold; AirSign Training, AirSign Schedule, AirSign Timesheets and AirSign Projects train, roster, pay and crew those same people.
- Customers & Assets - AirSign CRM for leads and customers, AirSign Assets for vehicles, equipment and tools, each with the documents they must hold.
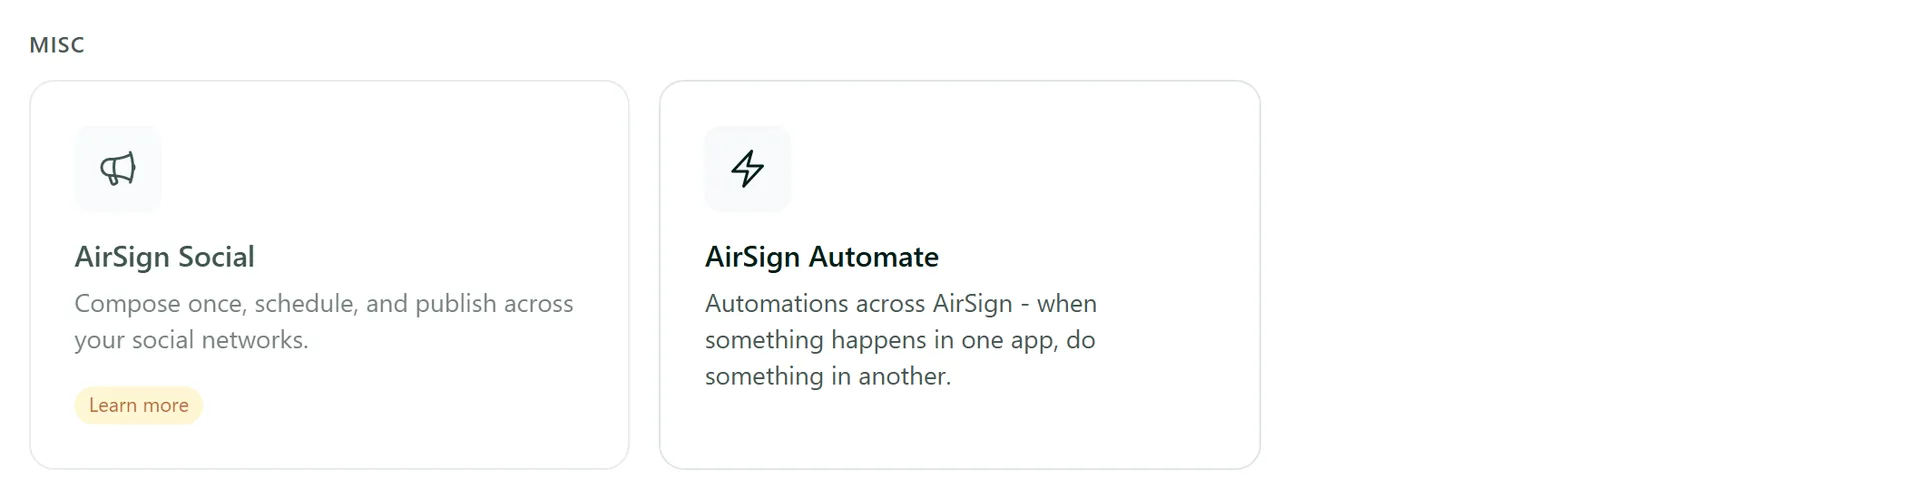
- Misc - AirSign Social for social posts and AirSign Automate for automations that connect the other apps.
The common thread is requirements: you say which documents, training or forms a person, customer or asset must have, and AirSign Compliance keeps track of what is on file, what is expiring and what is missing.
Step 2: Check the Dashboard
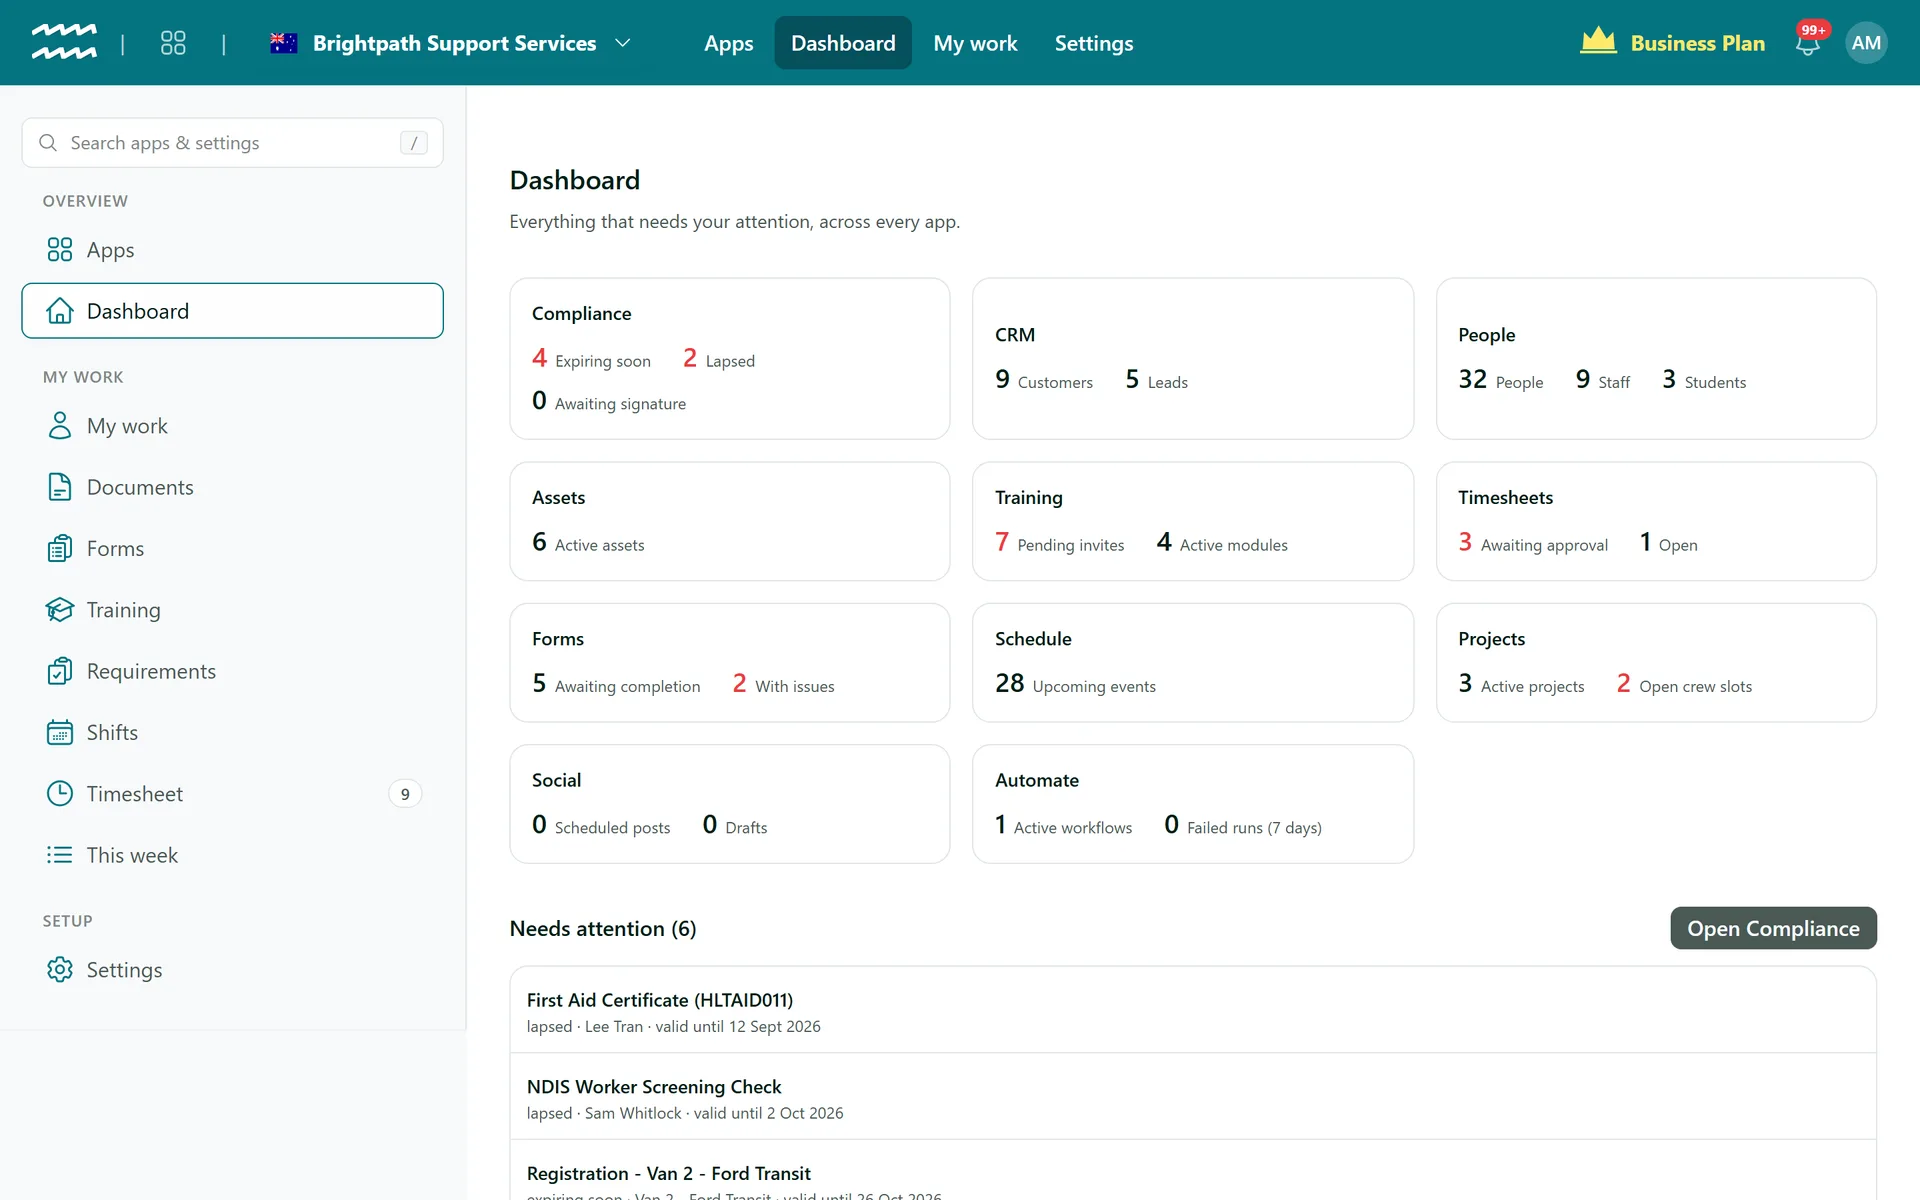
Dashboard gathers what needs your attention across every app into one page - documents expiring soon or lapsed, timesheets awaiting approval, training invites still out, open crew slots and more. Numbers in red need action. Select a card to jump into that app. Underneath, Needs attention lists the documents closest to expiring; select one to open it, or Open Compliance to see them all.
Step 3: Use My work for your own tasks
If you are also on your organisation's books yourself - for example a manager who clocks in or holds a licence - the left menu shows a My work section. It holds your own documents to sign, forms, training, requirements, shifts and timesheet, the same pages your staff see on their phones. If you are not linked to a person in the organisation, the section does not appear.
Step 4: Search apps and settings
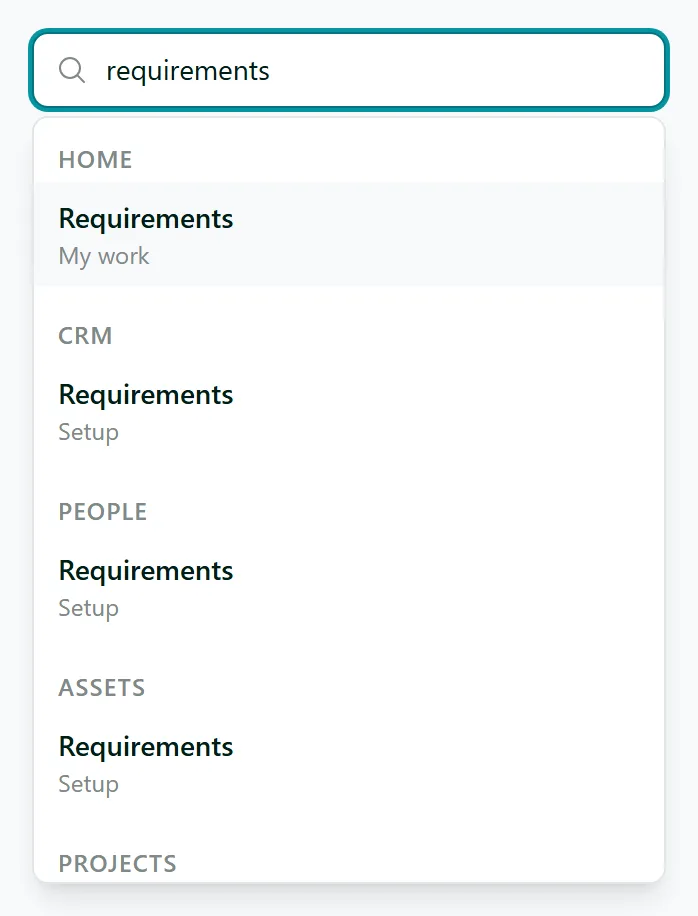
The Search apps & settings box at the top of the left menu finds any app, any page inside an app and any setting. Press / to jump to it, type a word such as "requirements" or "roles", and pick a result to go straight there. Results are grouped by app, so you can see at a glance that several apps have a page of that name.
Settings in the left menu opens every app's settings on one page.
Step 5: Recognise a locked app
Apps that are not part of your plan stay visible but are slightly faded and carry a Learn more badge (in search they show Locked). Selecting one opens a page about the app with a Request access button, so you can ask us to switch it on. Apps your administrator has not given you access to through permission groups are hidden instead.
Tips
- Start each day on the Dashboard - anything in red is waiting on someone in your team.
- Want an app that shows as locked? Use Request access or contact us and we will switch it on for your organisation.
- Can't see an app a colleague uses? Ask an admin to add it to your permission group.
Need More Help?
Related guides: Adding People, Tracking Compliance, Team Access and SSO. See our FAQ section or email support at [email protected].