Managing Leads
A lead is someone you are trying to win - a prospect who has enquired but has not signed anything yet. AirSign CRM keeps your leads in one list and on a pipeline board, moves them along as you send them documents, and turns them into customers the moment their first agreement is signed.
Where to find it
Step 1: Review your leads
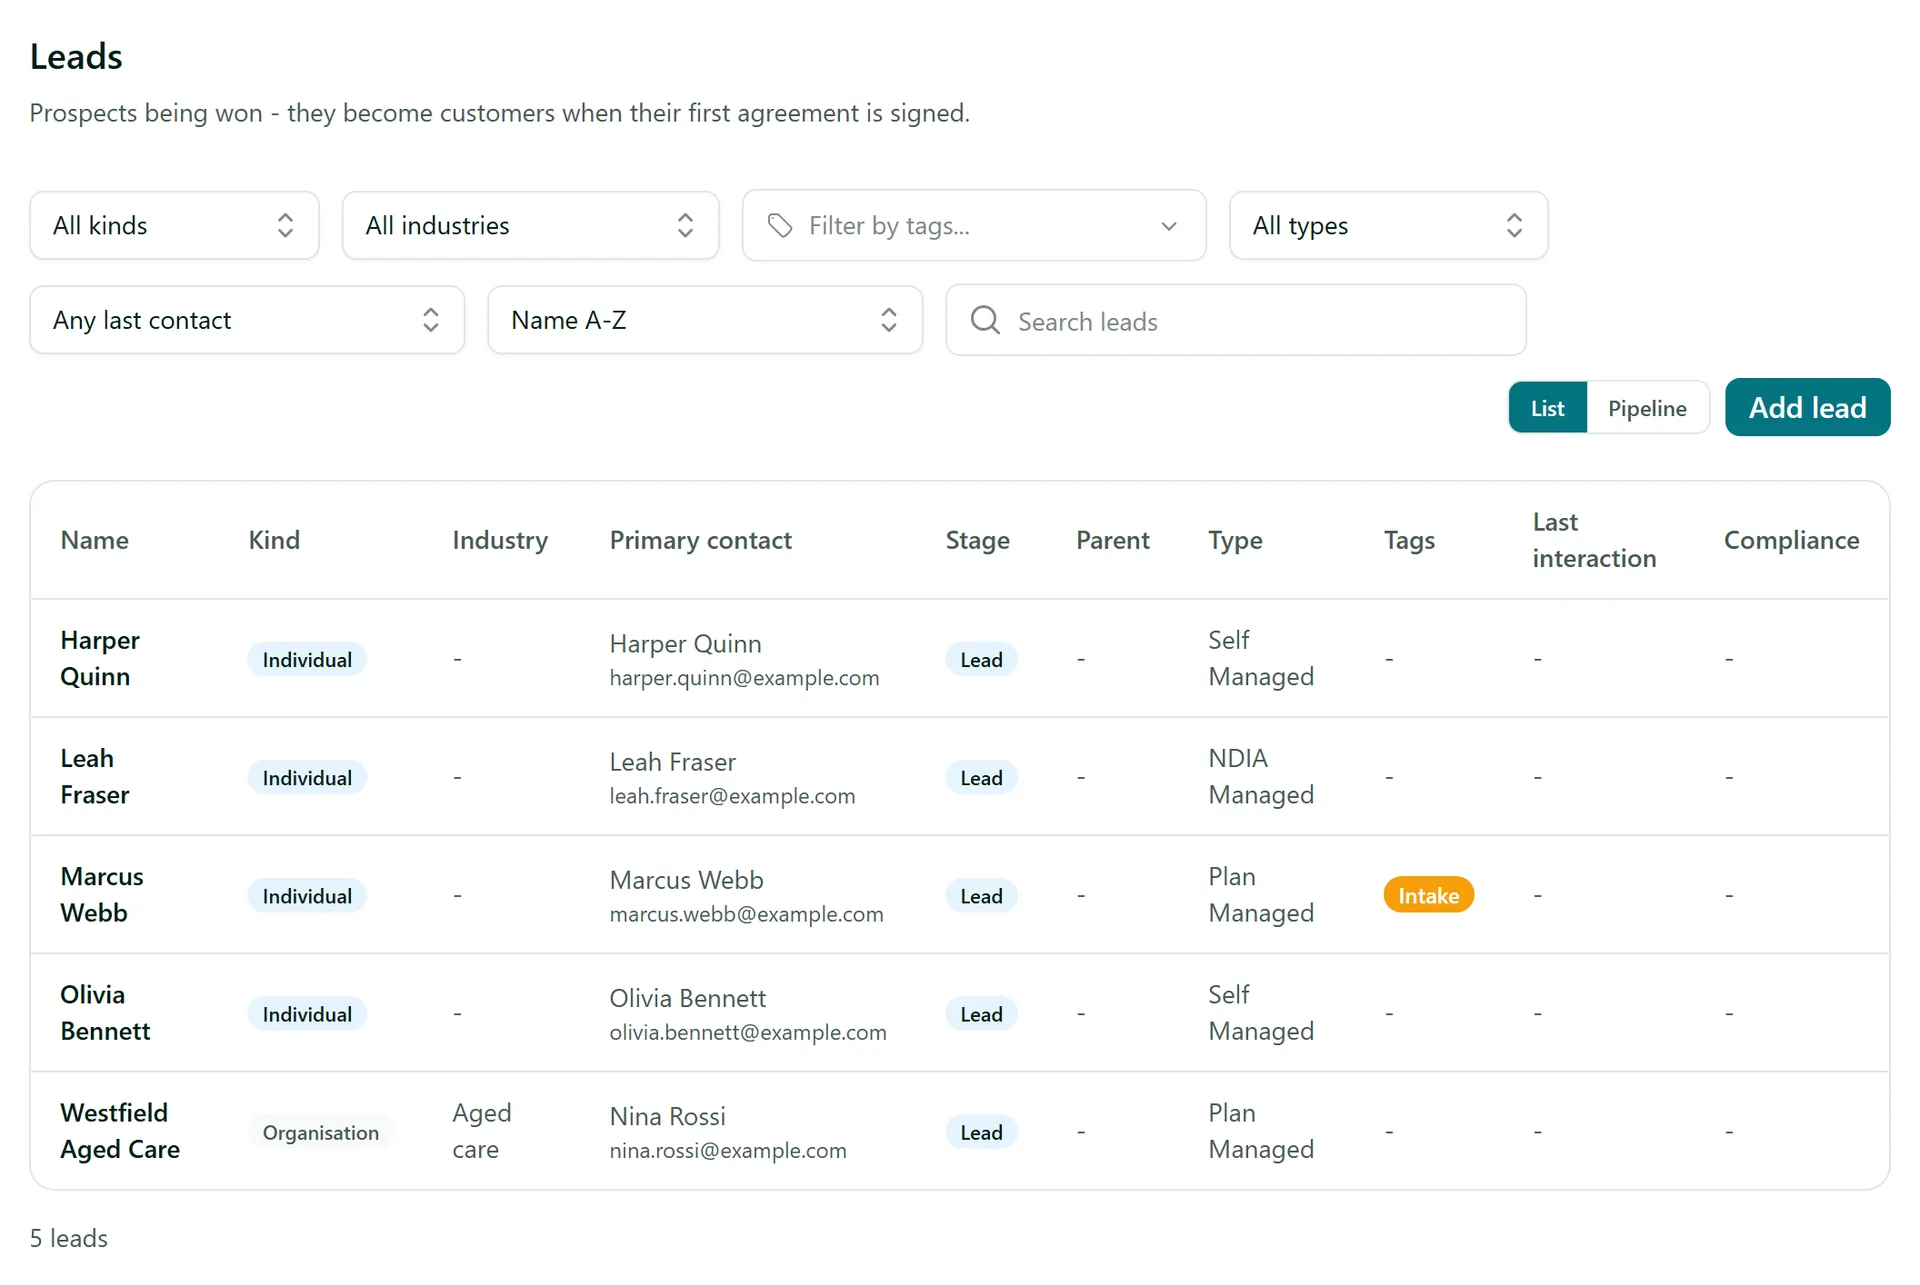
The Leads list shows every prospect with their kind (organisation or individual), primary contact, customer type, tags and the Last interaction you logged with them. Use the filters along the top to narrow the list - for example Not contacted in 60 days finds leads that are going cold - or type in Search leads. Click a row to open the lead.
Step 2: Add a lead
Click Add lead. The form is the same one used for customers, with the Stage already set to Lead. Choose Organisation for a company (it keeps its own name and you add the person you deal with as its contact) or Individual when a person is the account. Fill in a Source such as "Referral" or "Website enquiry" so you can see later where your leads come from, then click Add lead. See Adding Customers for every field on this form.
Step 3: Work the pipeline
Switch the list to Pipeline to see your leads as cards in columns, one column per stage. Drag a card to another column to move the lead along. New organisations start with the stages New, Contacted, Qualified and Proposal Sent. Open Manage stages under the board to rename, reorder (with the arrows), add or delete stages. Deleting a stage moves its leads to Unstaged rather than losing them.
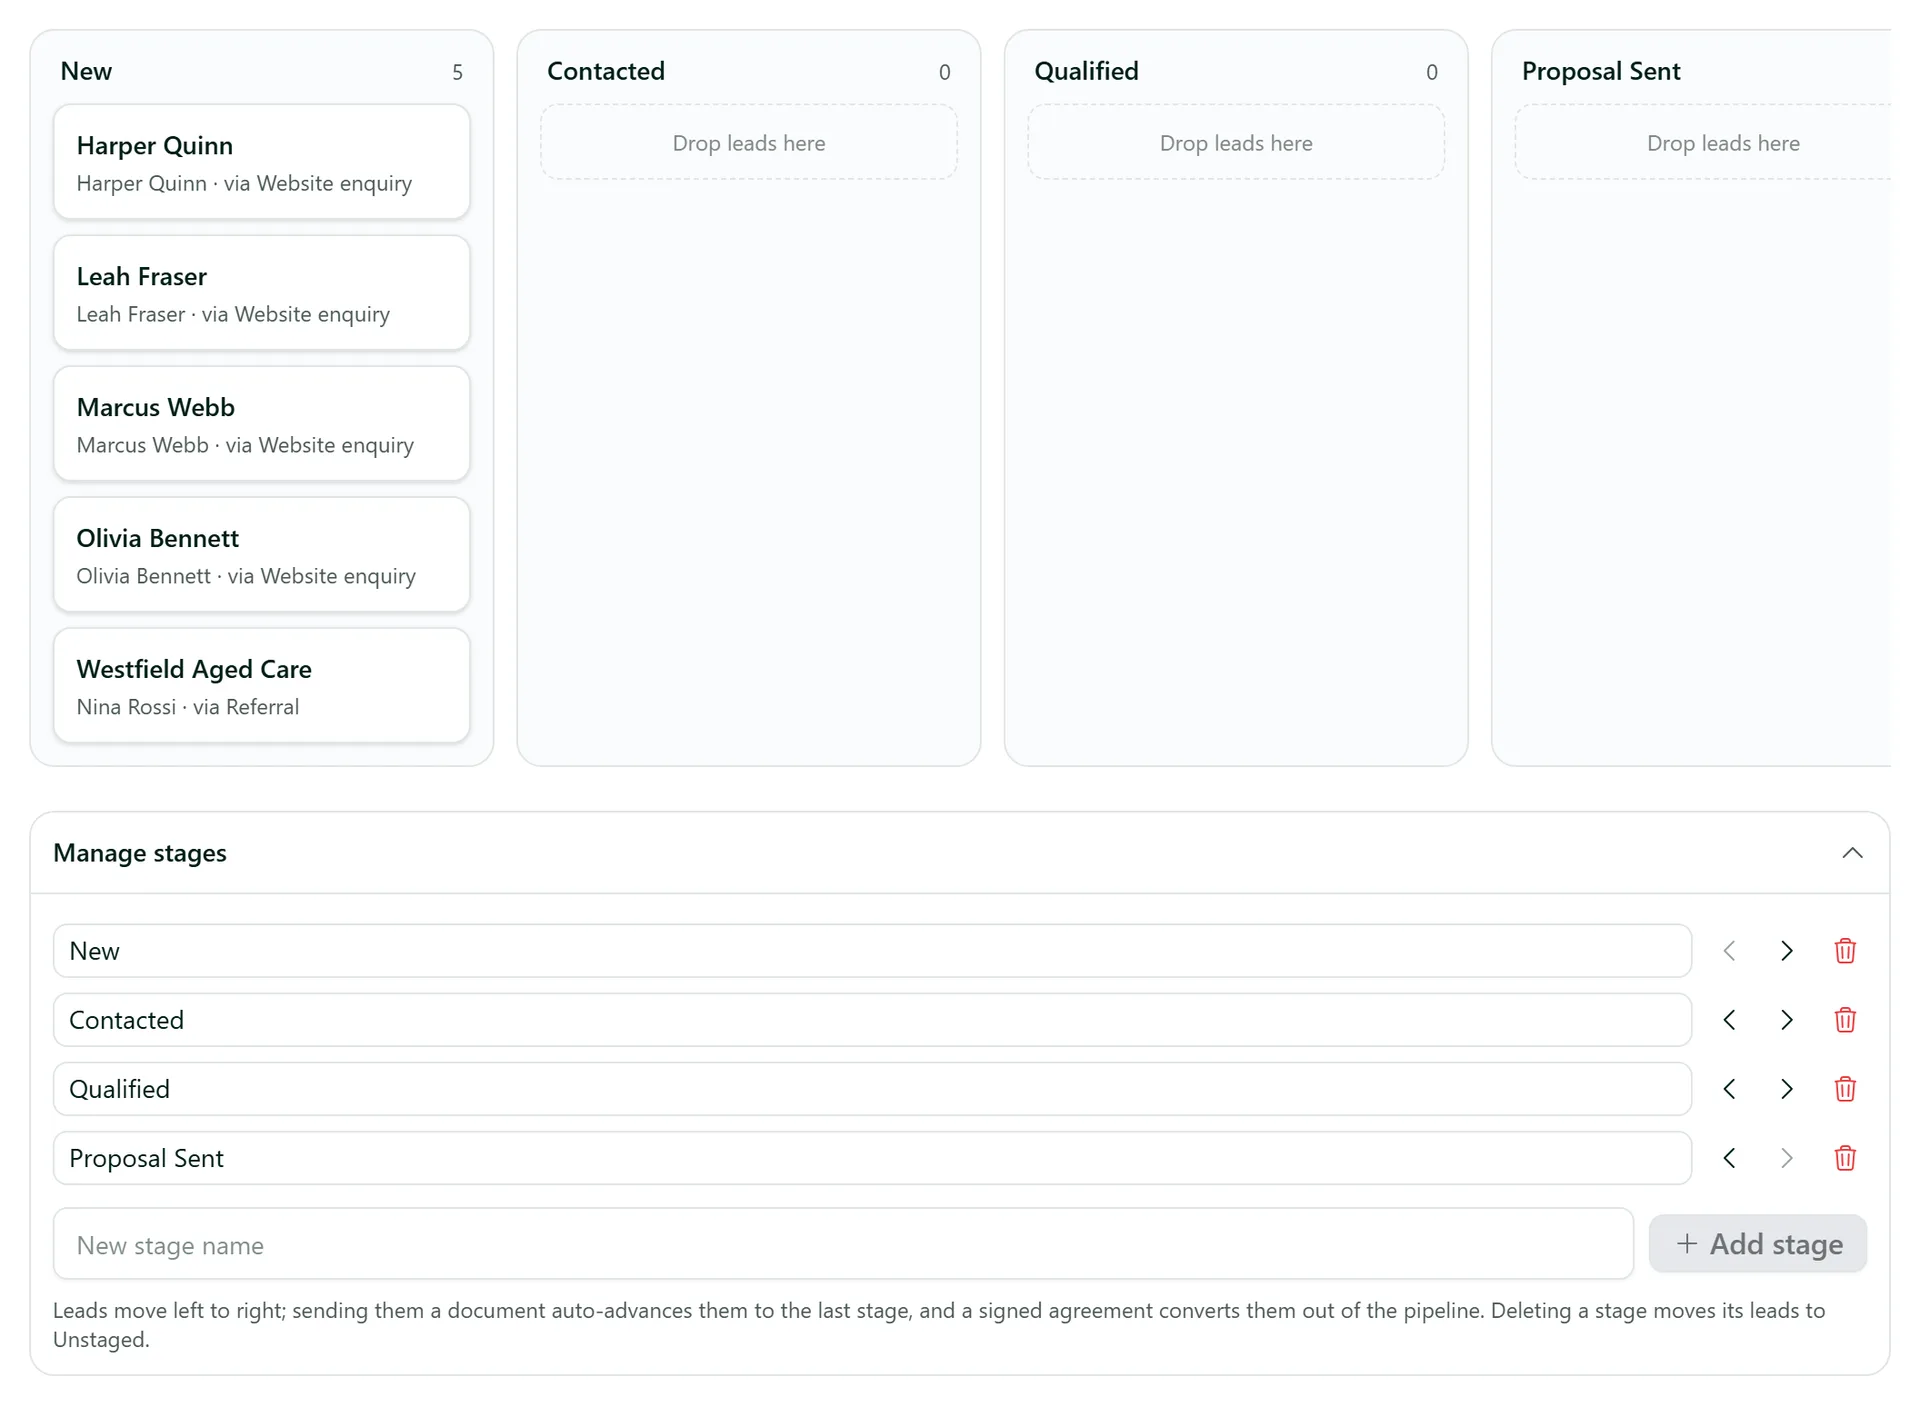
Two moves happen on their own: sending a lead a document from AirSign moves them to the last stage, and a signed agreement converts them to a customer and takes them off the board.
Step 4: Update a lead and convert them
Open a lead to see their details. The Details tab holds everything you can change - including the Lead stage - with one Save button. The other tabs hold their contacts and addresses (Overview), the calls and meetings you log (Interactions), their documents and notes.
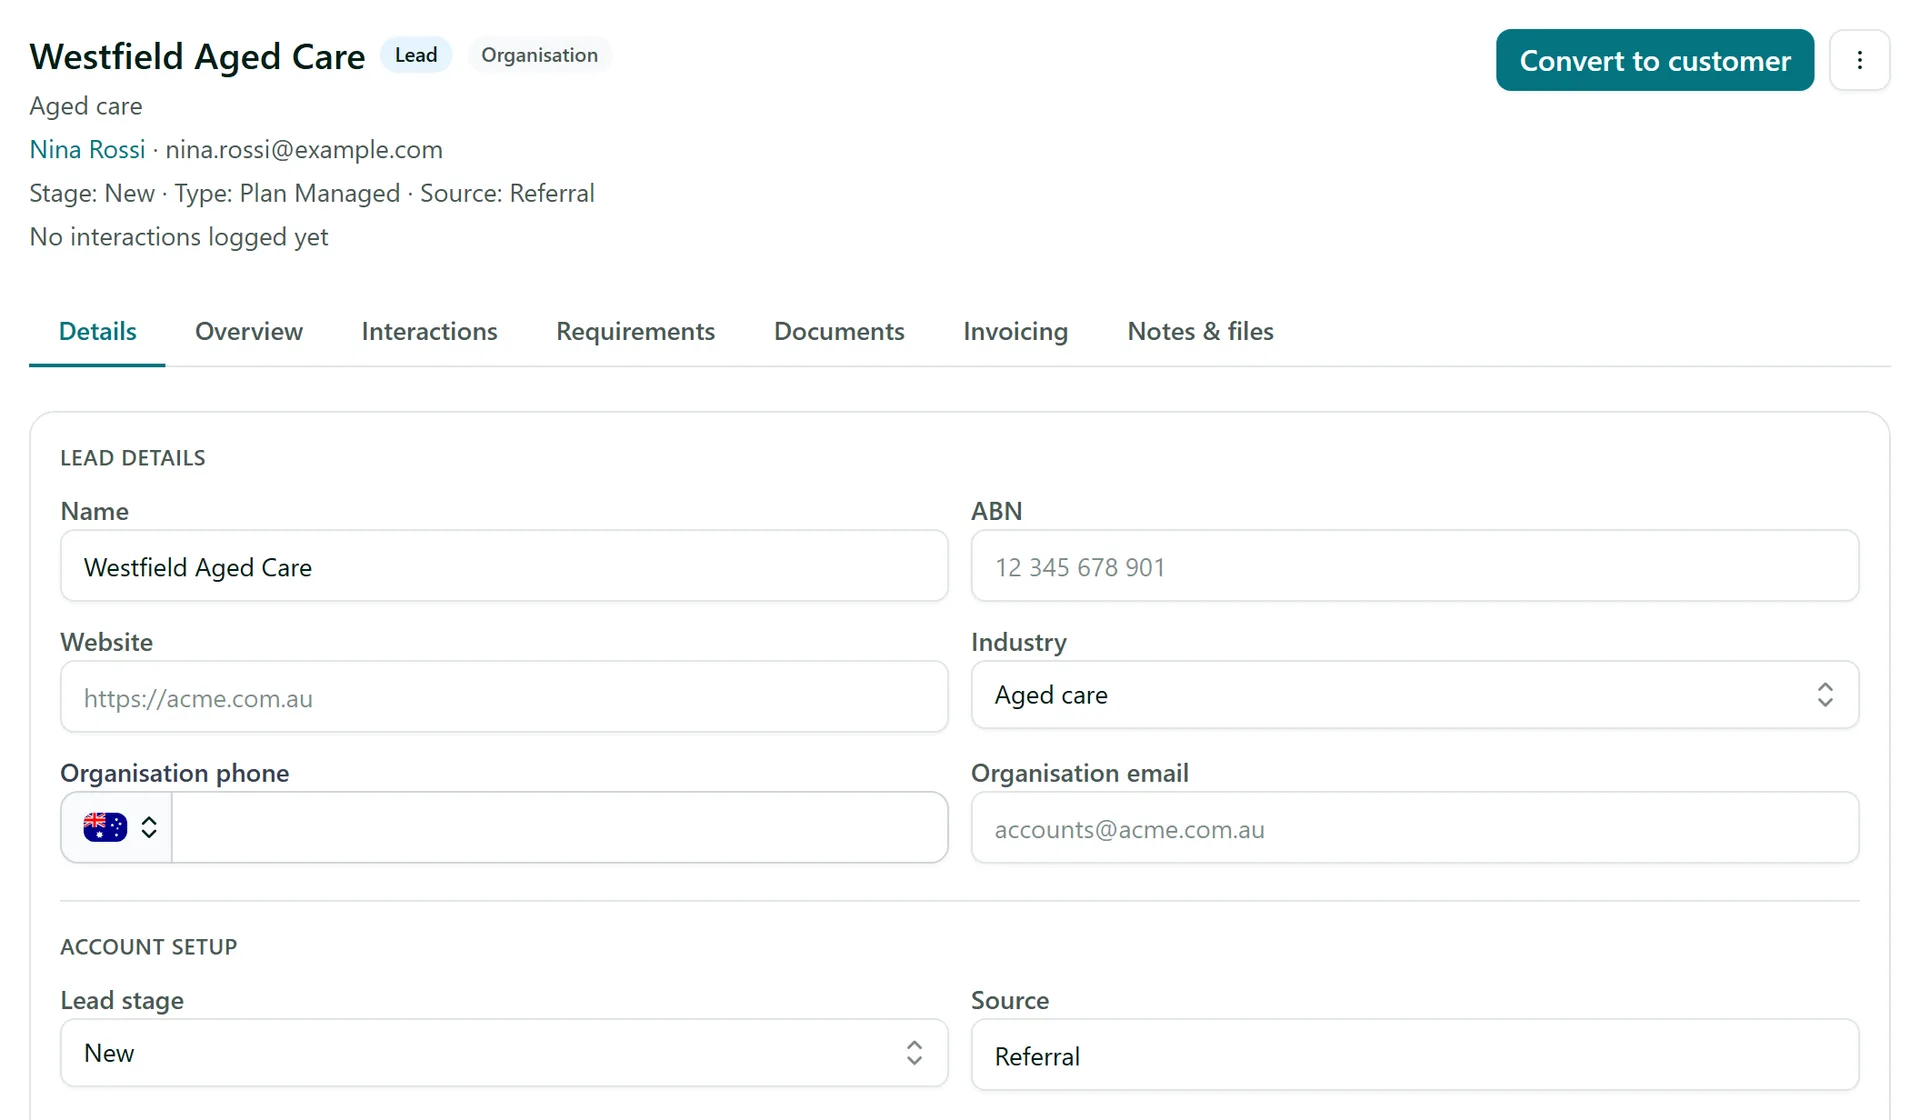
When the deal is won without a signature in AirSign (a verbal yes, a paper contract), click Convert to customer. The lead moves to your customers and any document requirements for customers start to apply from that moment. There is no way back to a lead, so convert when you are sure.
Tips
- Leads have no document requirements - those start when they become customers, so a prospect is never shown as non-compliant.
- Set the lead's customer type early: the right documents are sent automatically the moment they convert.
- Use Archive in the lead's menu for prospects that went nowhere - their history stays, they leave your day-to-day lists.
- Your organisation can rename "Customers" (for example to "Participants") in Settings > Terminology, and the CRM uses your word throughout.
Need More Help?
Related guides: Adding Customers, Logging Interactions and Notes, Creating Your First Signing Session. See our FAQ section or email support at [email protected].