Items, Prices and Rate Cards
Your price list is what jobs and invoices bill from. Set up each thing you sell once - with its item number, unit, price and tax rate - and AirSign uses it on every job and invoice. Rate cards let you charge particular customers different prices without keeping a separate price list for each one.
Where to find it
Step 1: Check your tax rates
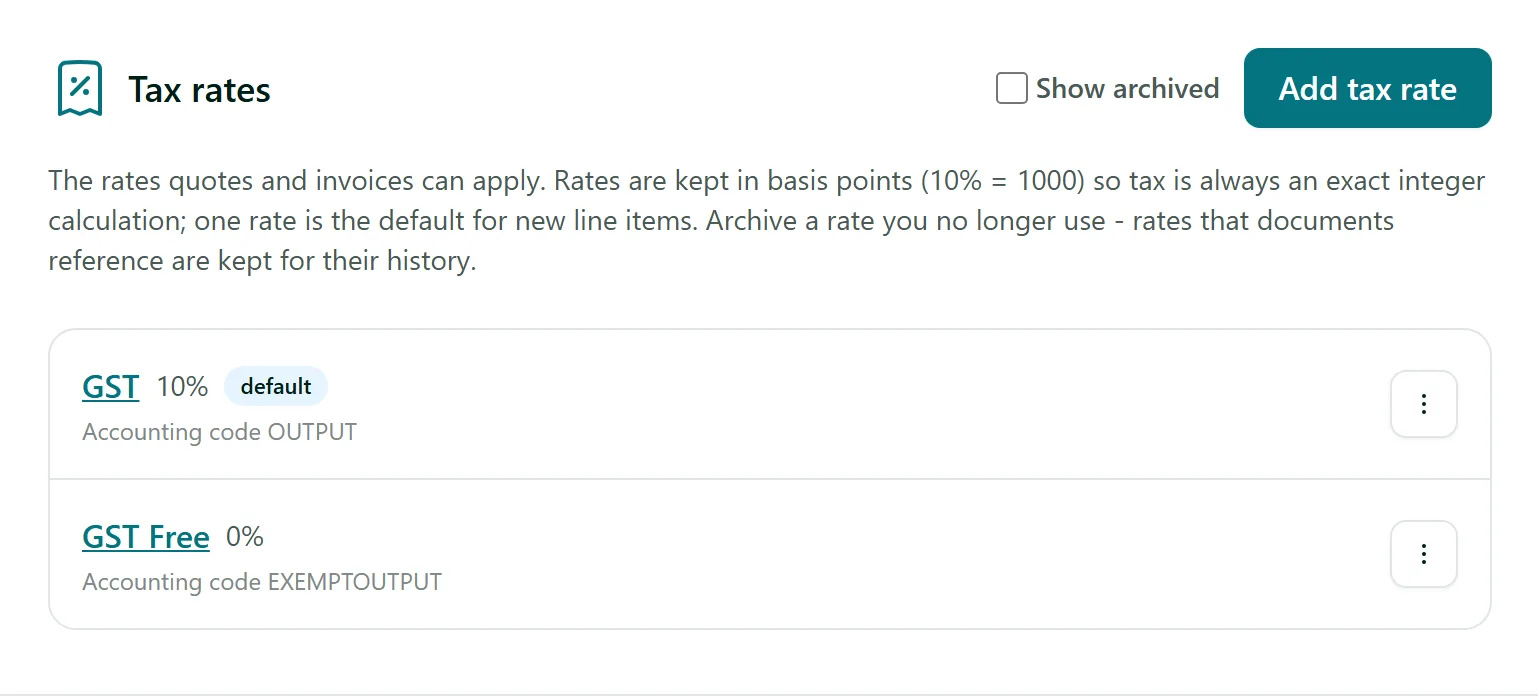
Under Settings > Finance, the Tax rates section lists the rates your invoices can use, such as GST at 10% and GST Free at 0%. Click Add tax rate to add one with its name, rate and an optional accounting code, and tick Default rate for new line items for the one most of your work uses. A rate that has been used can't be deleted - archive it instead.
Step 2: Build your price list
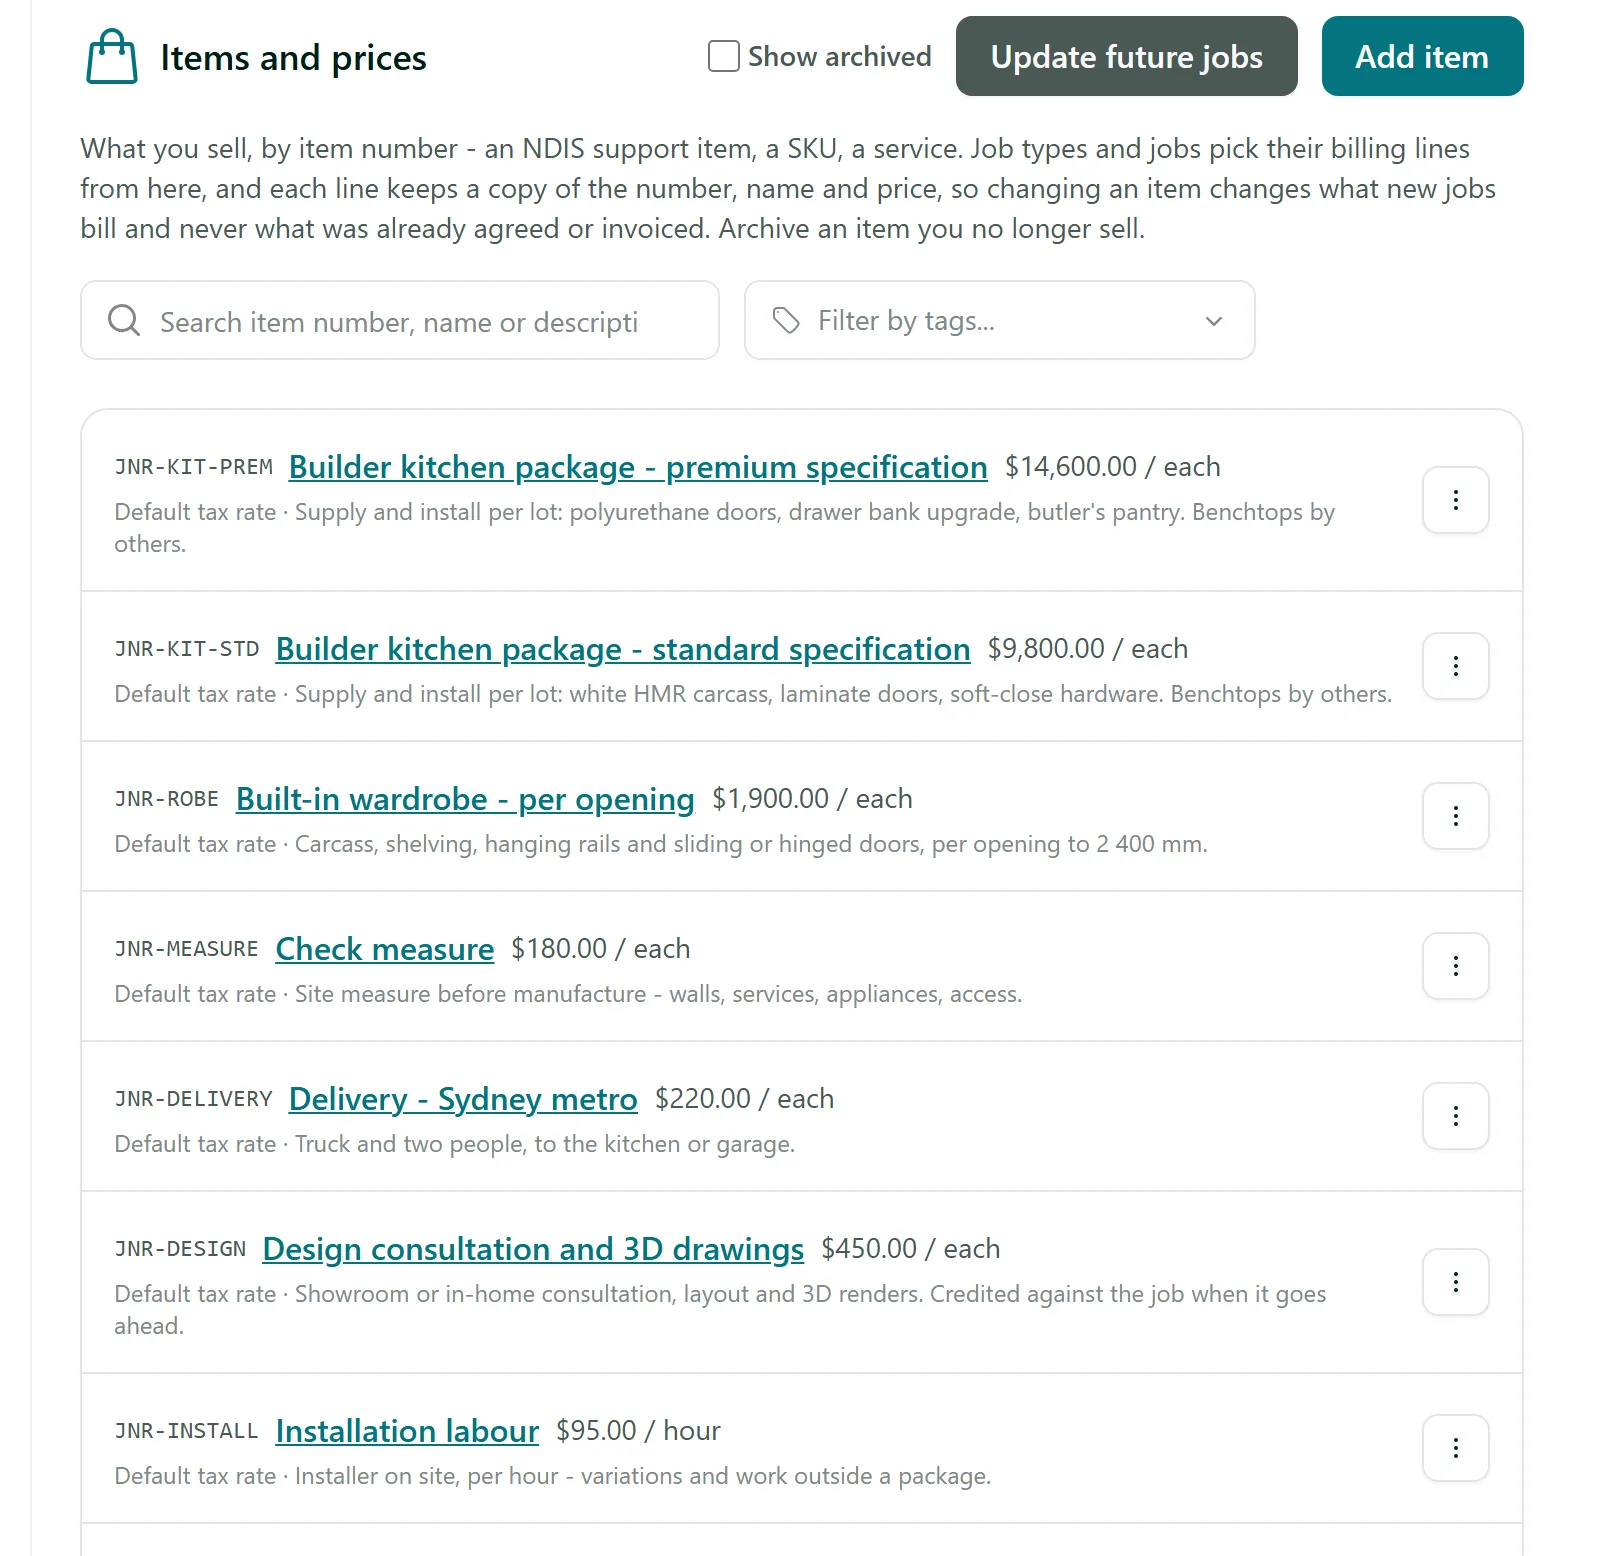
Open Items and prices. Every item shows its number, name, price and unit. Search or filter by tag to find one, and use Show archived to see items you no longer sell.
Step 3: Add or edit an item
Click Add item, or click an item's name. Fill in the Name, the Item number your customer or funder knows it by (an NDIS support item number, a SKU), how it is Sold (per hour, each, per day or per km), the Price ex tax and its Tax rate (leave it on Default rate to use your default). Then click Save item.
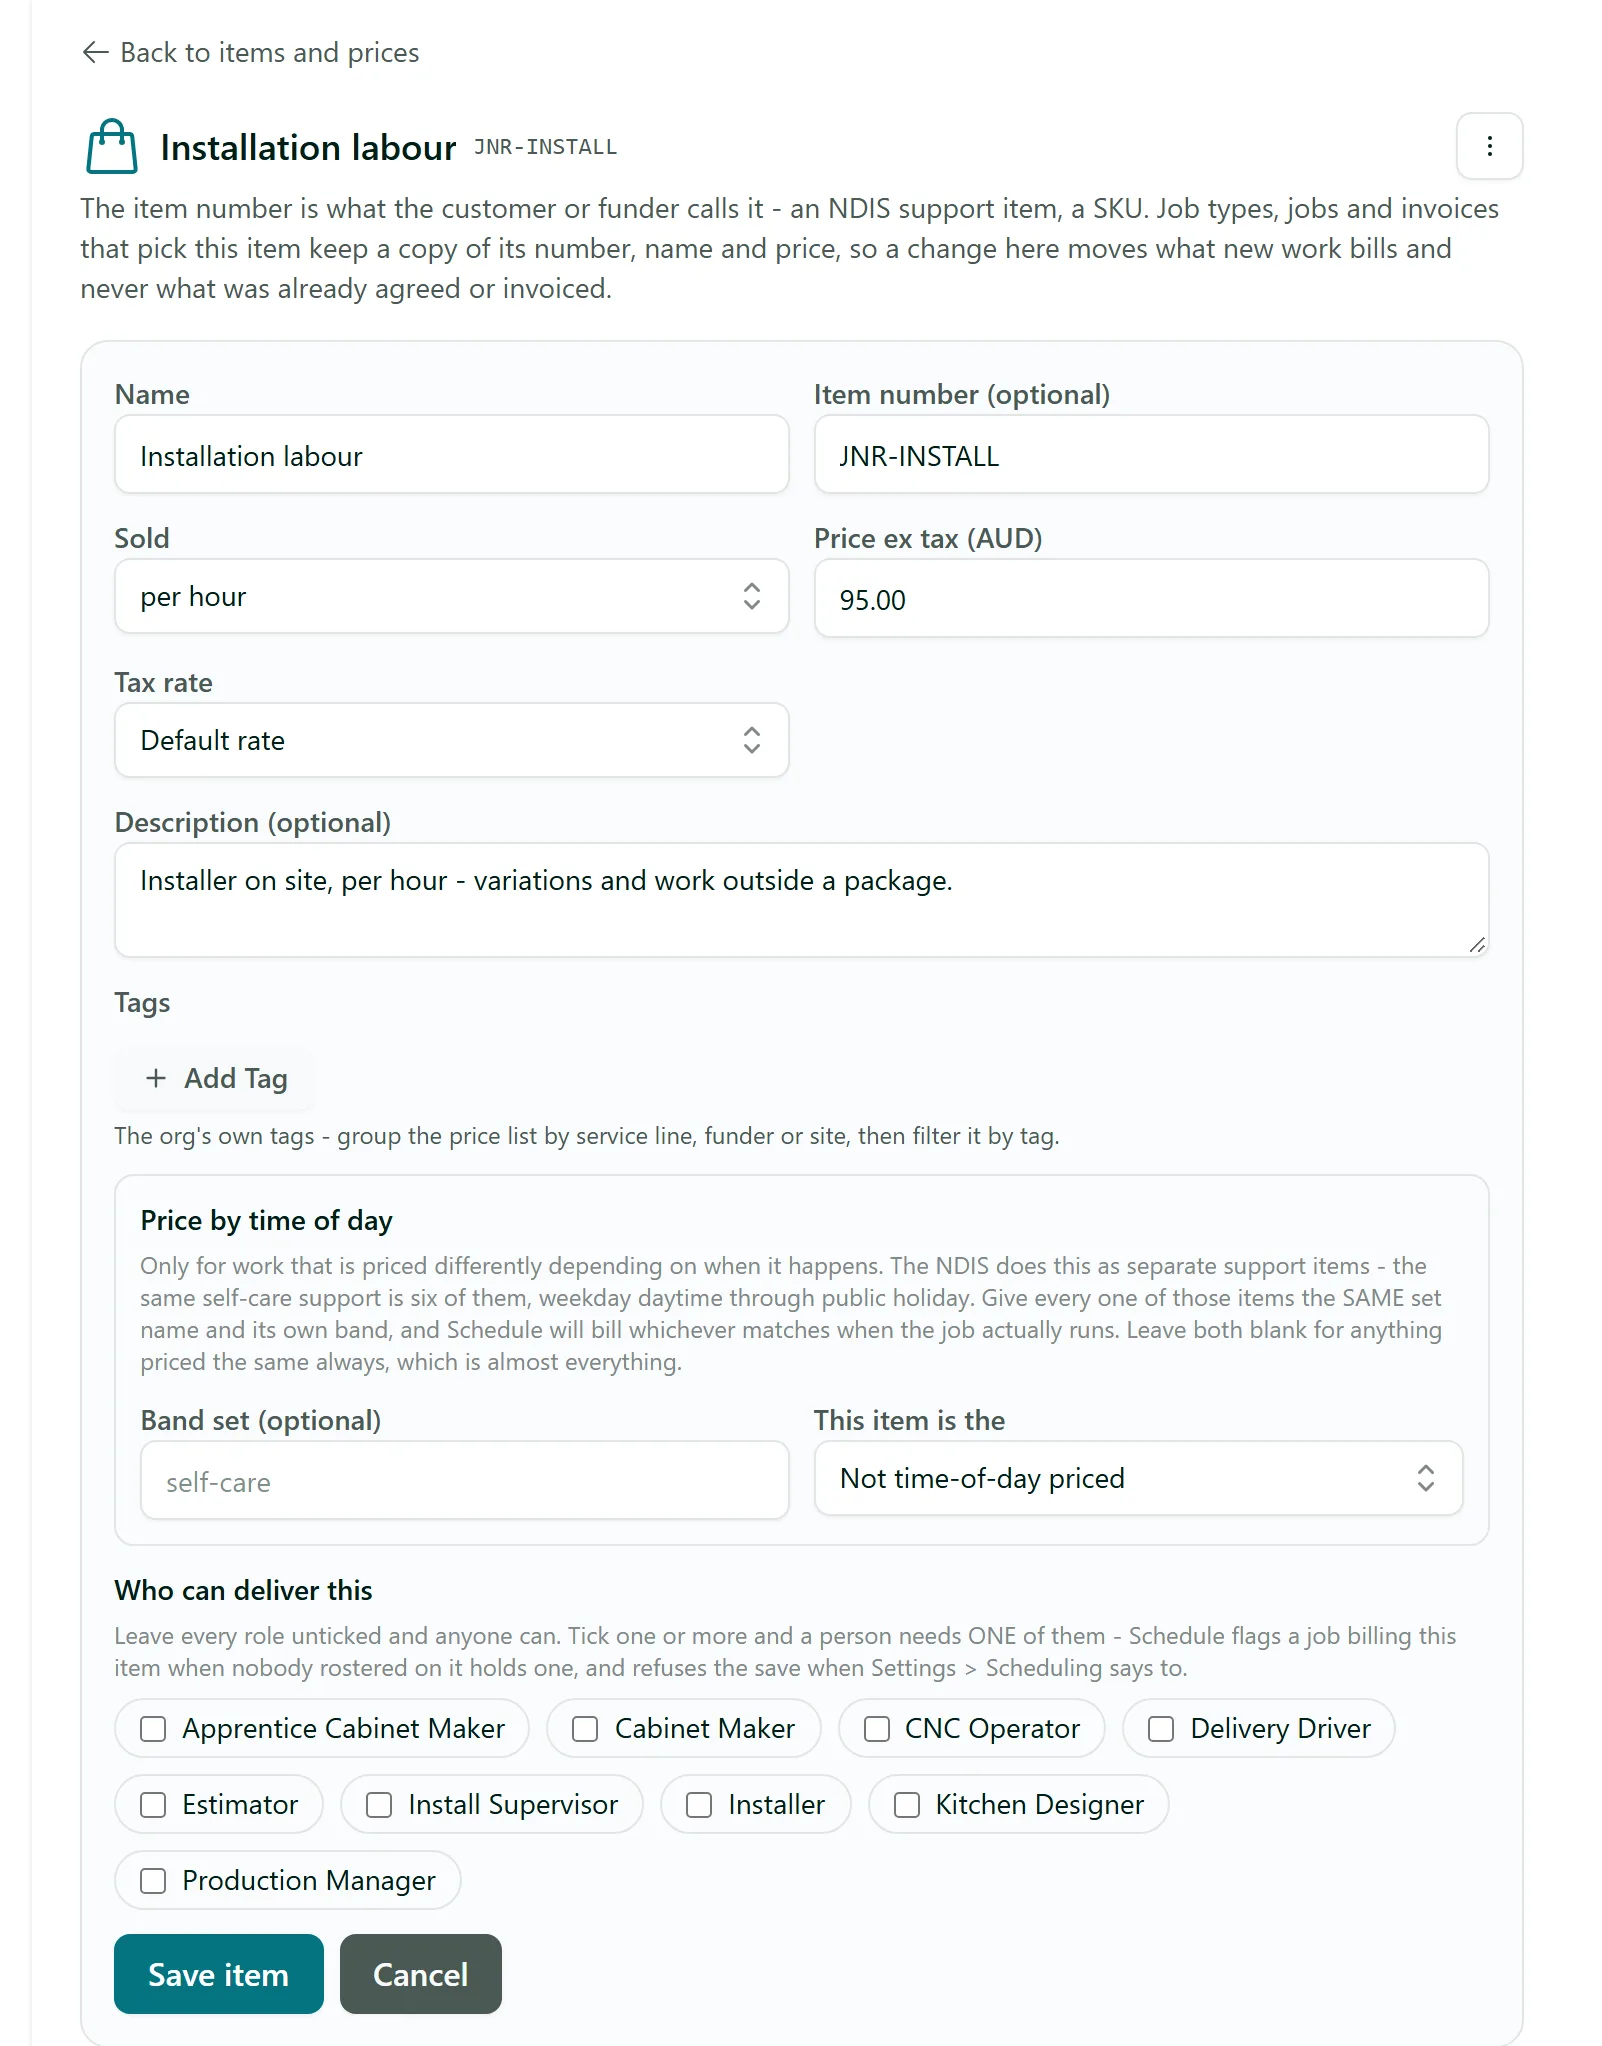
A few optional settings cover special cases:
- Price by time of day - for work priced by when it happens, set up as one item per time band (weekday, Saturday, Sunday, public holiday) sharing a Band set. The schedule bills whichever band the job falls in.
- Who can deliver this - tick roles when only certain staff may do the work. The schedule flags a job when nobody rostered holds one of them.
- Budget category - shown when you track customer budgets, to say which bucket pays for the item.
Each job and invoice line keeps its own copy of the price, so changing an item changes what new jobs bill - never what was already agreed or invoiced. To move jobs already on the roster to the new prices, click Update future jobs. Job types in the Schedule settings pick their default lines from this list too.
Step 4: Give some customers their own prices
Open Rate cards and click Add rate card. Give the card a Name (for example "Builder accounts") and click Add rate card to save it. Then use Price an item on this card to pick an item, enter Their price ex tax and click Add to card. The card shows how each price compares with the list price. Only list the items whose price is different - anything not on the card bills at the list price. Tick Charge a different tax rate if the deal changes the tax too.
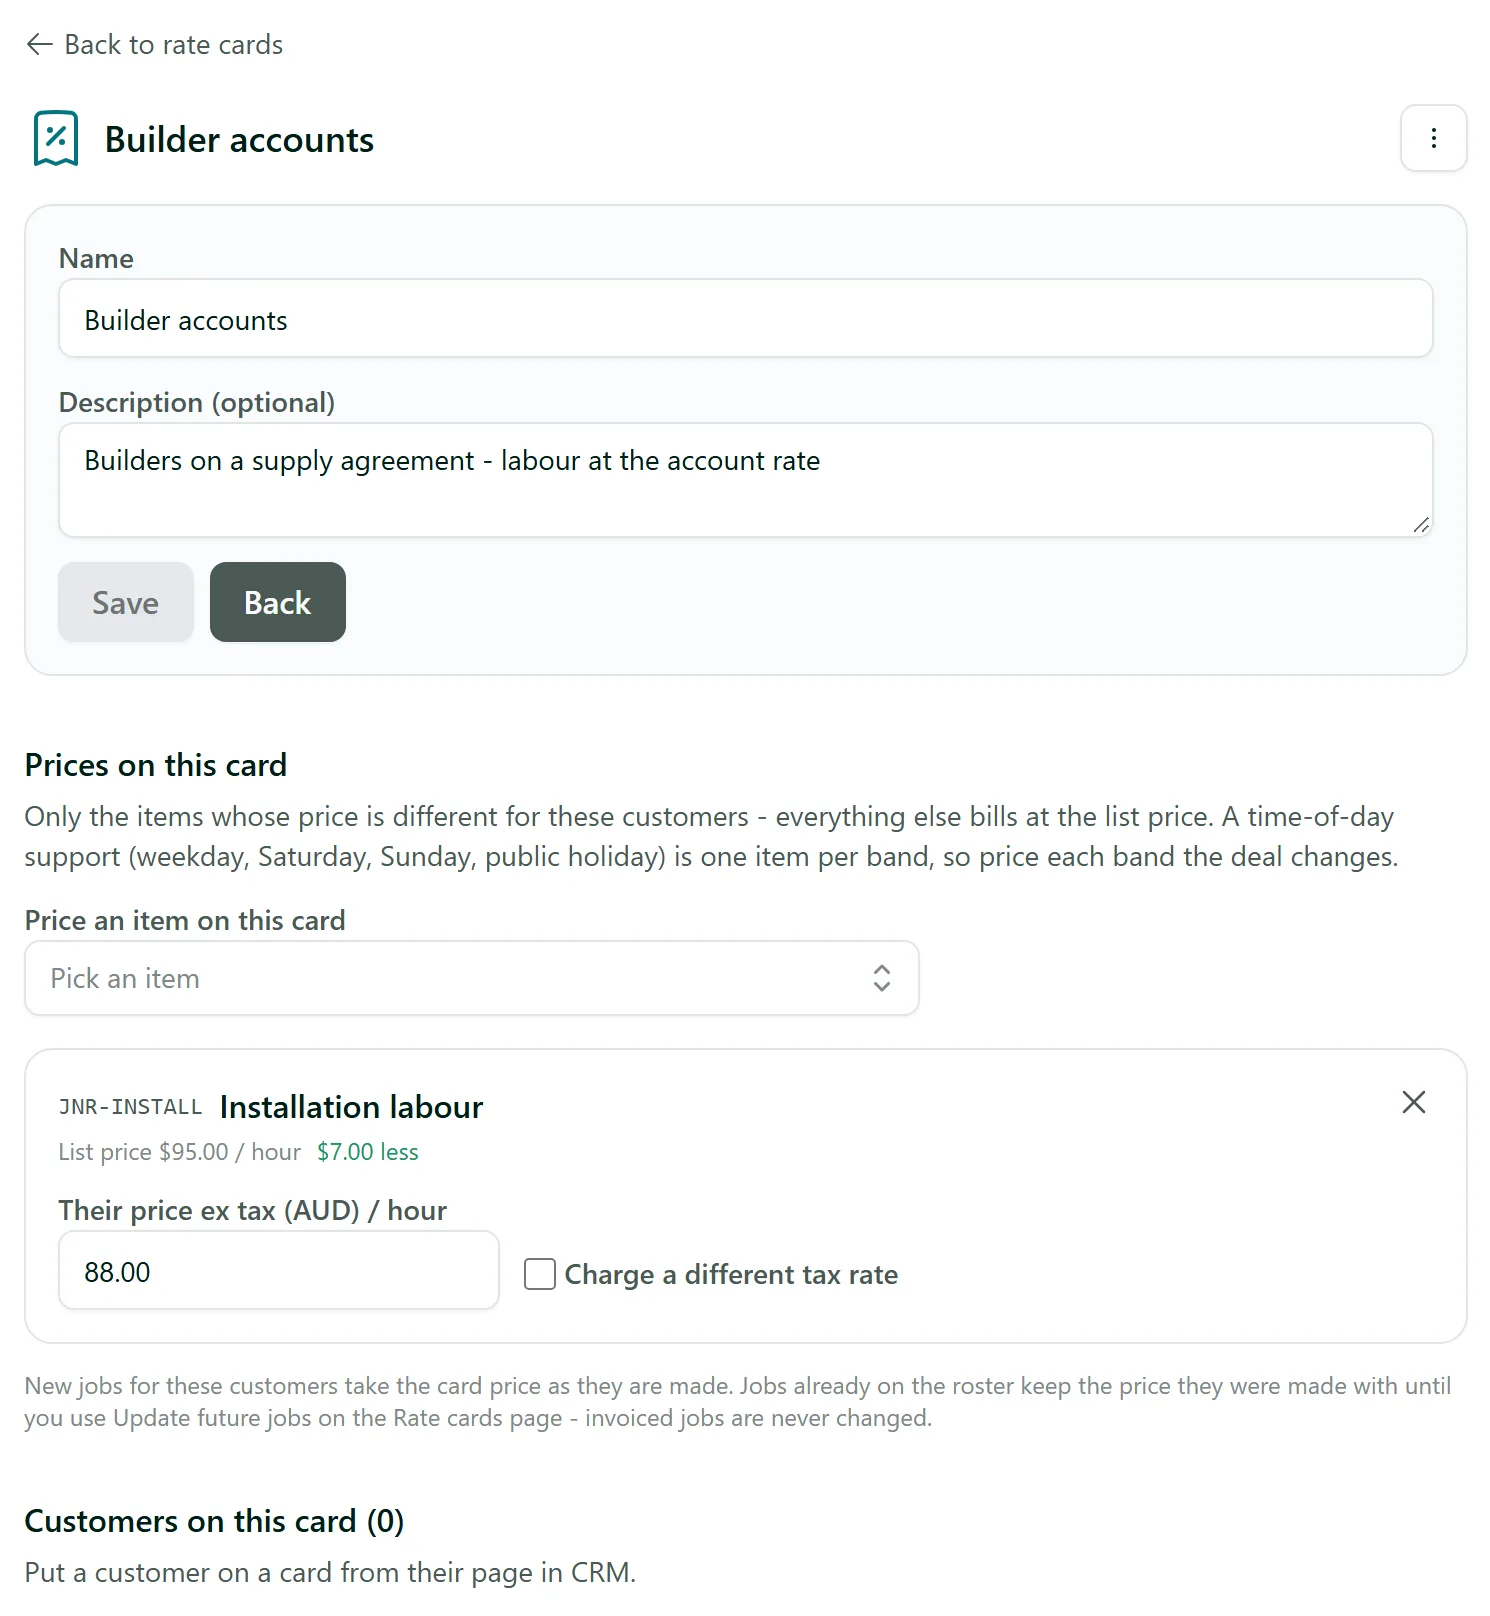
To put a customer on a card, open the customer in the CRM and choose it in the Rate card field on their Details tab (or when you add them). From then on their new jobs, and lines you add to their invoices, use the card's prices.
Tips
- Archive an item you no longer sell - it can only be deleted if nothing has ever used it.
- Tag items by service line, funder or site to filter a long price list.
- Only admins (or permission groups that allow it) can choose which rate card a customer is on.
Need More Help?
Related guides: Creating and Sending Invoices, Customer Budgets, Adding Customers. See our FAQ section or email support at [email protected].