Adding Customers
Customers are the businesses and people you work for. Each customer in AirSign CRM keeps its contacts, addresses, documents, invoices and history in one place, and AirSign checks that every customer holds the documents you require of them - a signed service agreement, a consent, a certificate.
Where to find it
Step 1: Add an organisation
Click Add customer. With Organisation selected, enter the company's Name and, if you have them, its ABN, Website and Industry (pick Other to type your own). Add the person you deal with under Contact name, Contact email and Phone - they become the primary contact, who receives the documents, training and forms you send this customer.
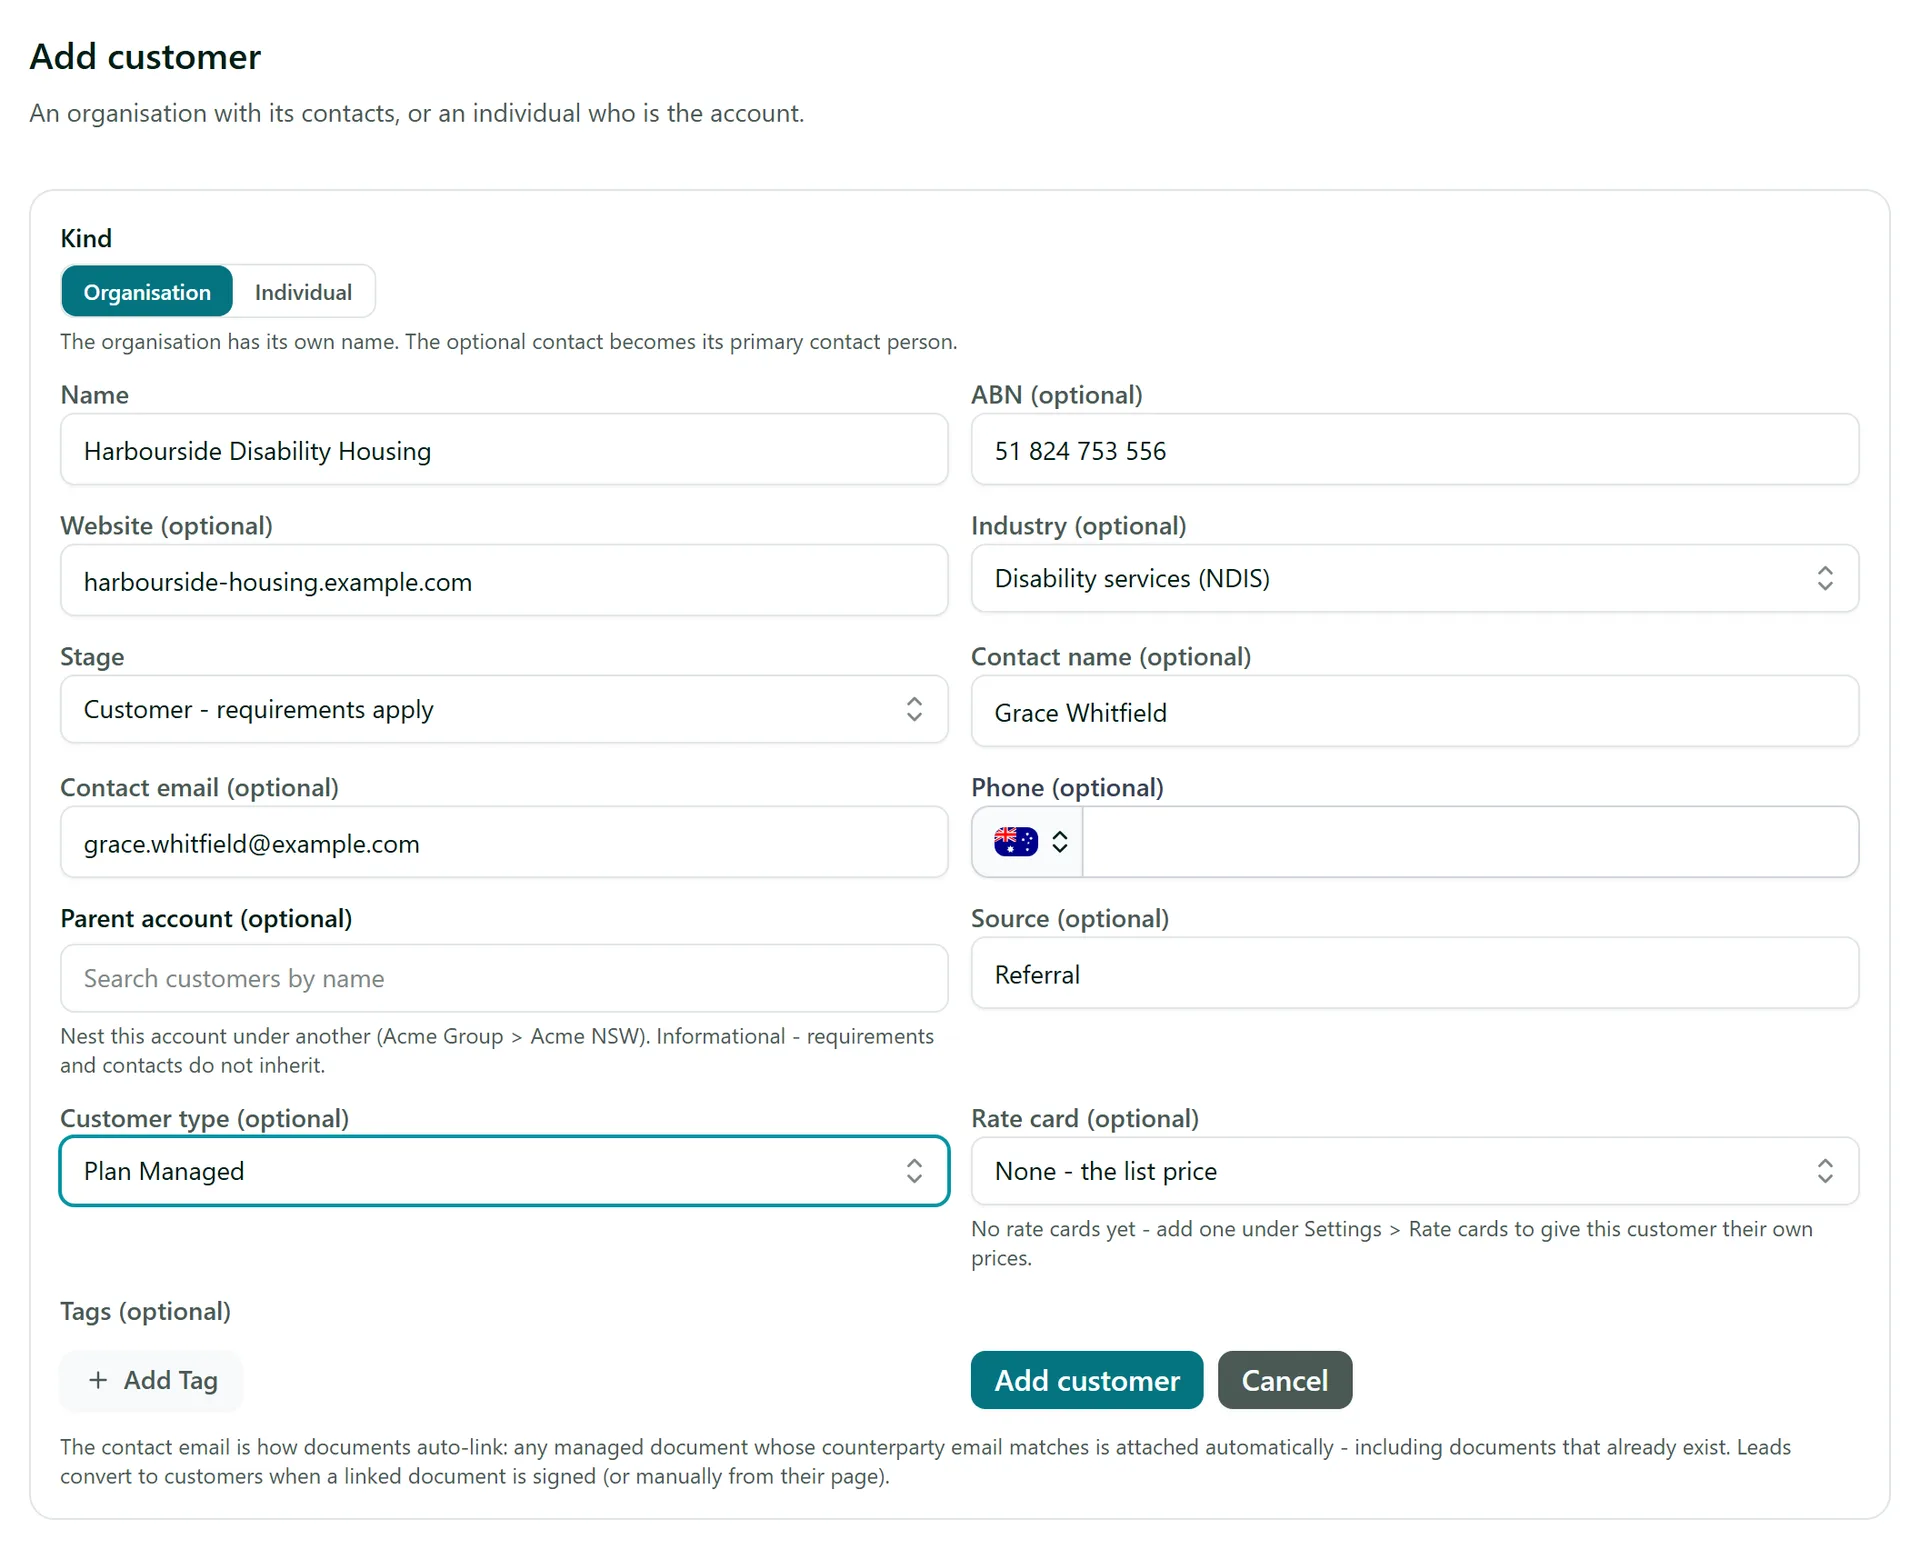
The rest of the form is optional:
- Stage - Customer (requirements apply) or Lead for a prospect.
- Parent account - nest a branch under its group (Acme Group > Acme NSW). It is for reference only; nothing is inherited.
- Source - where the customer came from.
- Customer type - your own segments (see Step 4). The type decides which documents are required.
- Rate card - the customer's own prices, if you have any (see Items, Prices and Rate Cards).
- Tags - labels for filtering, and for limiting who can see the customer.
Click Add customer. The new customer's page opens straight away.
Step 2: Or add an individual
When the customer is a person rather than a business (a home owner, an NDIS participant), choose Individual. Pick New person and enter their name, email and phone, or Existing person to choose someone already in AirSign. The account takes the person's name, and they are also its primary contact until you add someone else, such as a nominee or family member.
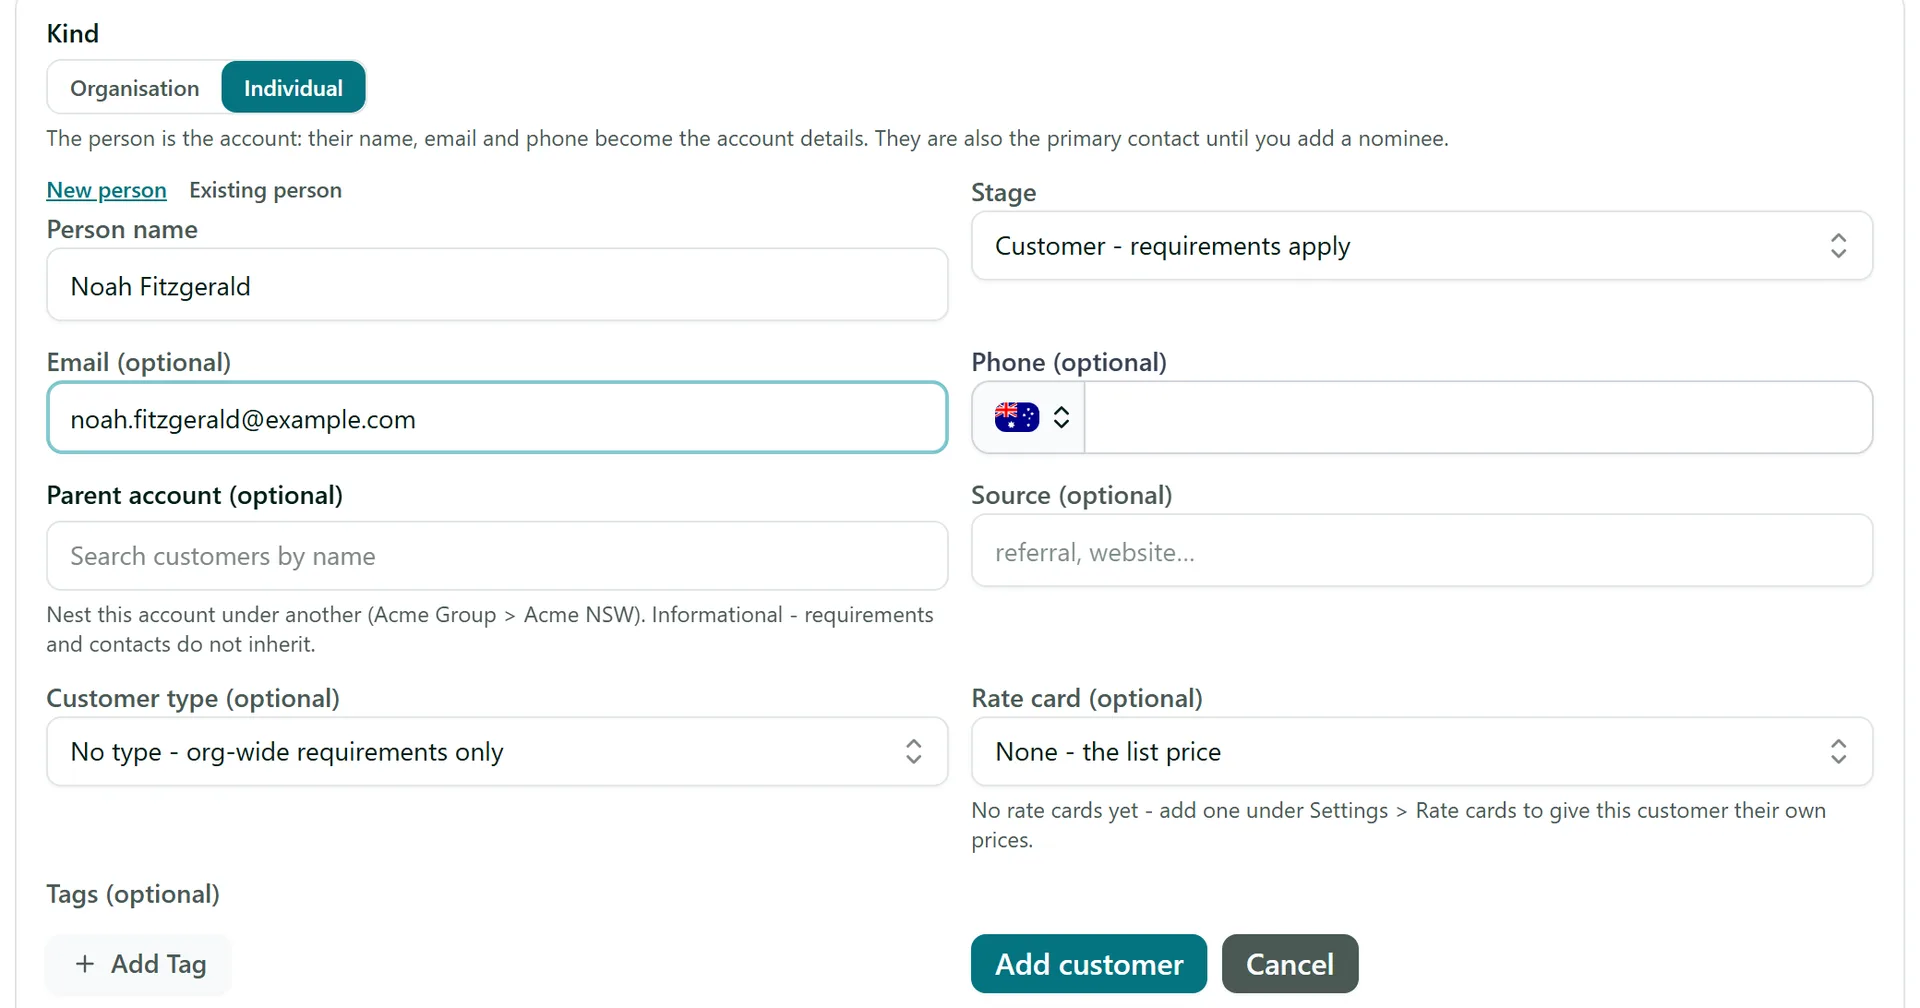
You can change your mind later: the menu at the top right of a customer's page has Change to individual or Change to organisation, and everything stays with the account.
Step 3: Add contacts and addresses
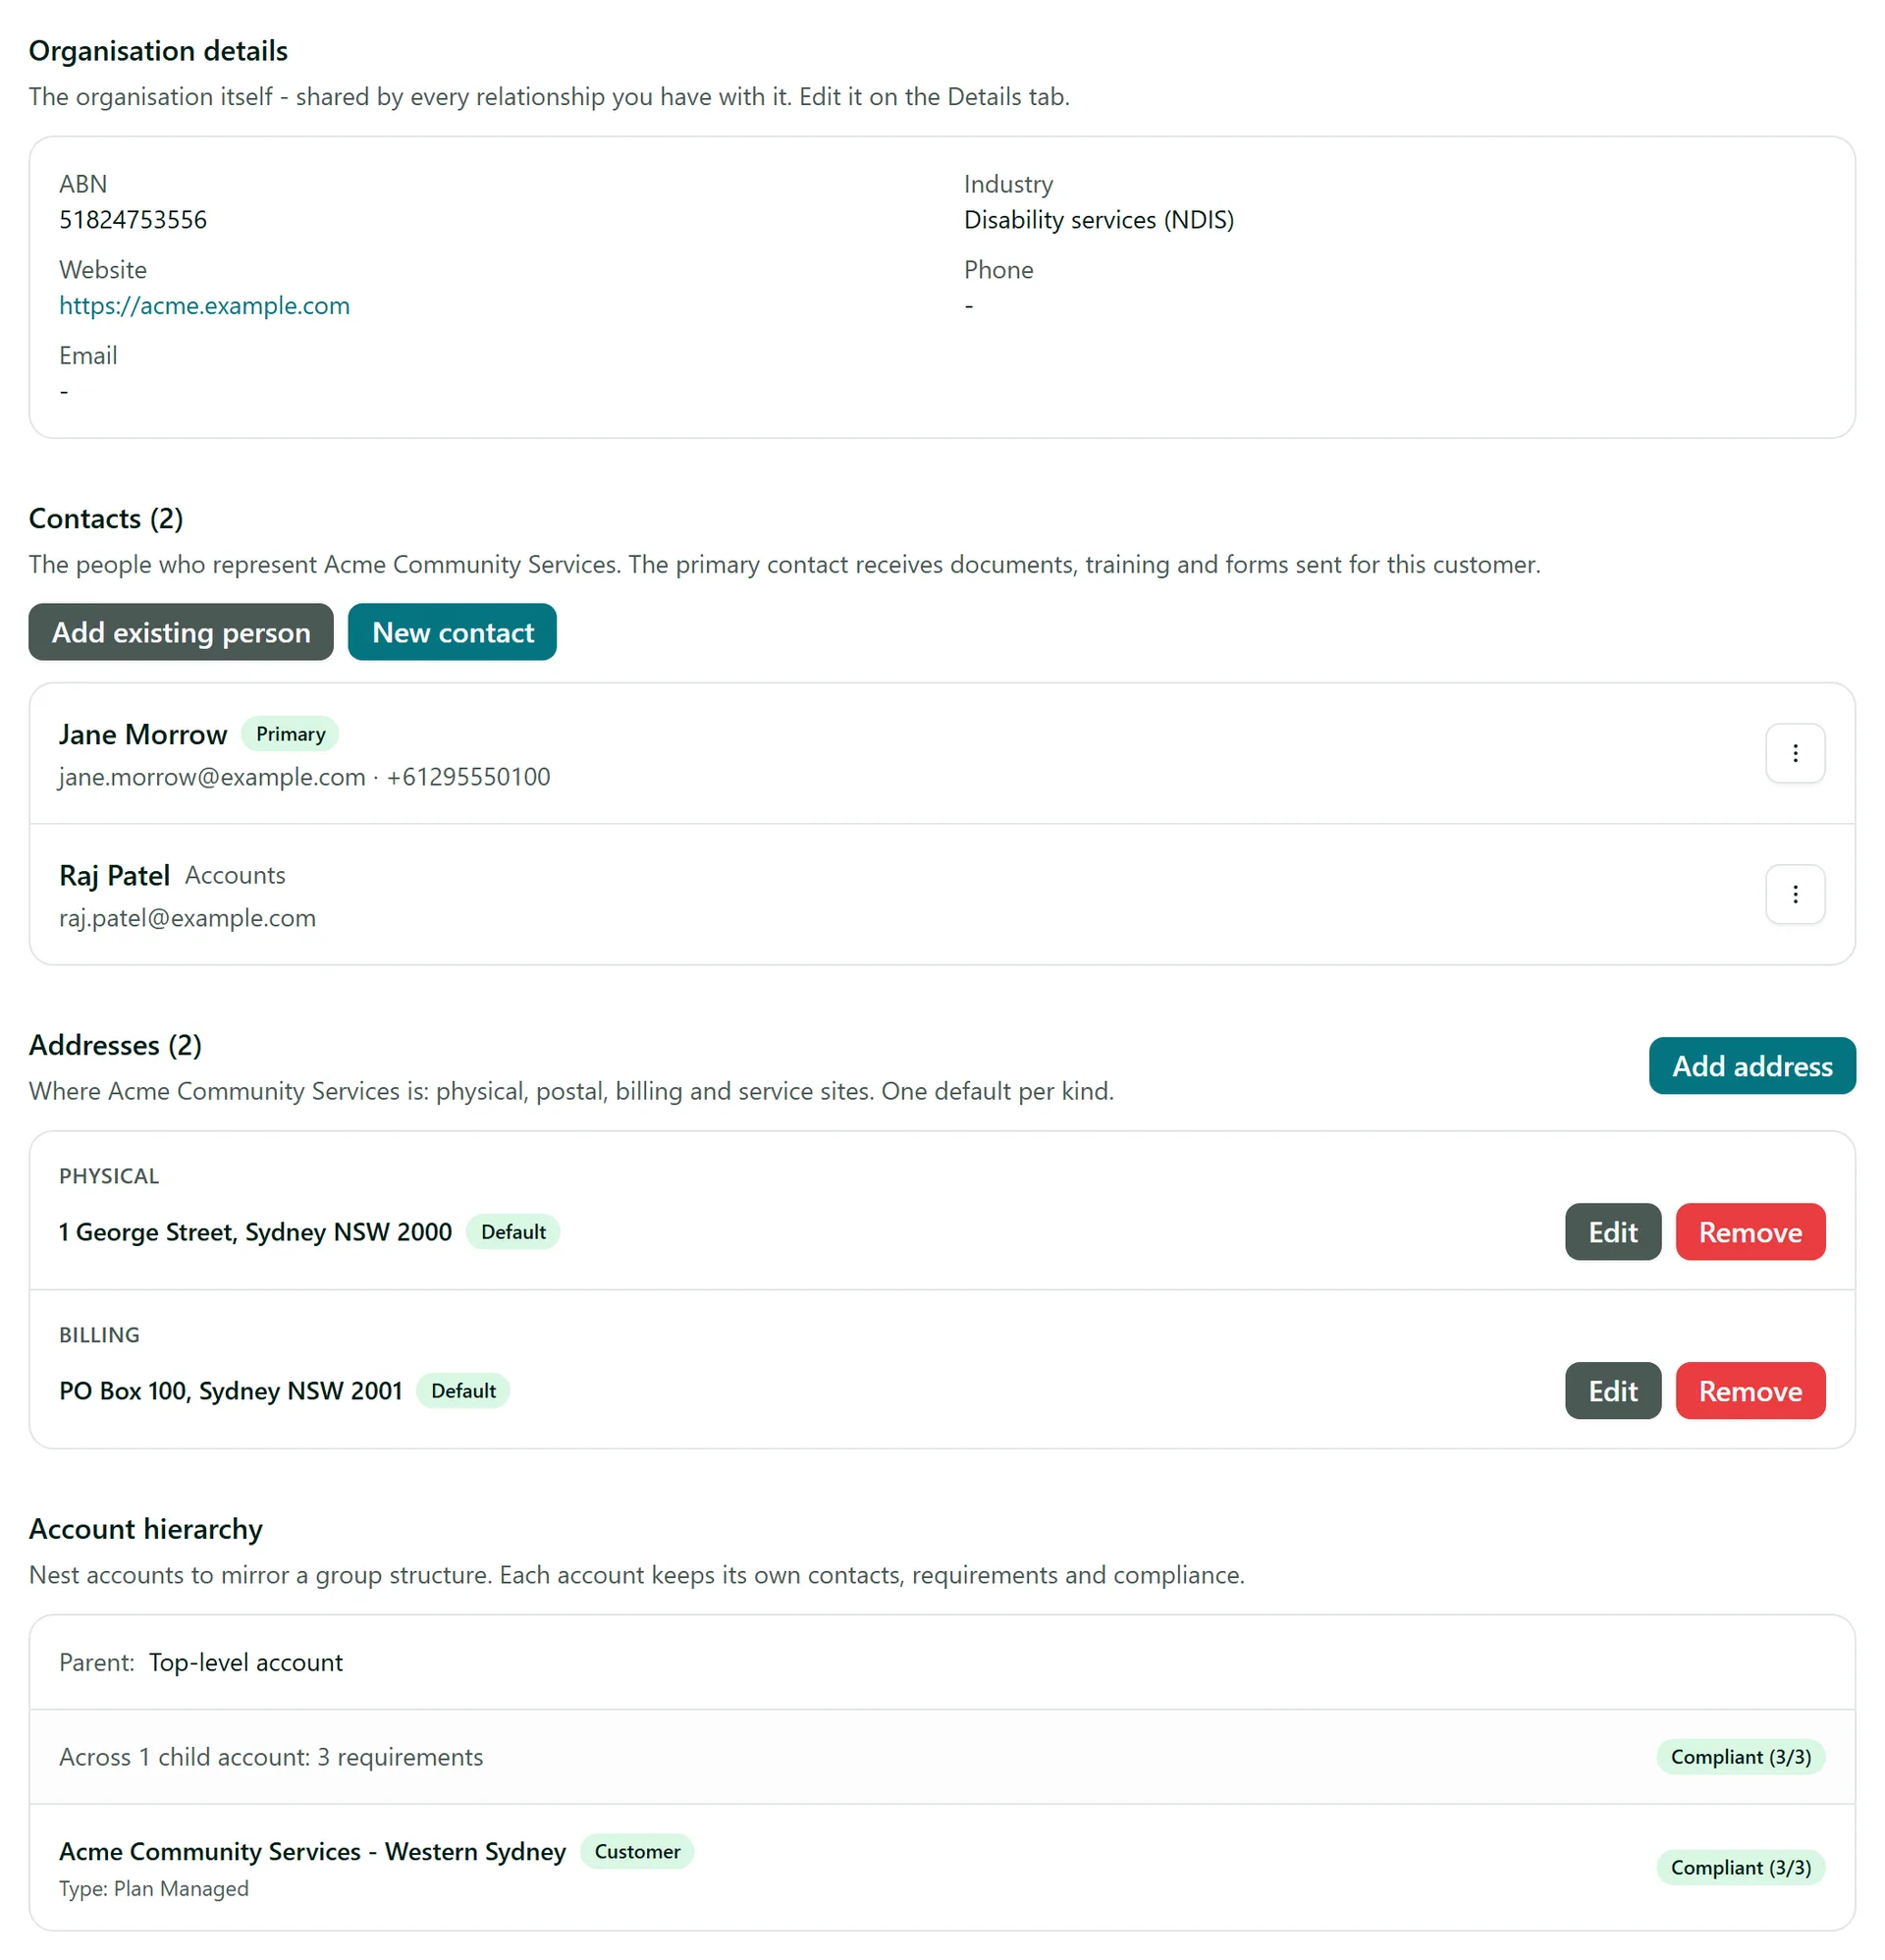
Open the customer's Overview tab. Under Contacts, click New contact to add a person, or Add existing person to link someone already in AirSign, with an optional title such as "Accounts". Each contact's menu has Make primary, Mark as former contact (for someone who has left - they are kept for history but never sent anything again) and Remove. Under Addresses, click Add address and choose its kind: Physical, Postal, Billing or Service site. Invoices use the billing address first.
Step 4: Set up customer types and required documents
Customer types are your own groups - "Builder" and "Home owner", or "Plan Managed" and "Self Managed". Create them under Setup > Customer types with Add type. Then, under Setup > Requirements, list the documents each type (or every customer) must hold, and the template that collects each one.
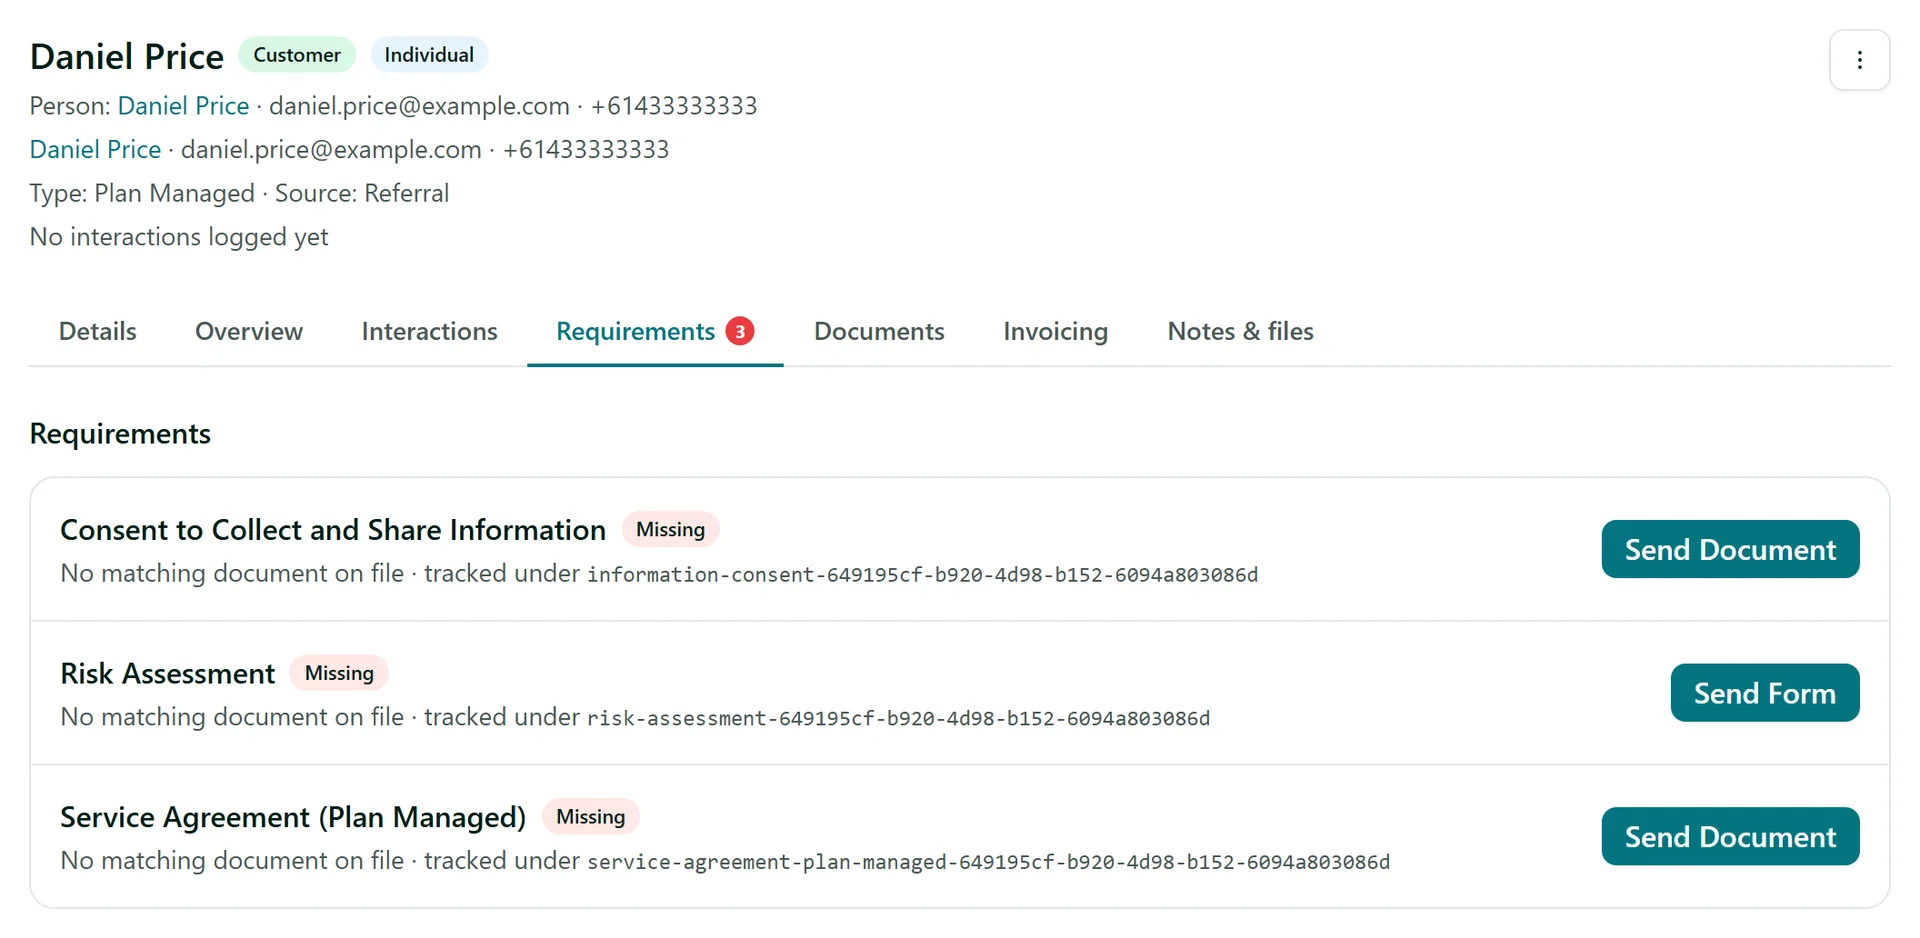
A customer's Requirements tab shows each document as Missing, due soon or current. Click Send Document (or Send Form, Send Training) to send it to the primary contact with their details filled in - once it is signed or completed, the requirement is met. A red number on the tab tells you how many are missing.
Tips
- Documents sent to a customer's email are suggested on their Documents tab - click Link to attach them.
- Keep quotes, photos and emails on the Notes & files tab.
- A customer with any history can't be deleted - use Archive from the page menu to keep the record and tidy your lists.
- Add your own fields under Setup > Custom fields to capture extra details, and show them as columns on the list.
Need More Help?
Related guides: Managing Leads, Creating Your First Template, How to Use Template Variables. See our FAQ section or email support at [email protected].