The Staff App
Your staff do not need a team login or any training to use AirSign. When they sign in on their phone they land on their own Home: where they are rostered, shifts to accept or pick up, their timesheet, and anything you have sent them to sign, fill in or complete. This guide walks through what they see, so you can explain it to your team.
Getting your staff onto it
Step 1: The Home screen
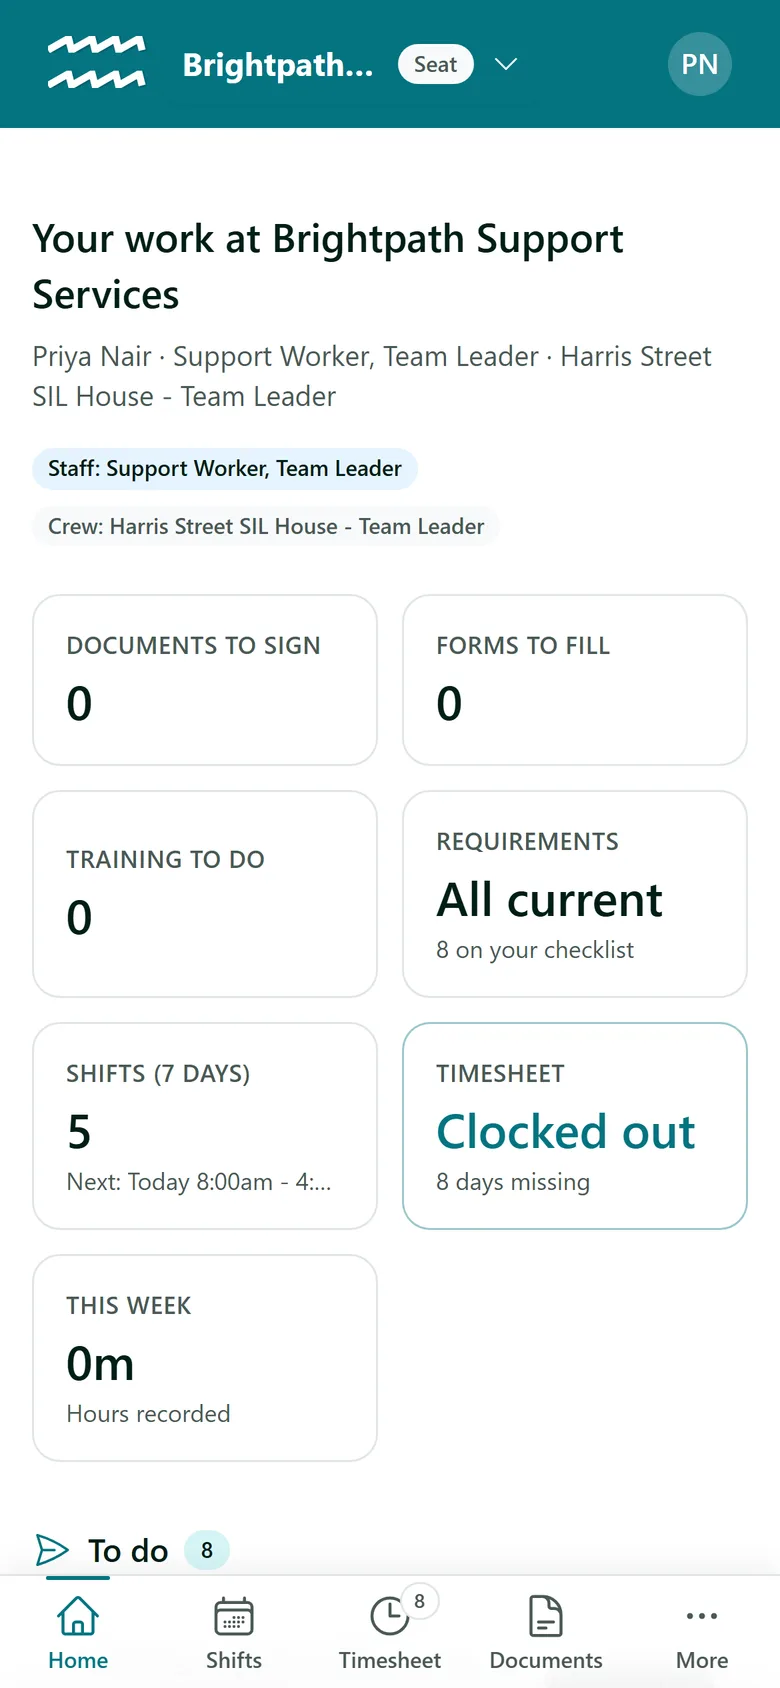
Home opens on Your work at your organisation, with their roles and tiles for Documents to sign, Forms to fill, Training to do, Requirements, their next shift, their Timesheet and hours This week. Below is a To do list of everything waiting on them. The bar along the bottom takes them to Shifts, Timesheet and Documents, and More holds Forms, Training, Requirements, This week and their profile.
Step 2: Their shifts
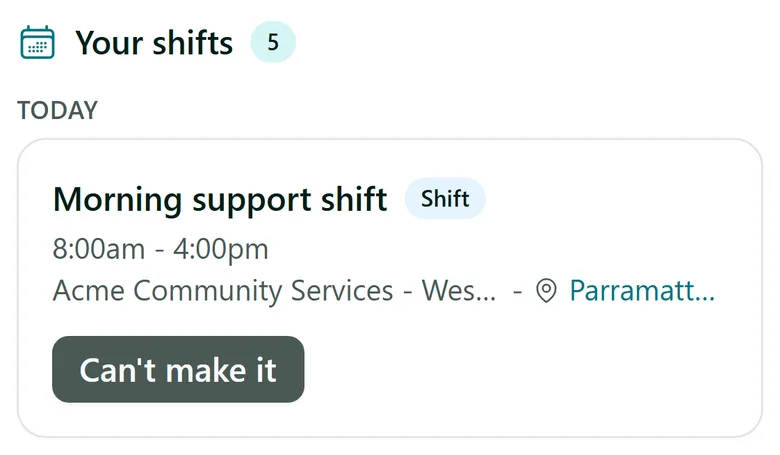
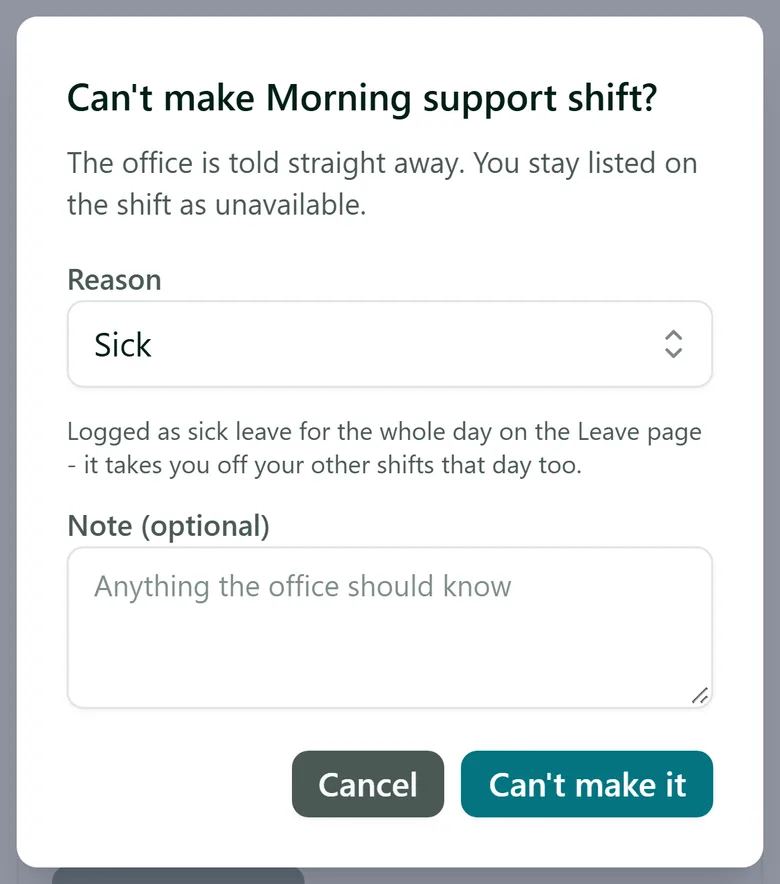
Shifts lists where they are rostered over the next seven days, grouped by day, with the customer and the address as a map link they can tap. If they cannot make a shift they tap Can't make it, pick a Reason and add a note. You are told straight away, and the shift is flagged for cover if it needs it. A sick or personal reason logs leave for the whole day and takes them off their other shifts that day too.
Step 3: Accepting a shift
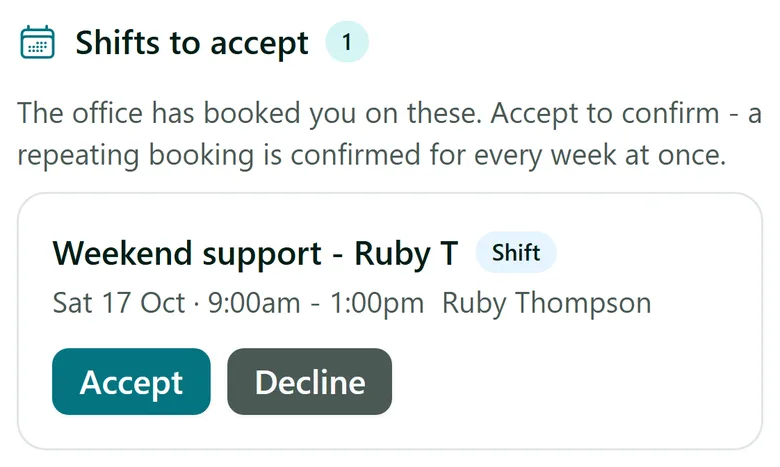
When you book someone on a shift marked Staff must accept, it appears under Shifts to accept instead of their shifts. They tap Accept to confirm it (for a repeating booking, that confirms every week at once) or Decline with an optional note. Until they accept, they cannot clock on against it, and you see "awaiting OK" on the roster.
Step 4: Picking up open shifts
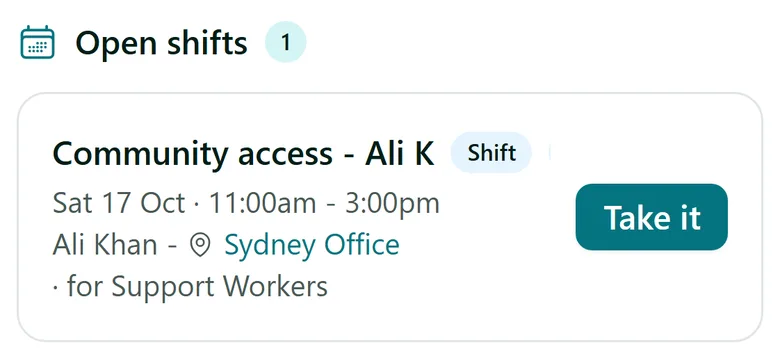
Shifts you have opened to one of their roles appear under Open shifts. They tap Take it when it is first come, first served, or Apply when you choose (and can Withdraw the application). Shifts you have offered them as cover appear under Shifts on offer, with Accept and No thanks.
Step 5: Documents, forms, training and requirements
Documents holds everything you have sent them to sign and what they have signed. Forms has inspections, inductions and checklists to fill in, Training their assigned modules and certificates, and Requirements every licence, ticket and document they must hold for their roles, with what is on file for each - so they can see what is about to lapse, and upload a copy where you have asked them to.
Tips
- Time off is requested from Shifts > Time off - see Managing Leave.
- Clocking on and off and typing in missed hours is on Timesheet - see Clocking On and Off.
- Contractors also see Get paid, where they set up their Stripe account and see their payouts.
- A person who works for more than one organisation on AirSign switches between them from the name at the top.
Need More Help?
Related guides: Clocking On and Off, Rostering Shifts, Open Shifts and Finding Cover. See our FAQ section or email support at [email protected].