Setting Up Requirements
A requirement is a rule such as "every Support Worker must hold a current First Aid certificate". You set it up once, and AirSign works out who it applies to, sends it to new people automatically, tracks what is on file and warns you before it expires. This guide shows how to set requirements up for people; customers and assets work the same way.
Where to find it
Step 1: Review your requirements
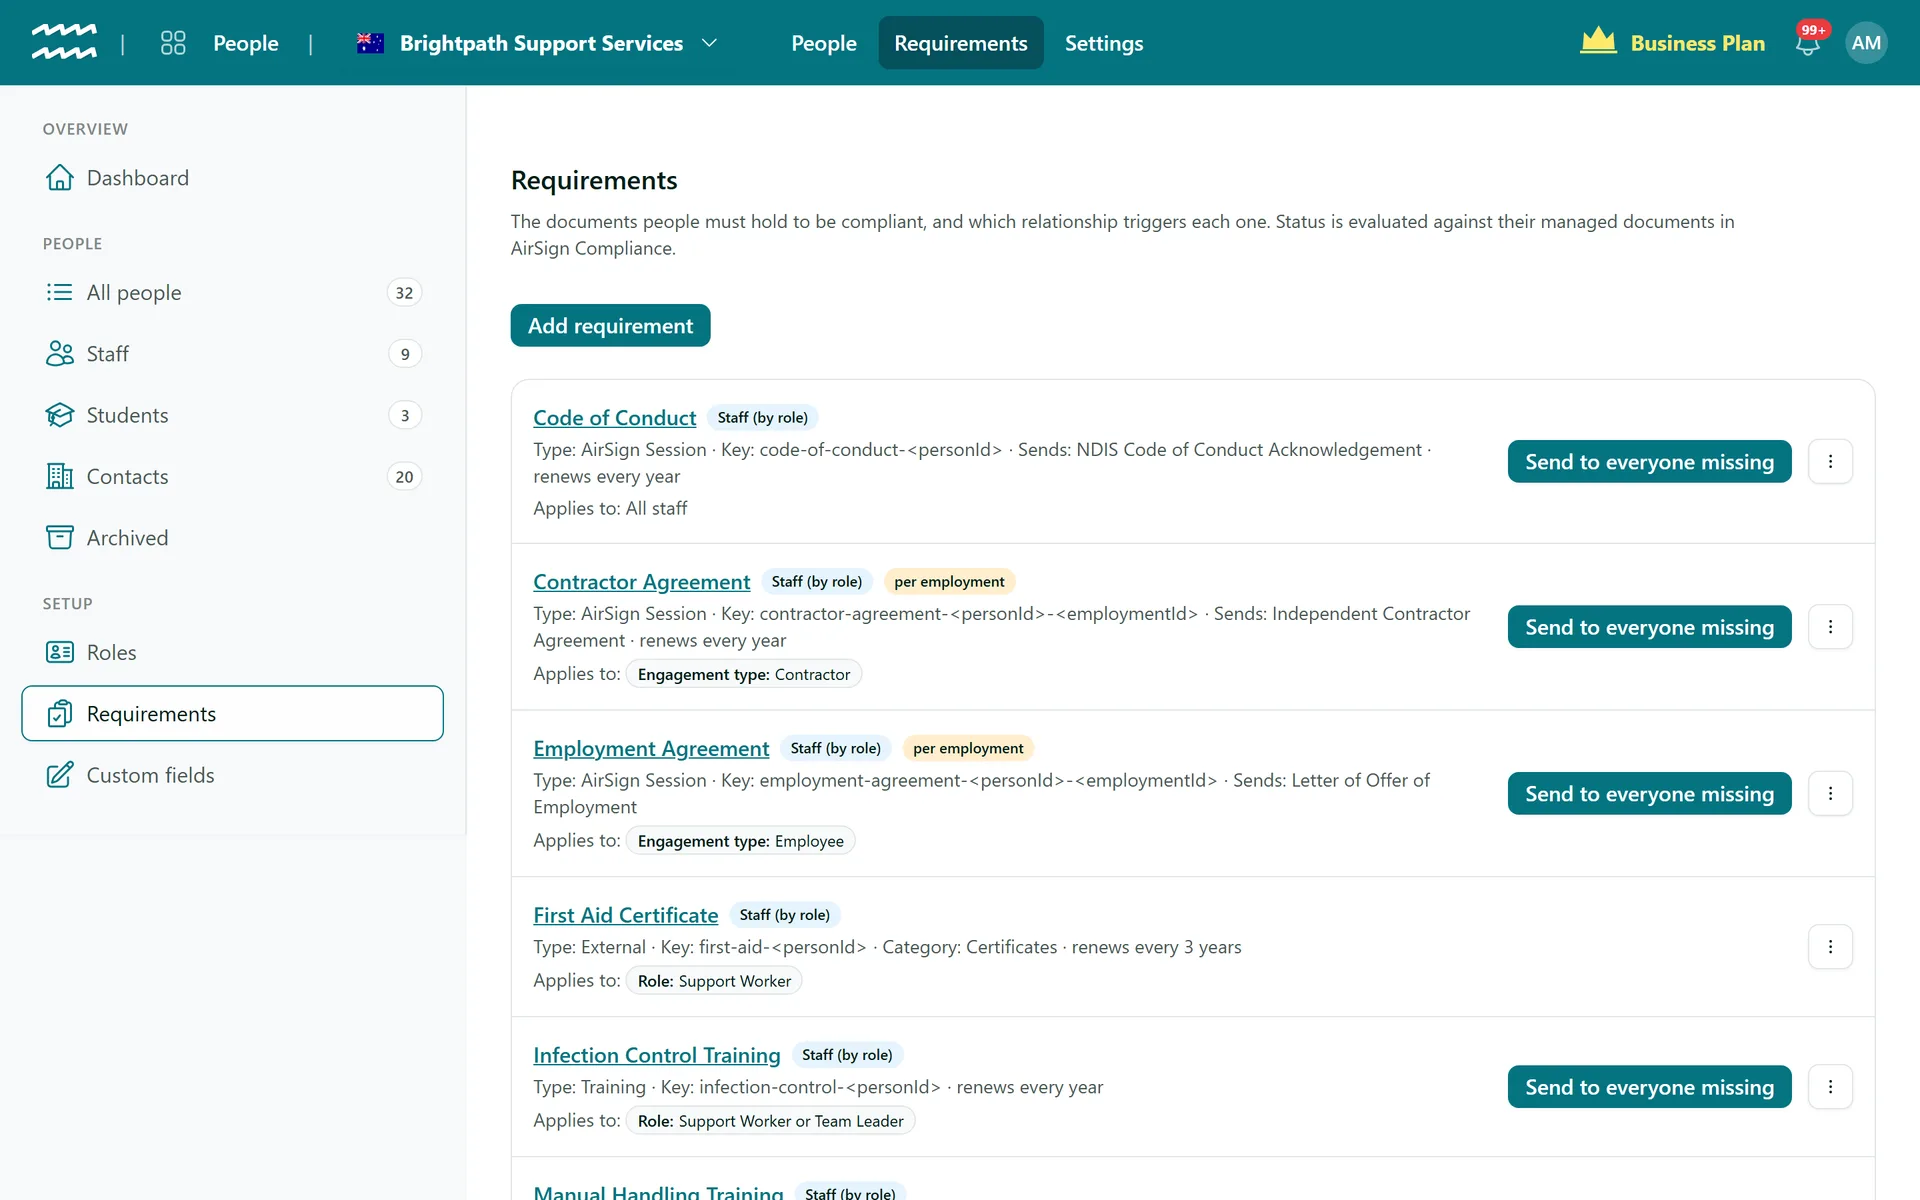
The Requirements page lists every rule with who it applies to, its type, how often it renews and the template, module or form it sends. Select a requirement's name to edit it, or select Add requirement to create a new one.
Step 2: Name it and choose the type
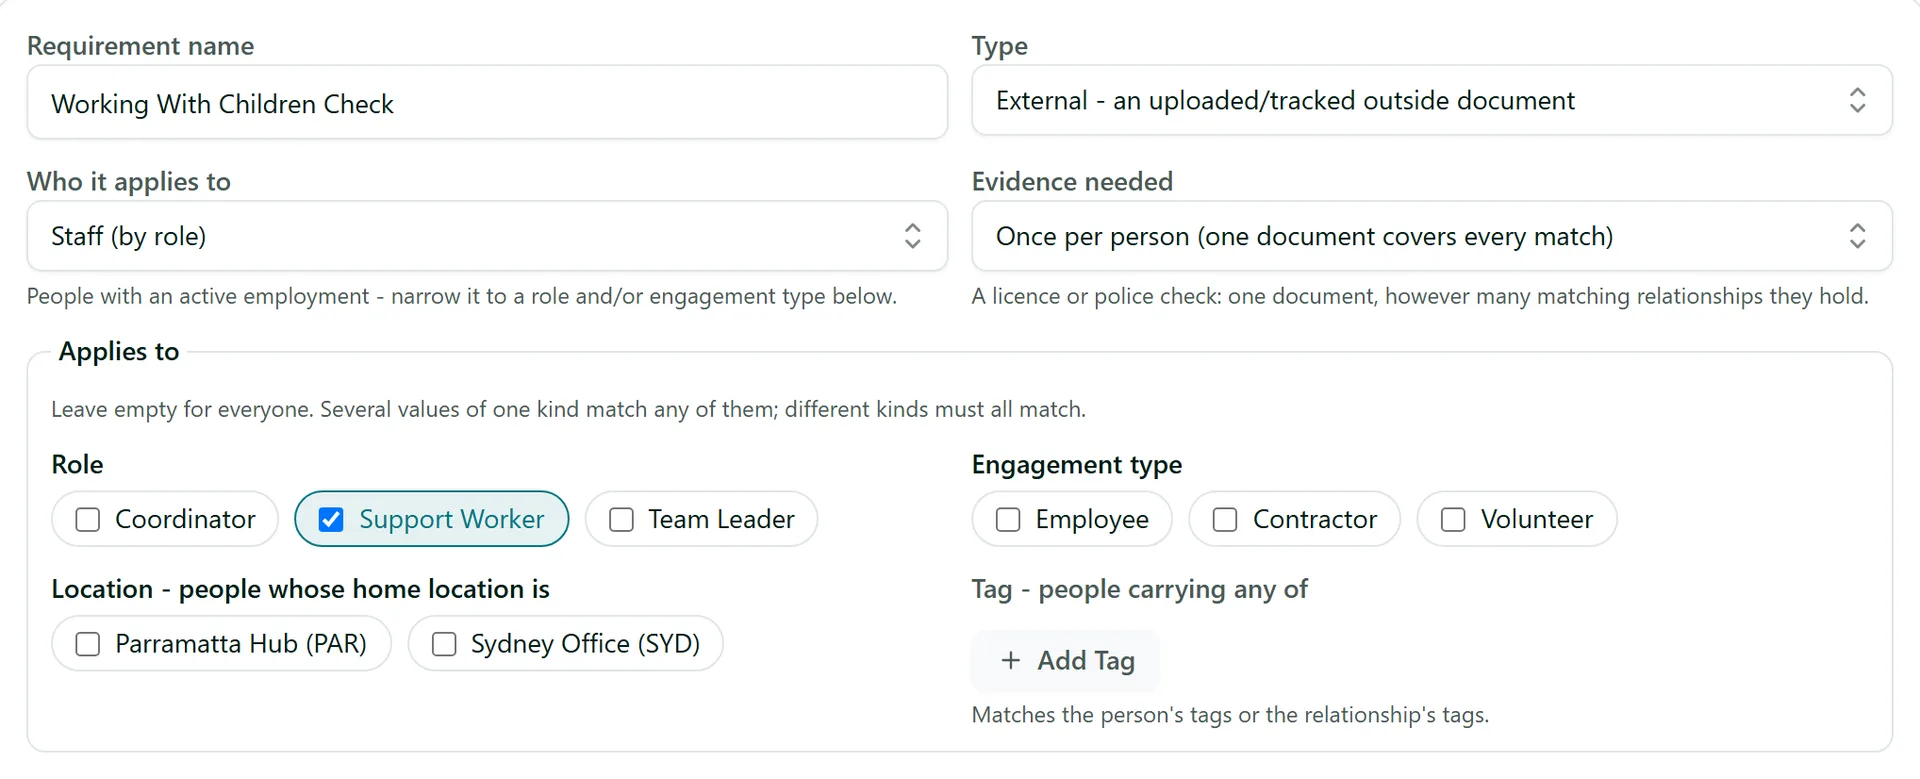
Enter a Requirement name and pick a Type:
- AirSign Session - a document signed from one of your templates, such as a code of conduct or an employment agreement.
- AirSign Training - a training module they complete.
- AirSign Form - an inspection or audit checklist they fill in.
- External - a document from outside AirSign, such as a licence, a police check or a certificate, that is uploaded with its expiry date.
Then pick the template, training module or form template it uses. The Document key fills itself in from the template; it is how AirSign recognises each person's copy of this document.
Step 3: Say who it applies to
In Who it applies to, choose Anyone on the books, Staff (by role), Students (by class), Customer contacts (by customer type) or a project crew. Then narrow it under Applies to by role, engagement type, location or tag. Leave a section empty to include everyone; several ticks of one kind mean "any of these", and ticks across different kinds must all match - for example Support Worker AND Contractor.
Evidence needed decides whether one document covers the person however many matching roles they hold (a licence or police check), or whether they need a separate one for each employment, class or customer.
Step 4: Set evidence, expiry and renewal
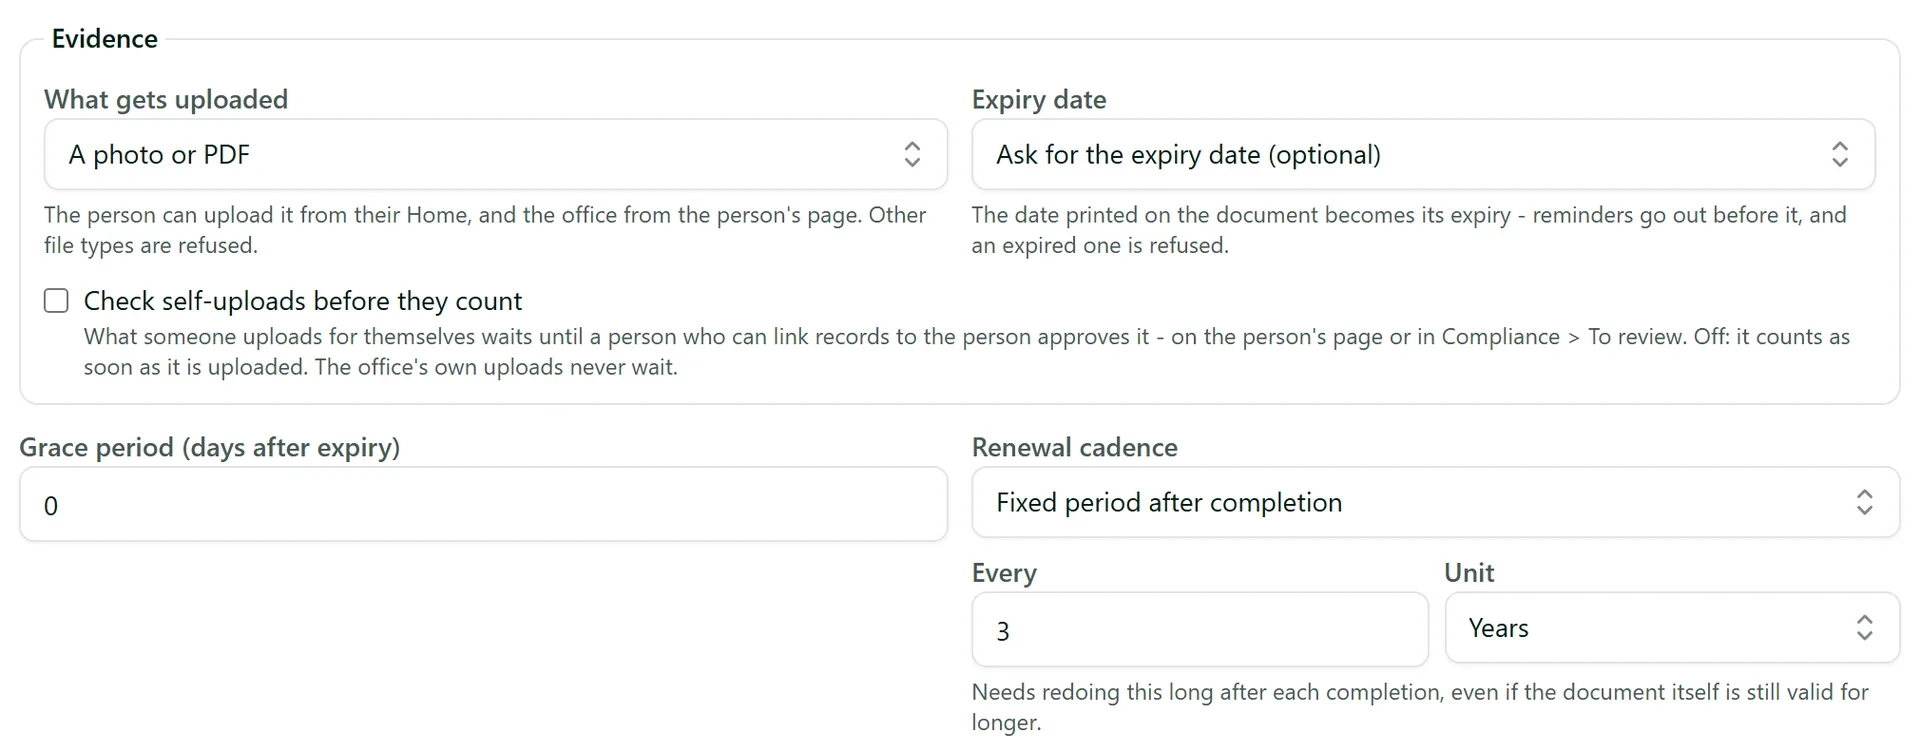
For an External requirement, the Evidence panel sets What gets uploaded (a photo or PDF, a photo only, a PDF only, or nothing - the office records it) and whether to ask for the Expiry date printed on it. Tick Check self-uploads before they count if you want to approve what people upload for themselves (see Reviewing Uploaded Evidence).
Then decide when it needs redoing:
- Grace period (days after expiry) - how long a person stays "in grace" after expiry before they count as non-compliant.
- Renewal cadence - When the document expires (the document's own dates decide), Fixed period after completion (for example every 3 years, even if the certificate says longer) or Calendar period (resets each week, month, quarter or year).
Select Add requirement (or Save) to finish.
Step 5: Send it to everyone who is missing it
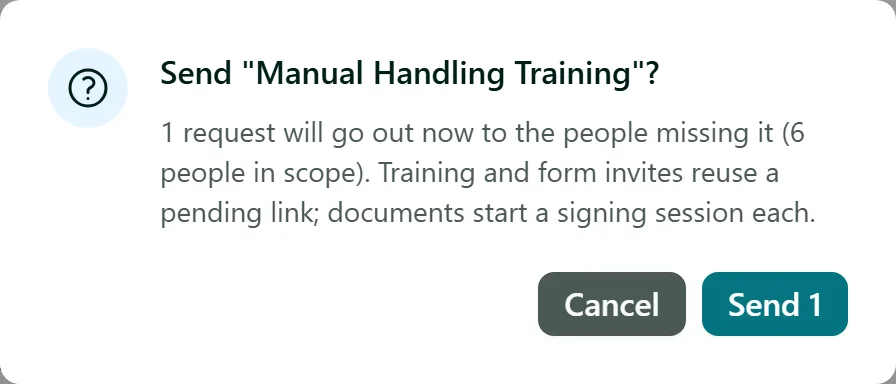
New people are sent their requirements automatically, but a rule you add today does not go out to people who are already on your books. Select Send to everyone missing on the requirement's row. AirSign first tells you how many requests will go out and to how many people in scope - confirm to send them.
Tips
- Set up roles before requirements so you can target them.
- For outside documents with an expiry date, keep the cadence on "When the document expires" so reminders follow the date on the certificate.
- Deleting a requirement recalculates everyone's compliance straight away - edit it instead if you only need to change who it applies to.
Need More Help?
Related guides: Tracking Compliance, Person Records and Documents, Creating Your First Template. See our FAQ section or email support at [email protected].