Reviewing Uploaded Evidence
For documents that come from outside AirSign - a First Aid certificate, a licence, a police check - your staff can upload a photo or PDF themselves from their Home, along with the expiry date printed on it. If you would rather check each one before it counts, turn on approval and review the uploads as they come in.
Where to find it
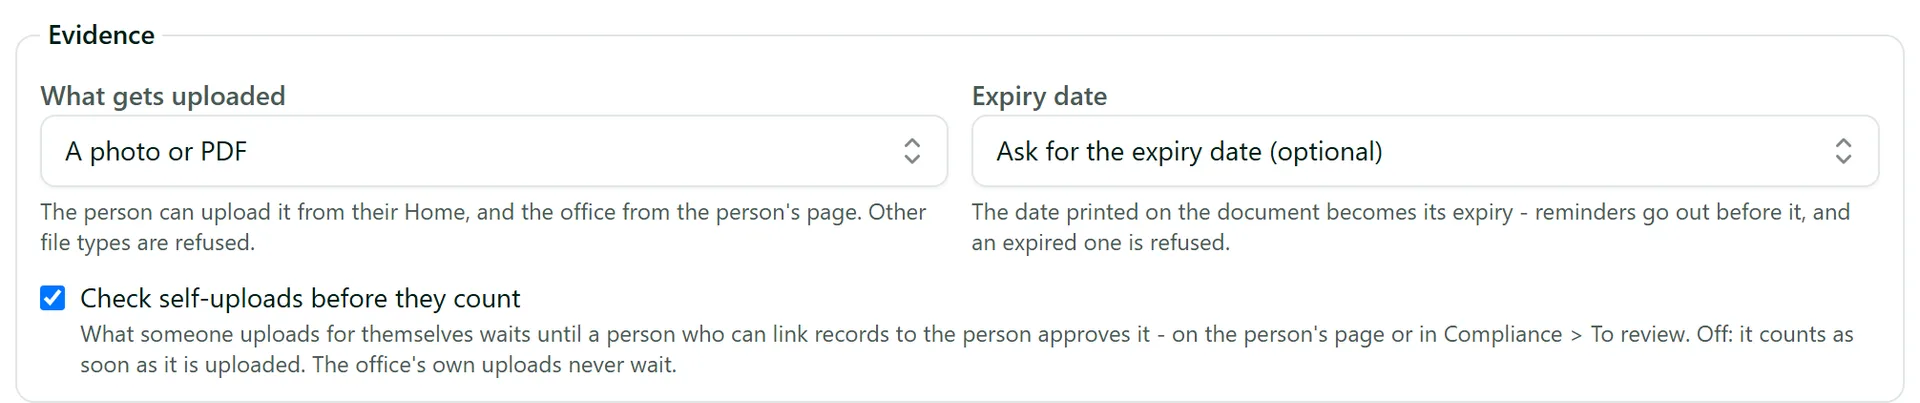
Step 1: Turn on approval for the requirement
Open the requirement in AirSign People > Requirements (it must be an External requirement that takes a photo or PDF). In the Evidence panel, tick Check self-uploads before they count and save. Without it, what people upload counts straight away. Uploads made by your office never wait for approval. Approval is available for requirements on people and on customers.
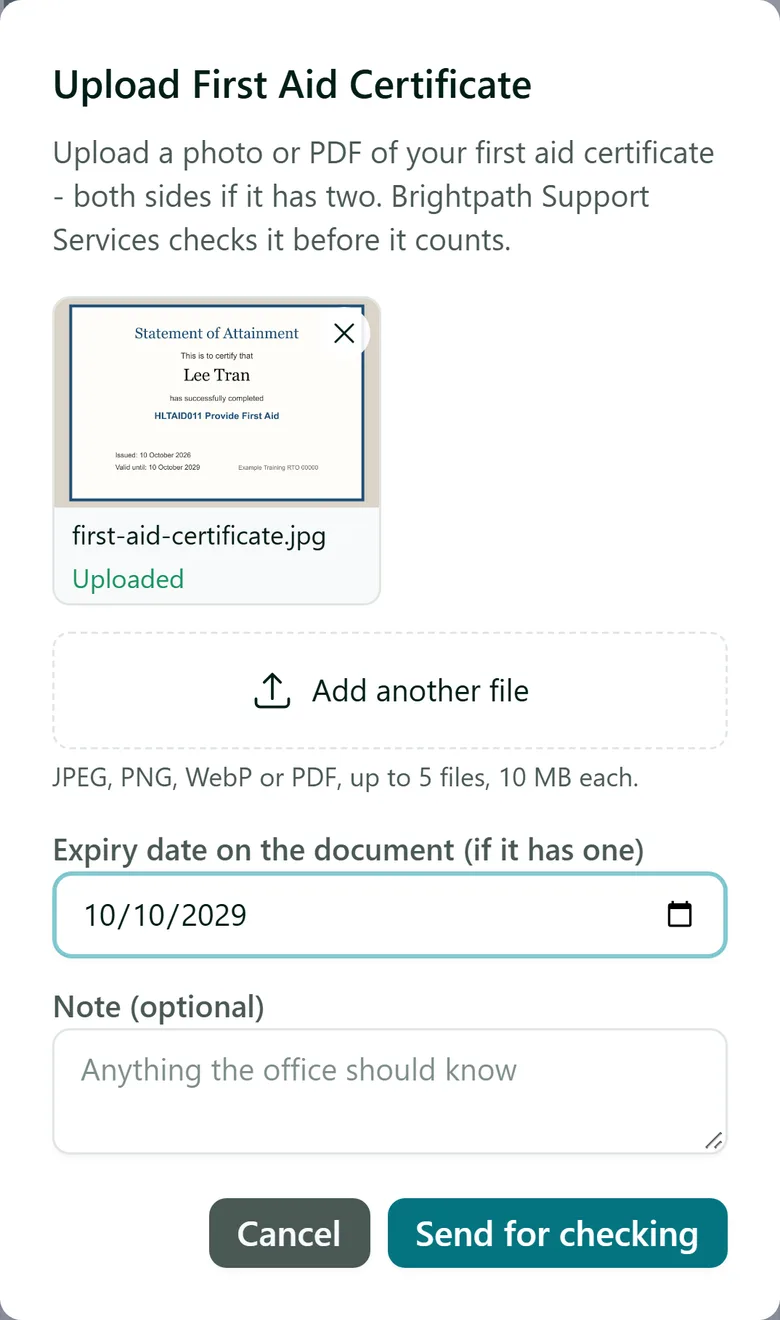
Step 2: Your staff upload from their Home
A person who needs the document sees it on their Home under Requirements with an Upload button (Upload new one once something is already on file). They take a photo or choose a file, enter the expiry date on the document and select Send for checking. Only the file types the requirement allows are accepted, and an already expired document is refused.
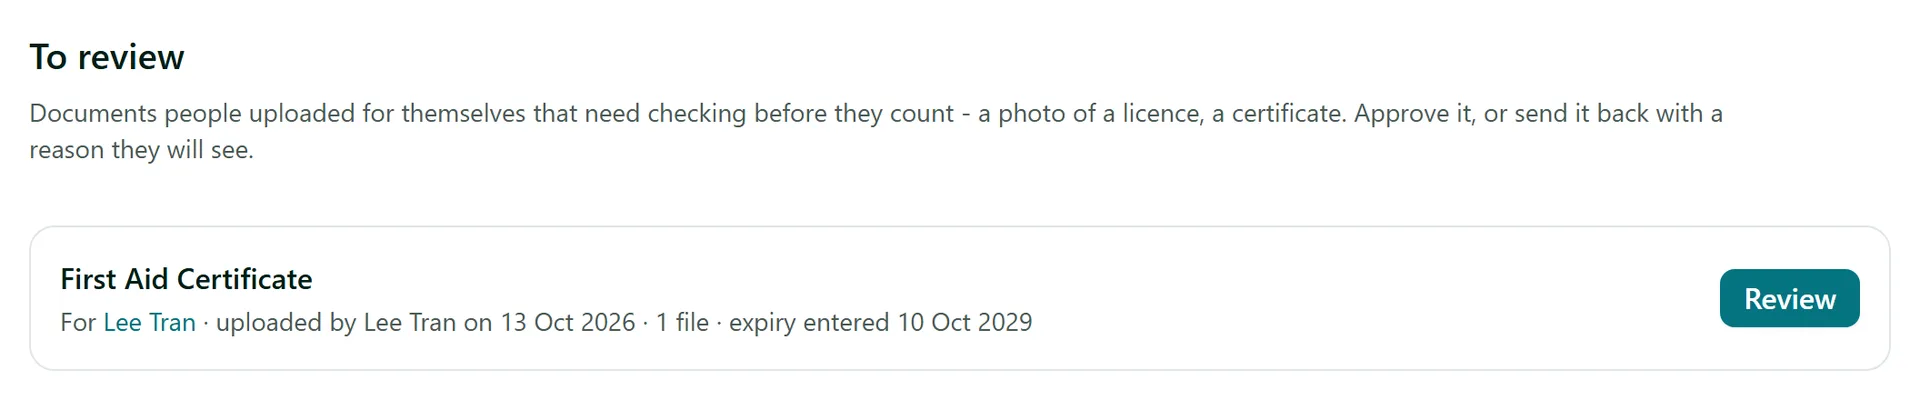
Step 3: Find uploads waiting for review
Your admins get a notification in the bell for each new upload. Every upload waiting for you is listed under To review in AirSign Compliance, oldest first, showing who it is for, who uploaded it, when, and the expiry date they entered. The same upload shows on the person's Requirements tab as "waiting for review" with a Review upload button.

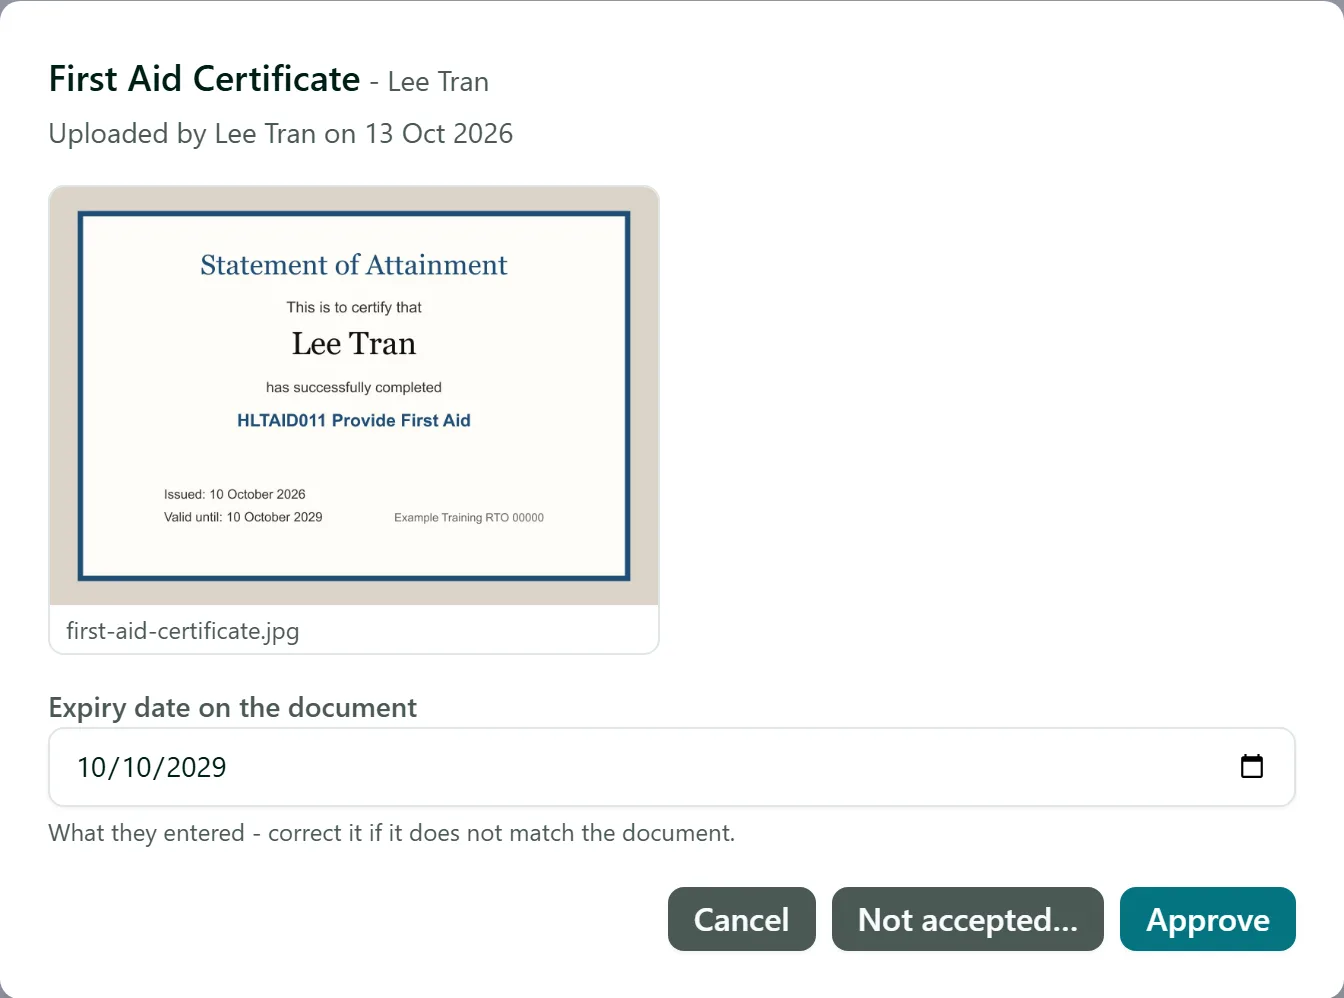
Step 4: Approve it or send it back
Select Review to open the upload. Check the file (select it to see it full size) and the Expiry date on the document - correct the date if it does not match. Then:
- Approve - the upload becomes the person's document for that requirement, as a new version if they had an older one, and their status updates straight away.
- Not accepted... - enter the reason (for example "The photo is blurry - the expiry date can't be read") and send it back. The person sees the reason on their Home and can upload it again.
Either way, the person is told the outcome in their notifications.
Tips
- An upload waiting for review does not make anyone compliant - review promptly so a current certificate is not shown as lapsed.
- You can also upload on someone's behalf from their Requirements tab with Upload; it counts straight away.
- To review an upload you need permission to link documents to that person (or customer).
Need More Help?
Related guides: Setting Up Requirements, Tracking Compliance, Inviting Staff to AirSign. See our FAQ section or email support at [email protected].