Project Documents and Hours
Every build has paperwork that has to be in place - approvals, the construction certificate, home warranty insurance, the signed contract - and plenty more you just want to keep with the job. This guide covers the Documents and Notes & files tabs on a project, and the report of hours booked against each project.
Where to find it
Step 1: Set the documents every project needs
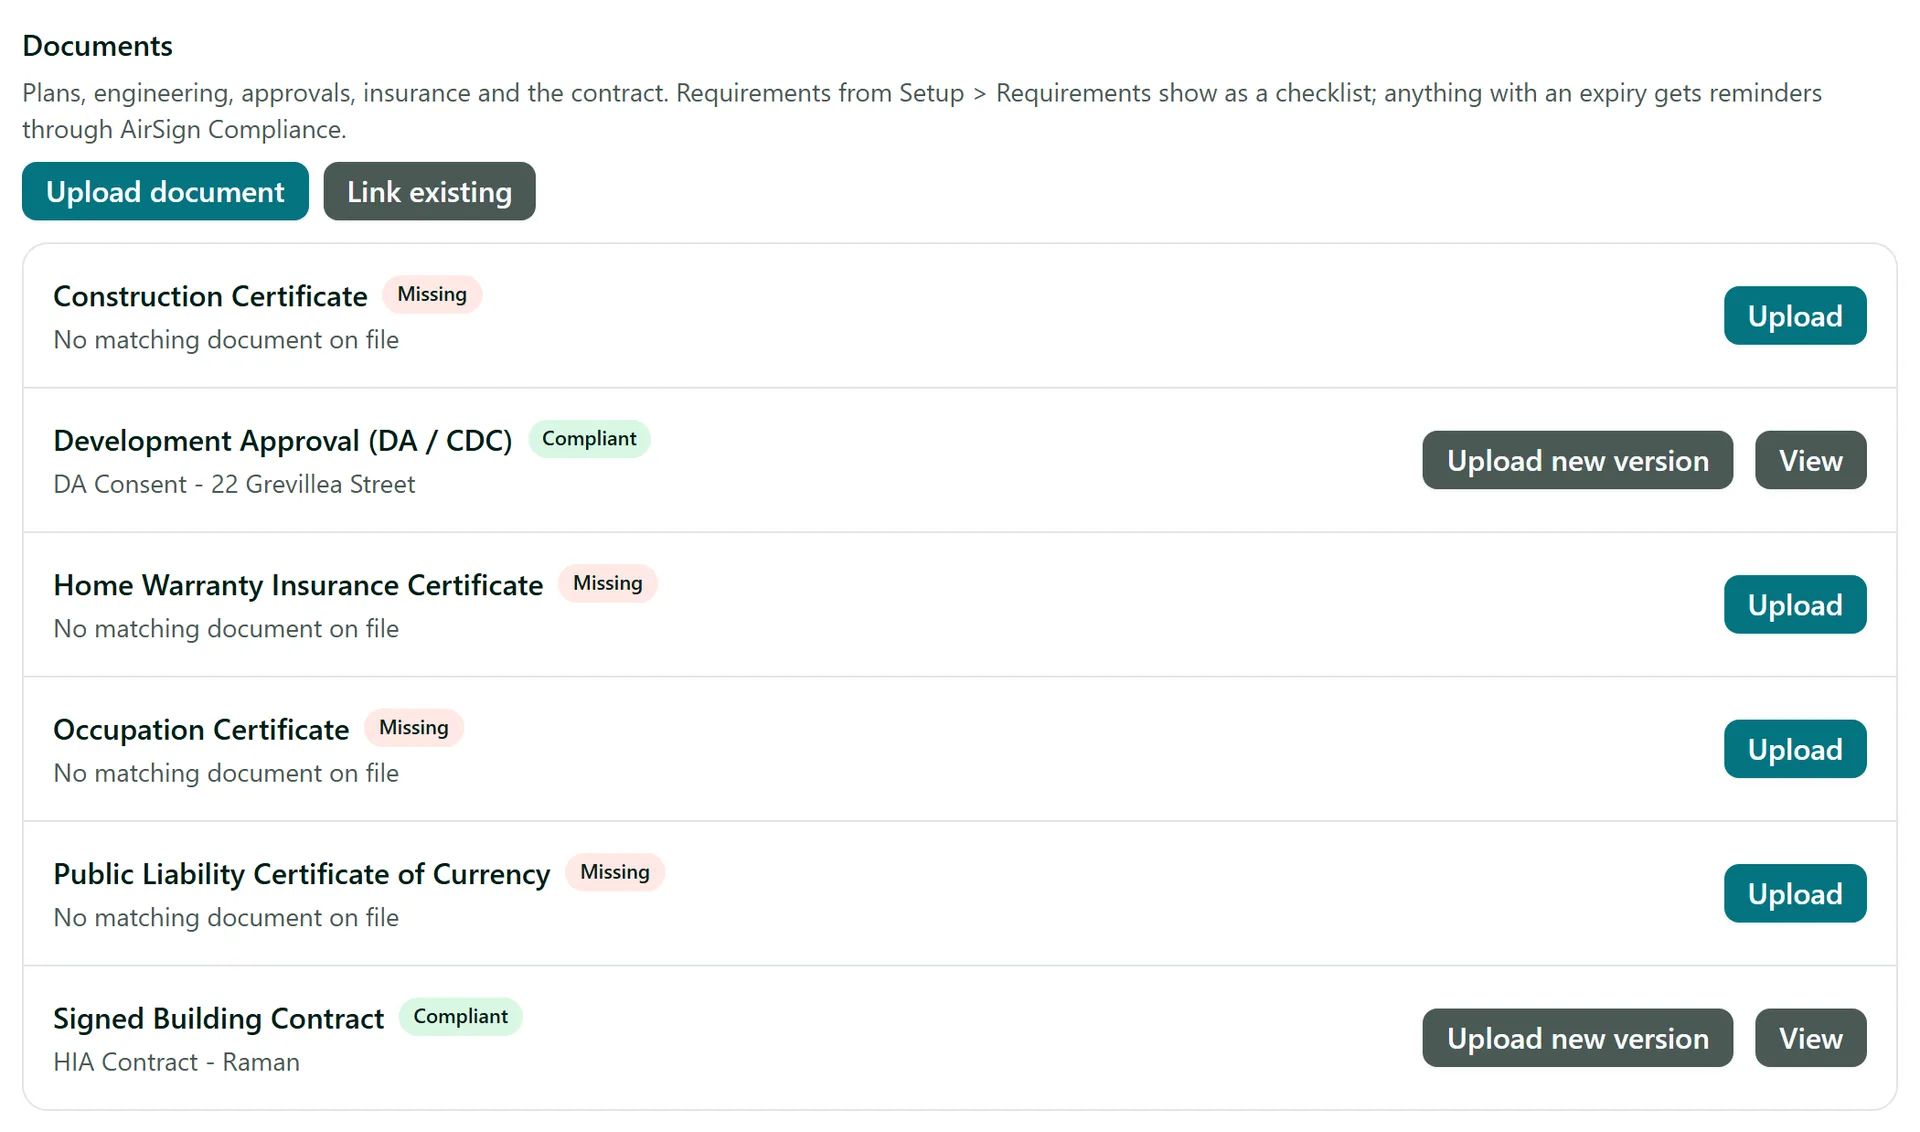
Click Requirements in the left menu, then Add requirement. Name it (for example "Development Approval") and pick the type: External for a document you upload, such as a certificate or insurance policy, or AirSign Session for one signed through an AirSign template, such as the building contract. Under Applies to, scope it to project types, sites or tags, or leave it empty for every project. Each project's Documents tab then shows the rule as a checklist line.
Step 2: Work through a project's checklist
Open the project's Documents tab. Each requirement shows Missing, Compliant or how soon it is due, and the tab carries a red count of anything missing or lapsed.
- Upload hands in the document the rule asks for (with its expiry date if it has one). Upload new version renews one already on file.
- Send Document emails a signing requirement's template to the customer's primary contact. It is signed like any AirSign session and ticks the requirement when done. The project needs a customer for this.
- Send new version issues a fresh copy of a signed document. The signed version stays valid until the new one is signed.
- Recall cancels a document still out for signature, for example if it went to the wrong contact.
- View opens the document in AirSign Compliance, with its history and reminders.
Step 3: Add any other document
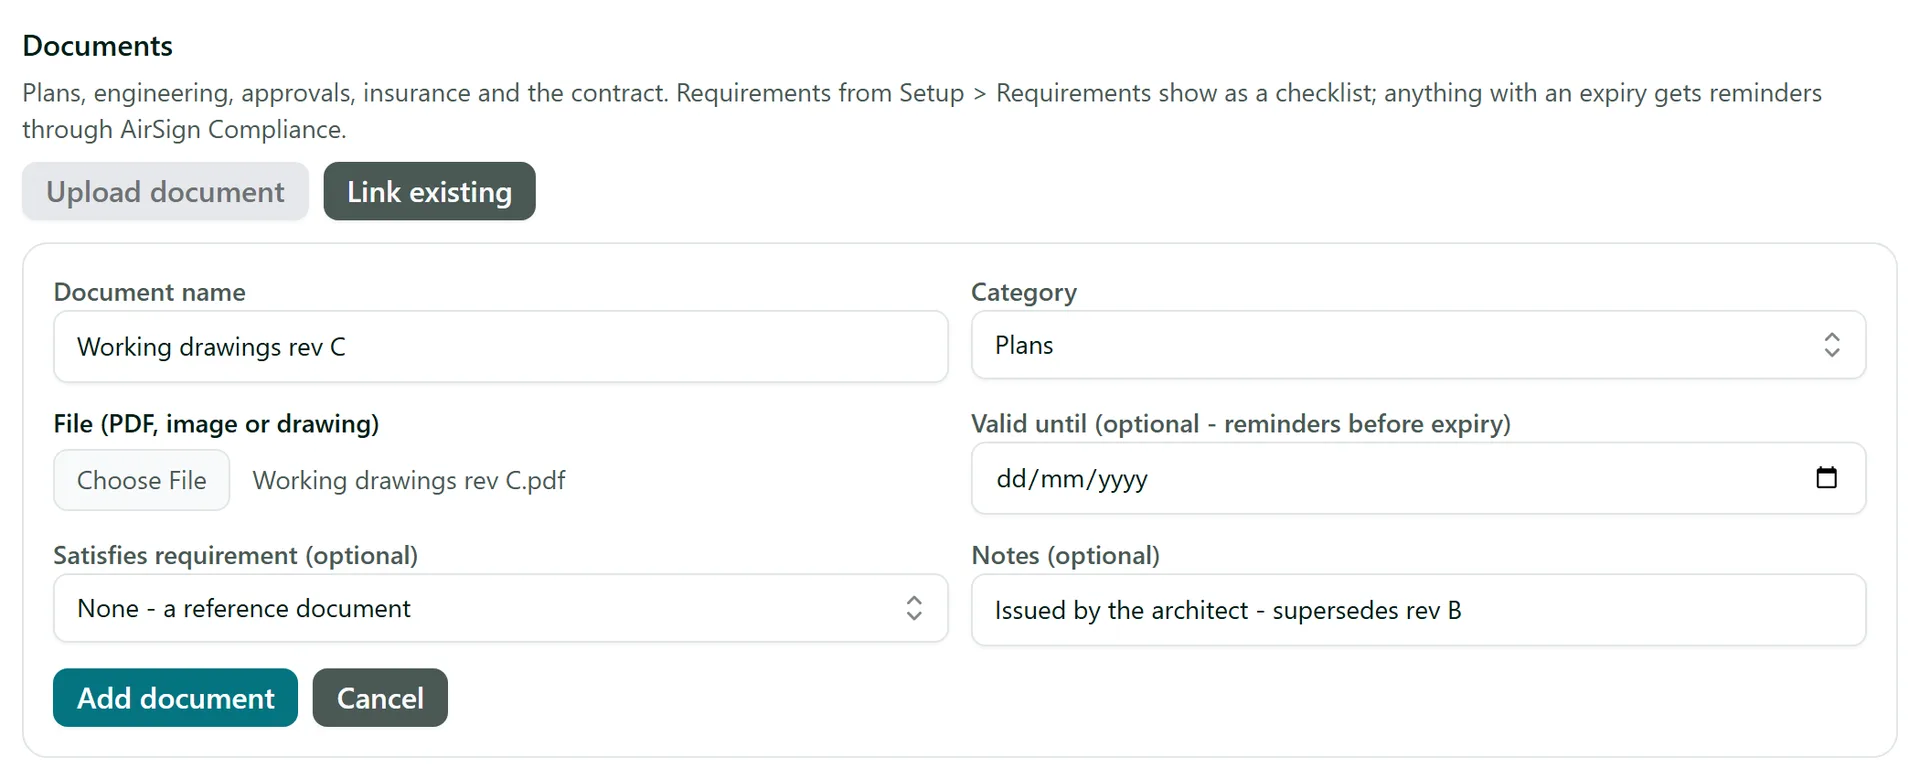
Click Upload document to add a document that is not tied to a rule, or that should satisfy one. Give it a Document name, a Category (Plans, Engineering, Approvals, Contract, Insurance and so on), the file, and a Valid until date if you want reminders before it expires. Pick a Satisfies requirement to tick a checklist line, then click Add document. Link existing attaches a document already tracked in AirSign Compliance.
Step 4: Keep plans, photos and site notes with the job
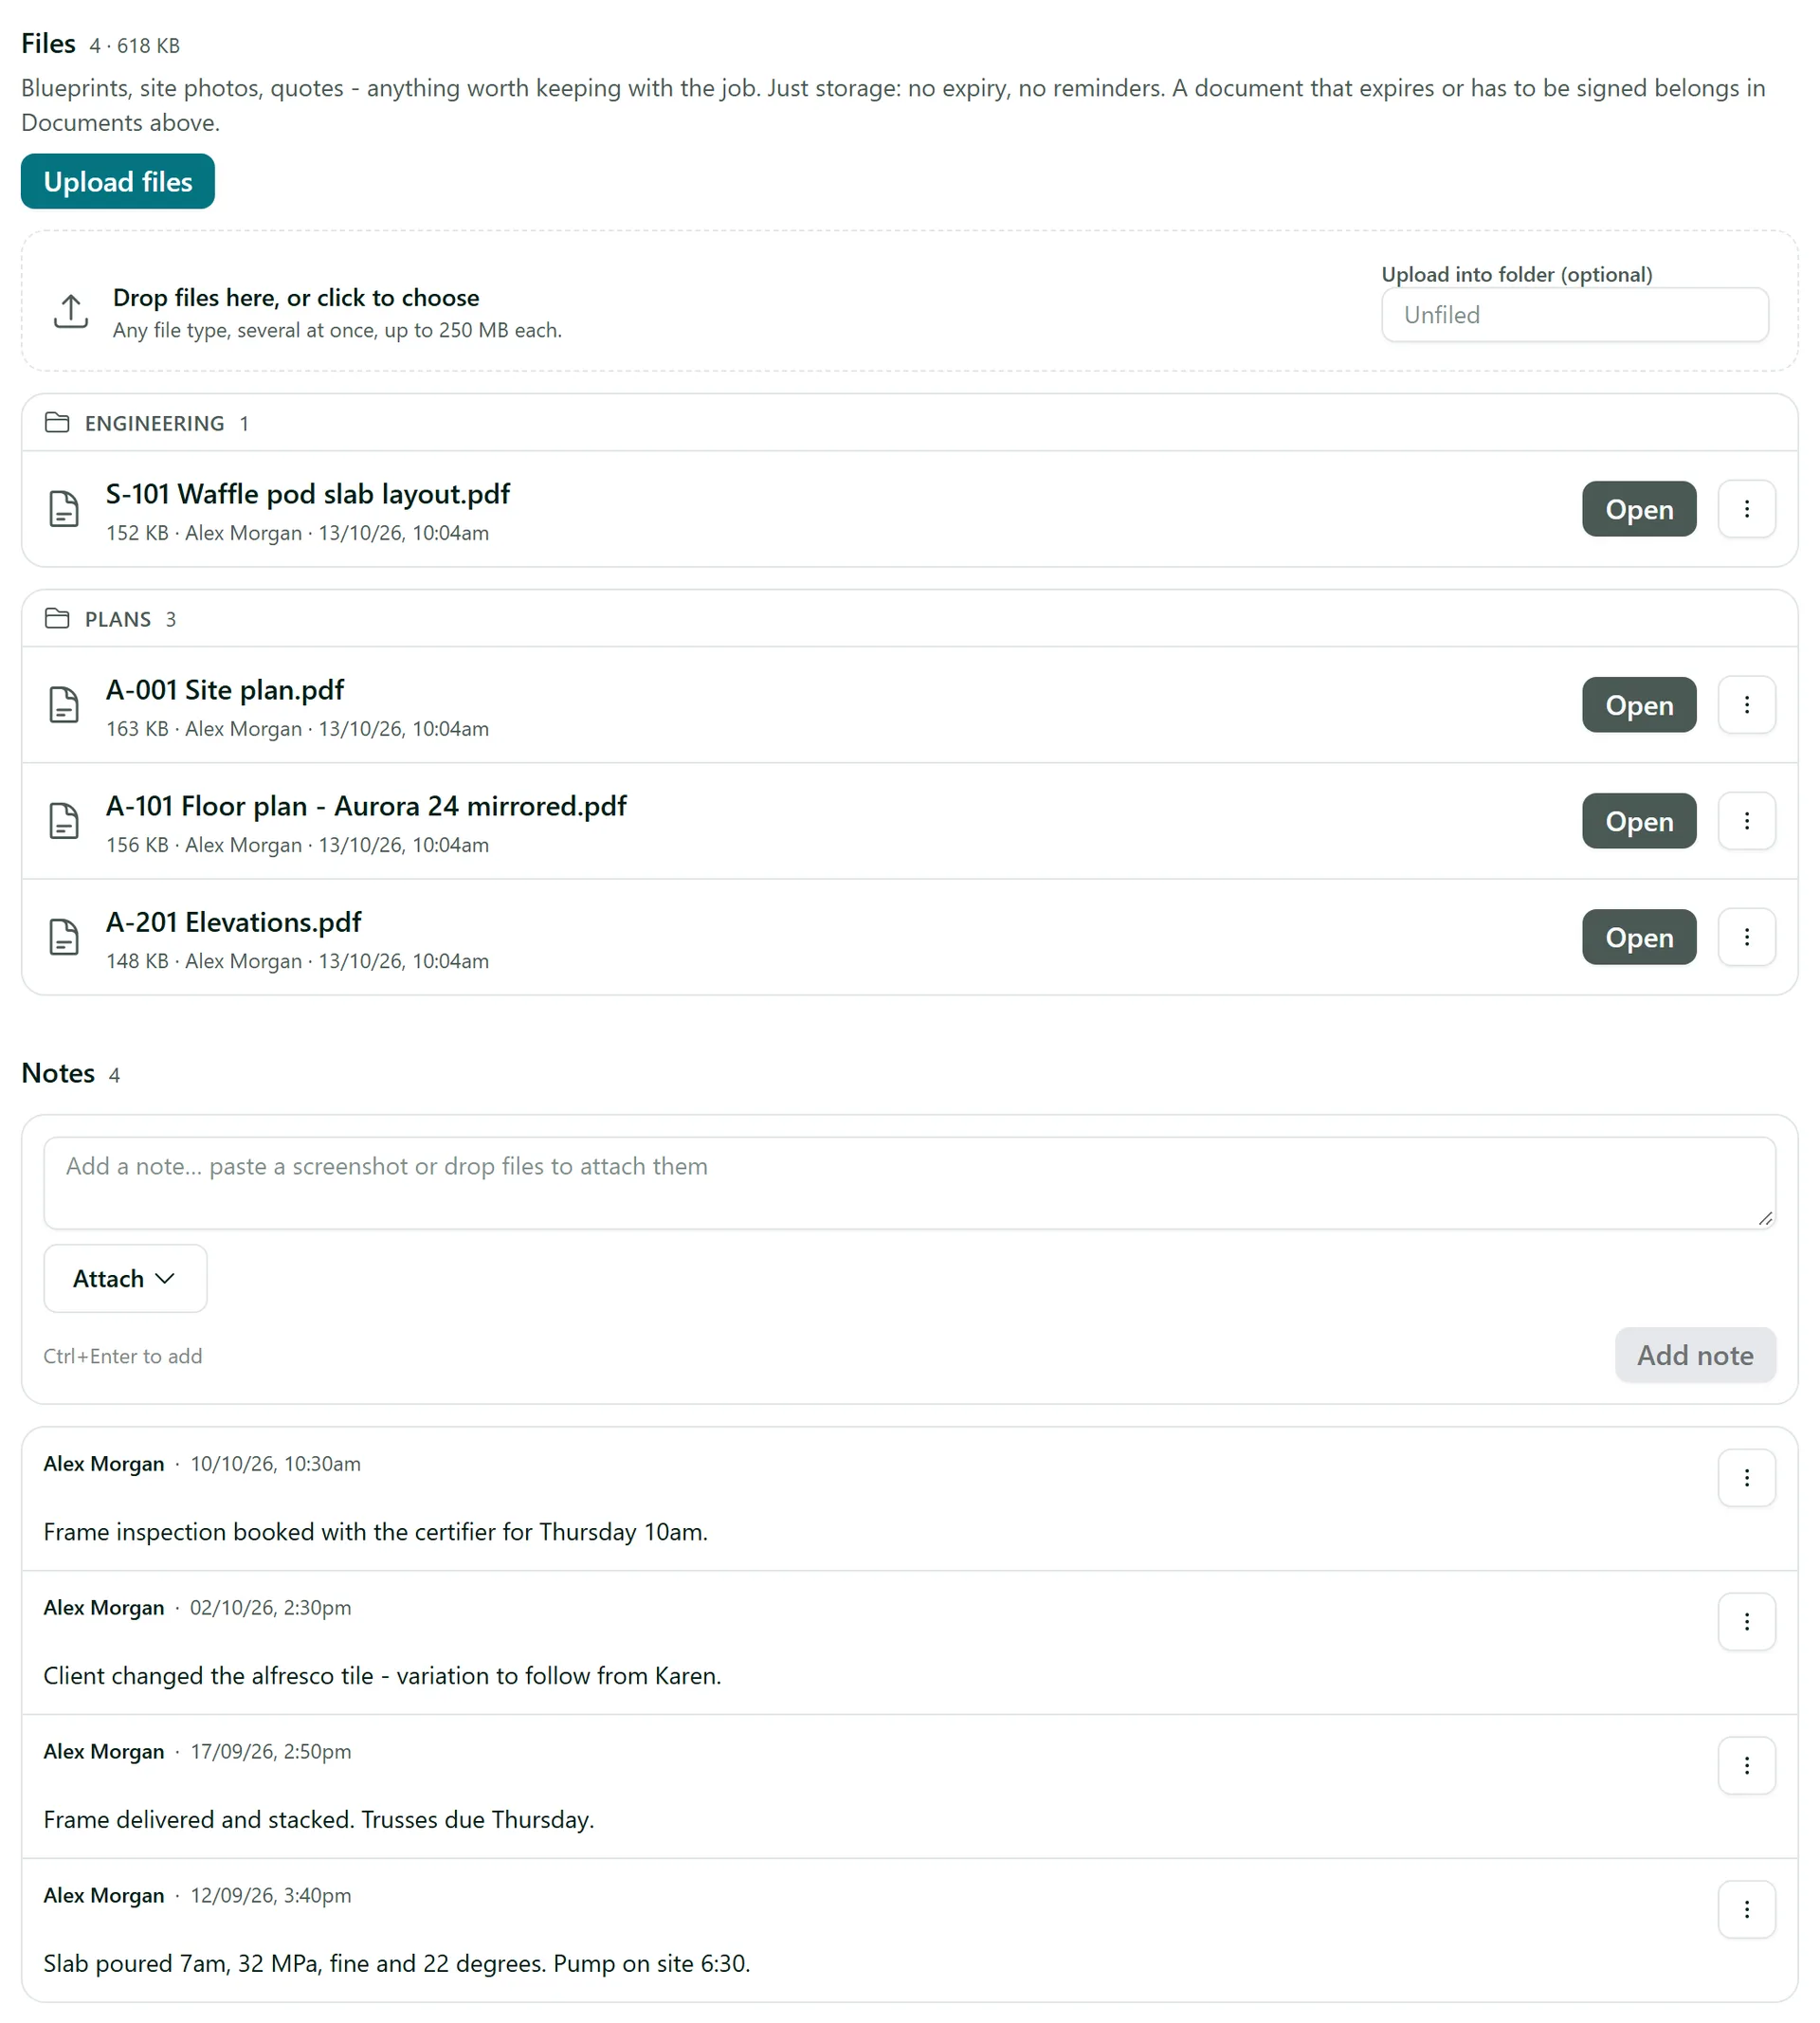
Not everything needs an expiry or a signature. On the Notes & files tab, the Files section is plain storage for blueprints, engineering sets, site photos and quotes. Drop files onto the box or click Upload files (any type, up to 250 MB each), optionally into a folder such as Plans or Site photos. Click Open to view a file, and use its menu to rename, move or delete it.
Below that, Notes is the project's diary. Type a note, attach files or paste a screenshot, and click Add note (or press Ctrl+Enter). Notes are dated and show who wrote them; only the author can edit or delete their own note.
Step 5: Report hours against projects
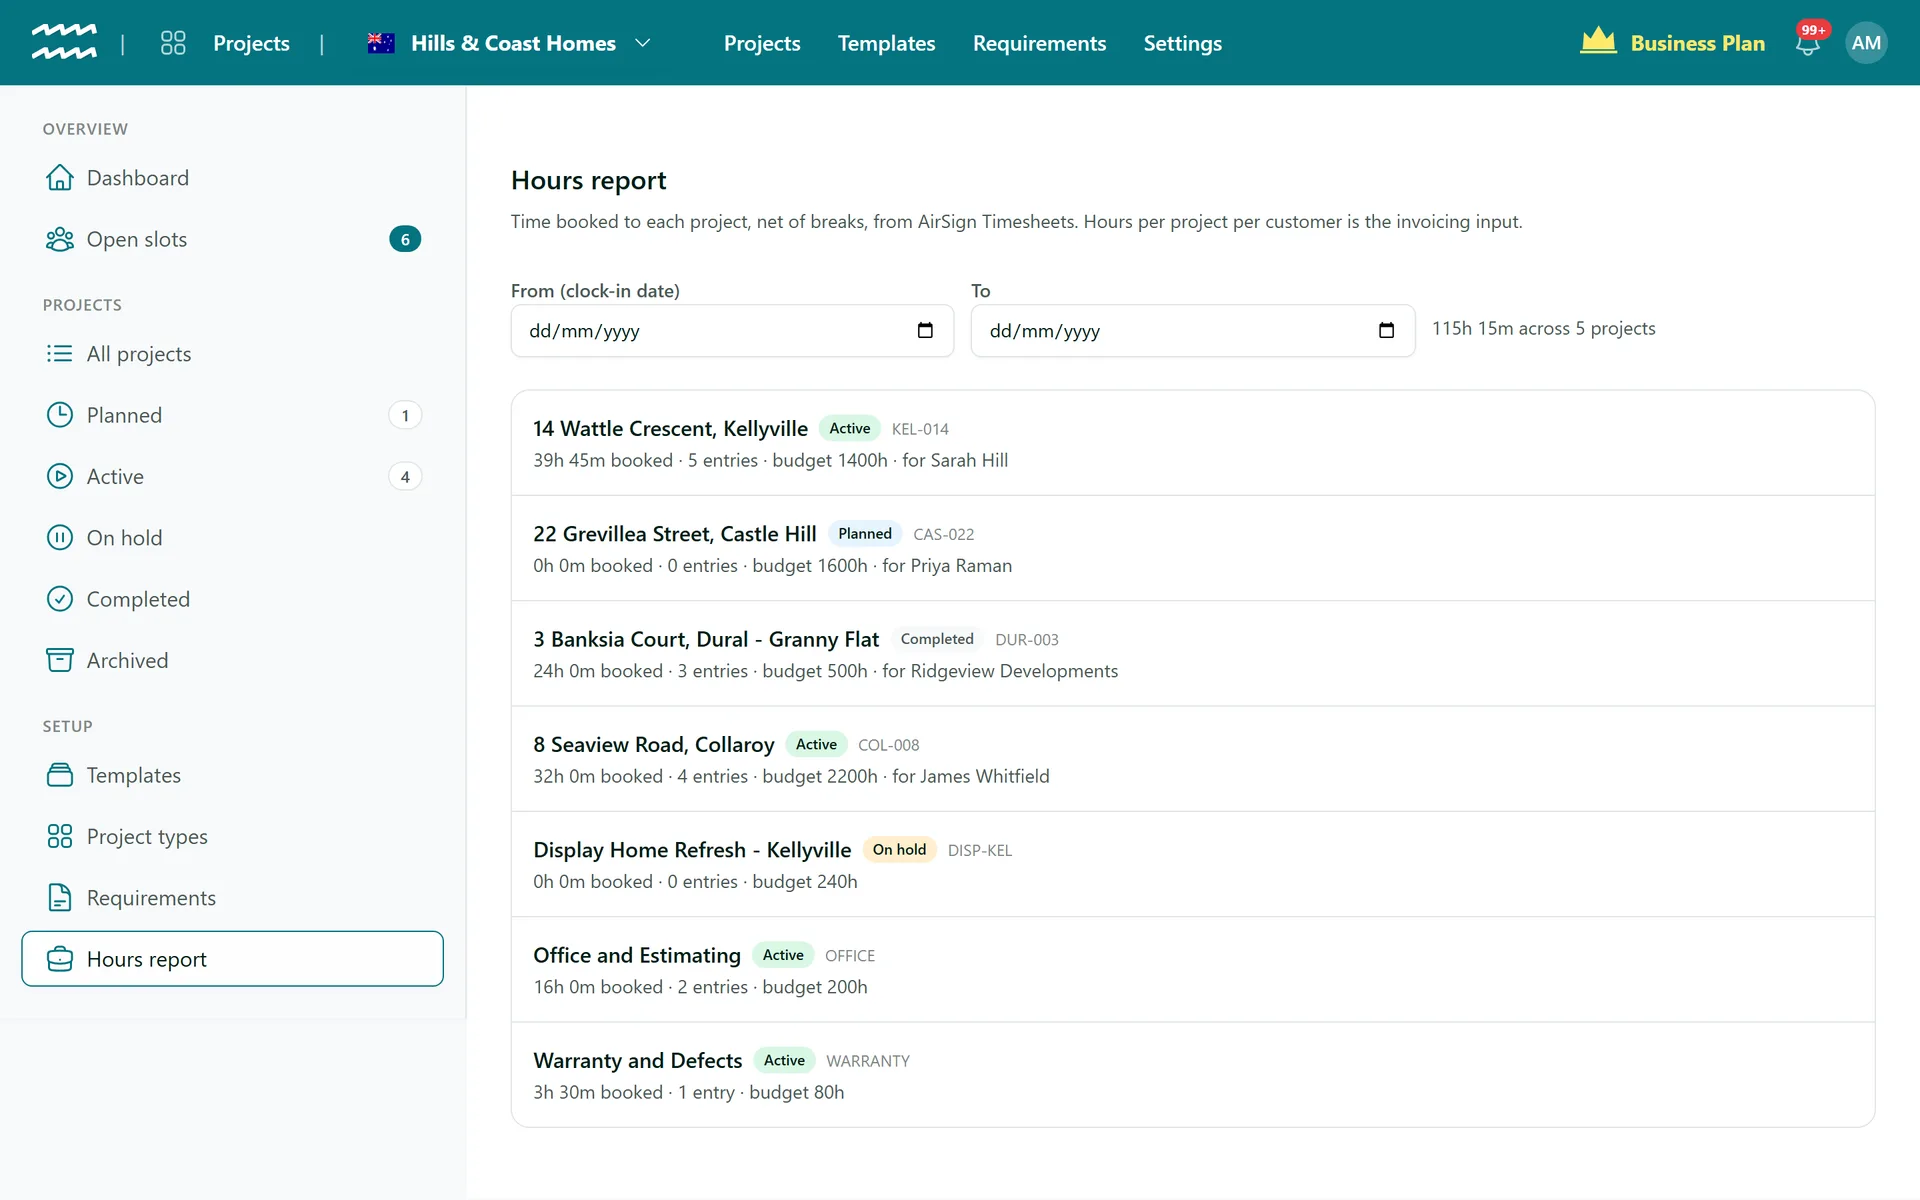
Staff book time to projects in AirSign Timesheets. The project header shows the hours booked against its budget, and flags it when the budget is exceeded. For every project at once, open Hours report: it lists the time booked to each project (net of breaks), the number of entries, the budget and the customer. Set From and To to report on a date range, and click a project to open it.
Tips
- A rule of thumb: a document that expires or has to be signed belongs in Documents; everything else worth keeping is a File.
- Projects without a customer have nobody to send documents to, so their requirements are upload-only.
- A project that holds documents or files cannot be deleted - archive it instead so the history stays.
- On the Requirements page, Send to everyone missing sends a requirement to every live project that does not have it yet.
Need More Help?
Related guides: Creating a Project, Running Stages and Crew, Creating Your First Template. See our FAQ section or email support at [email protected].