Creating a Project
AirSign Projects keeps each build or job in one place: who it is for, the site, the stages it runs through and the crew it needs. Timesheets books hours against it and Schedule rosters shifts for it. This guide shows you how to start a new project, usually from a template so the stages and crew slots come with it.
Where to find it
Step 1: Open your projects
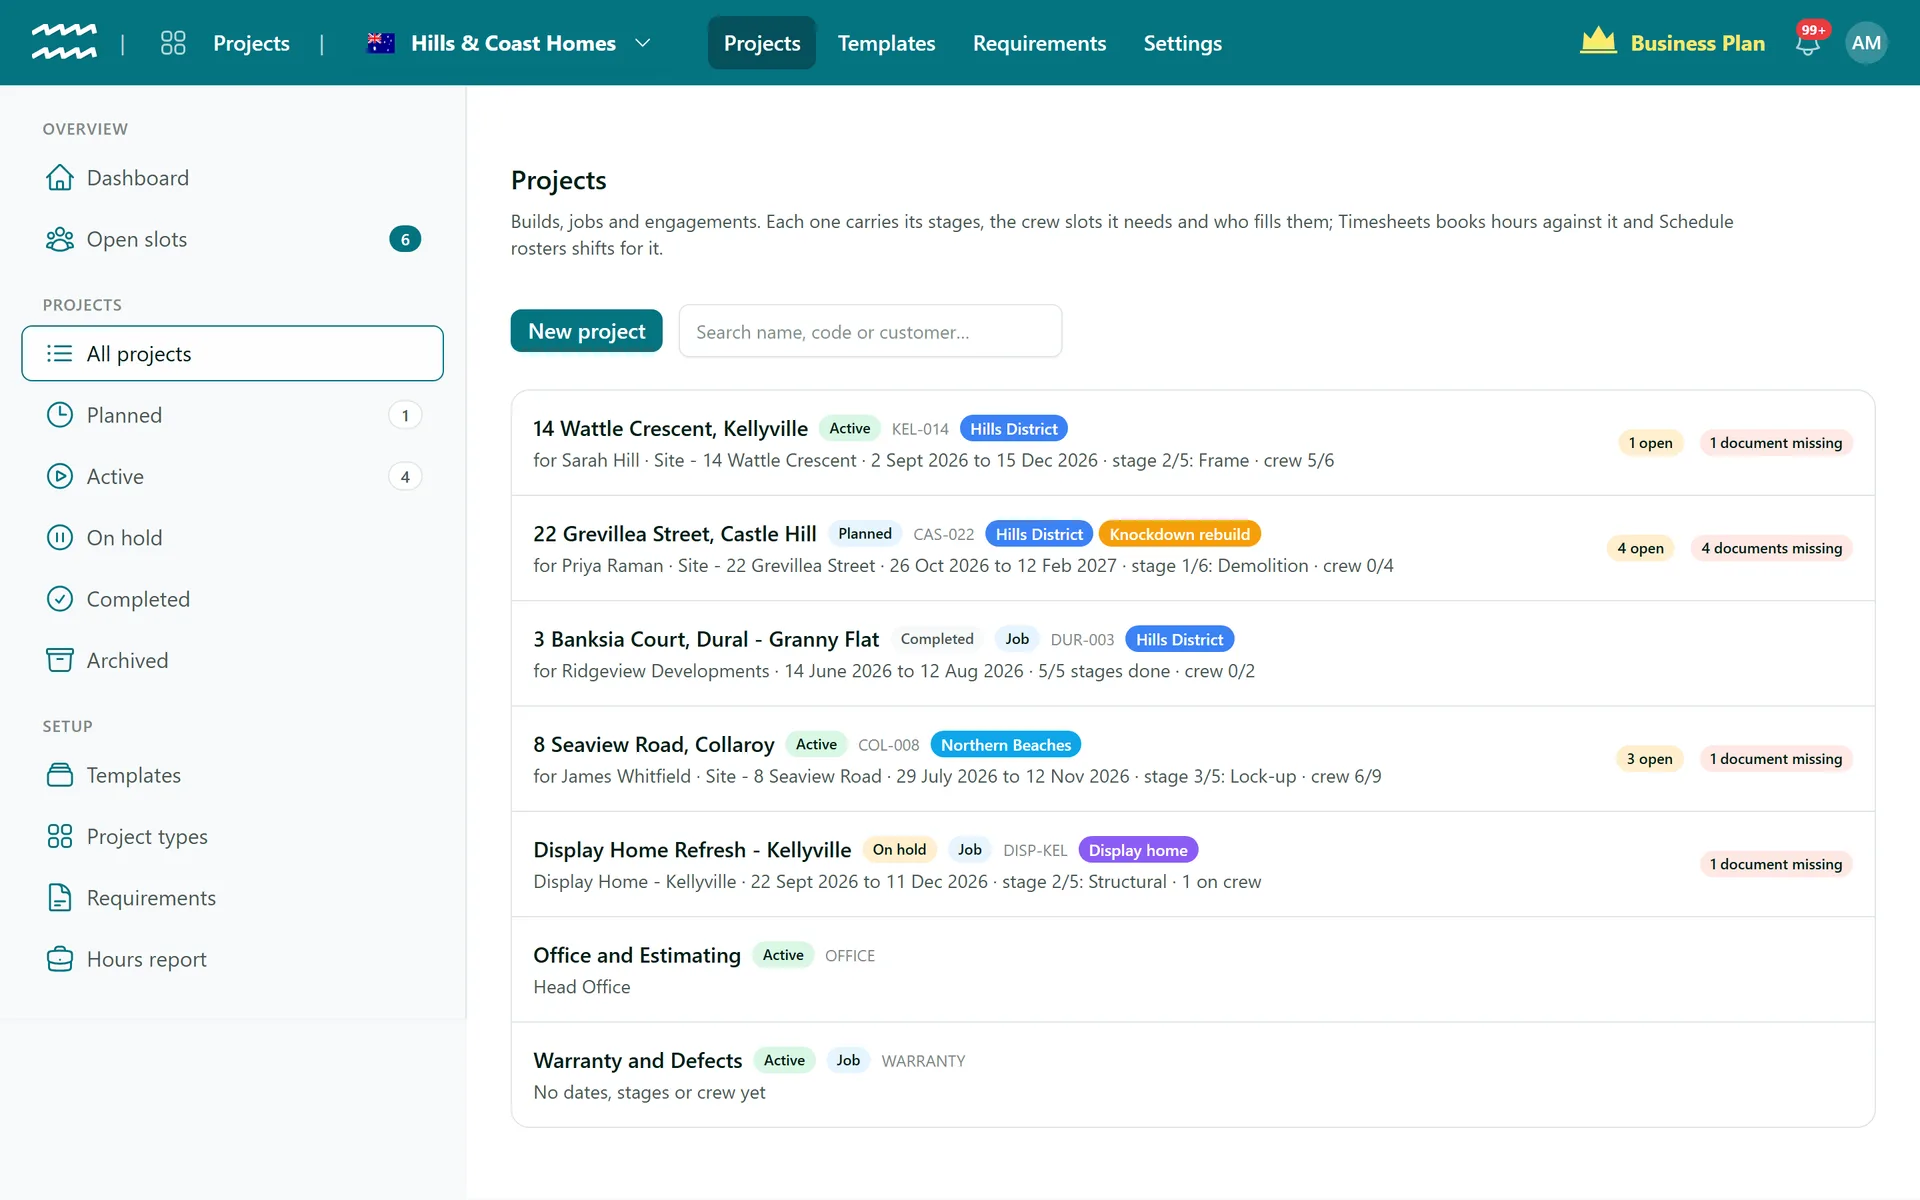
Click All projects in the left menu, or one of the status buckets: Planned, Active, On hold, Completed and Archived. Each row shows the customer, site, dates, the current stage and how many crew seats are filled, with badges for open seats and missing documents. Search by name, code or customer to find one quickly.
Step 2: Start a new project
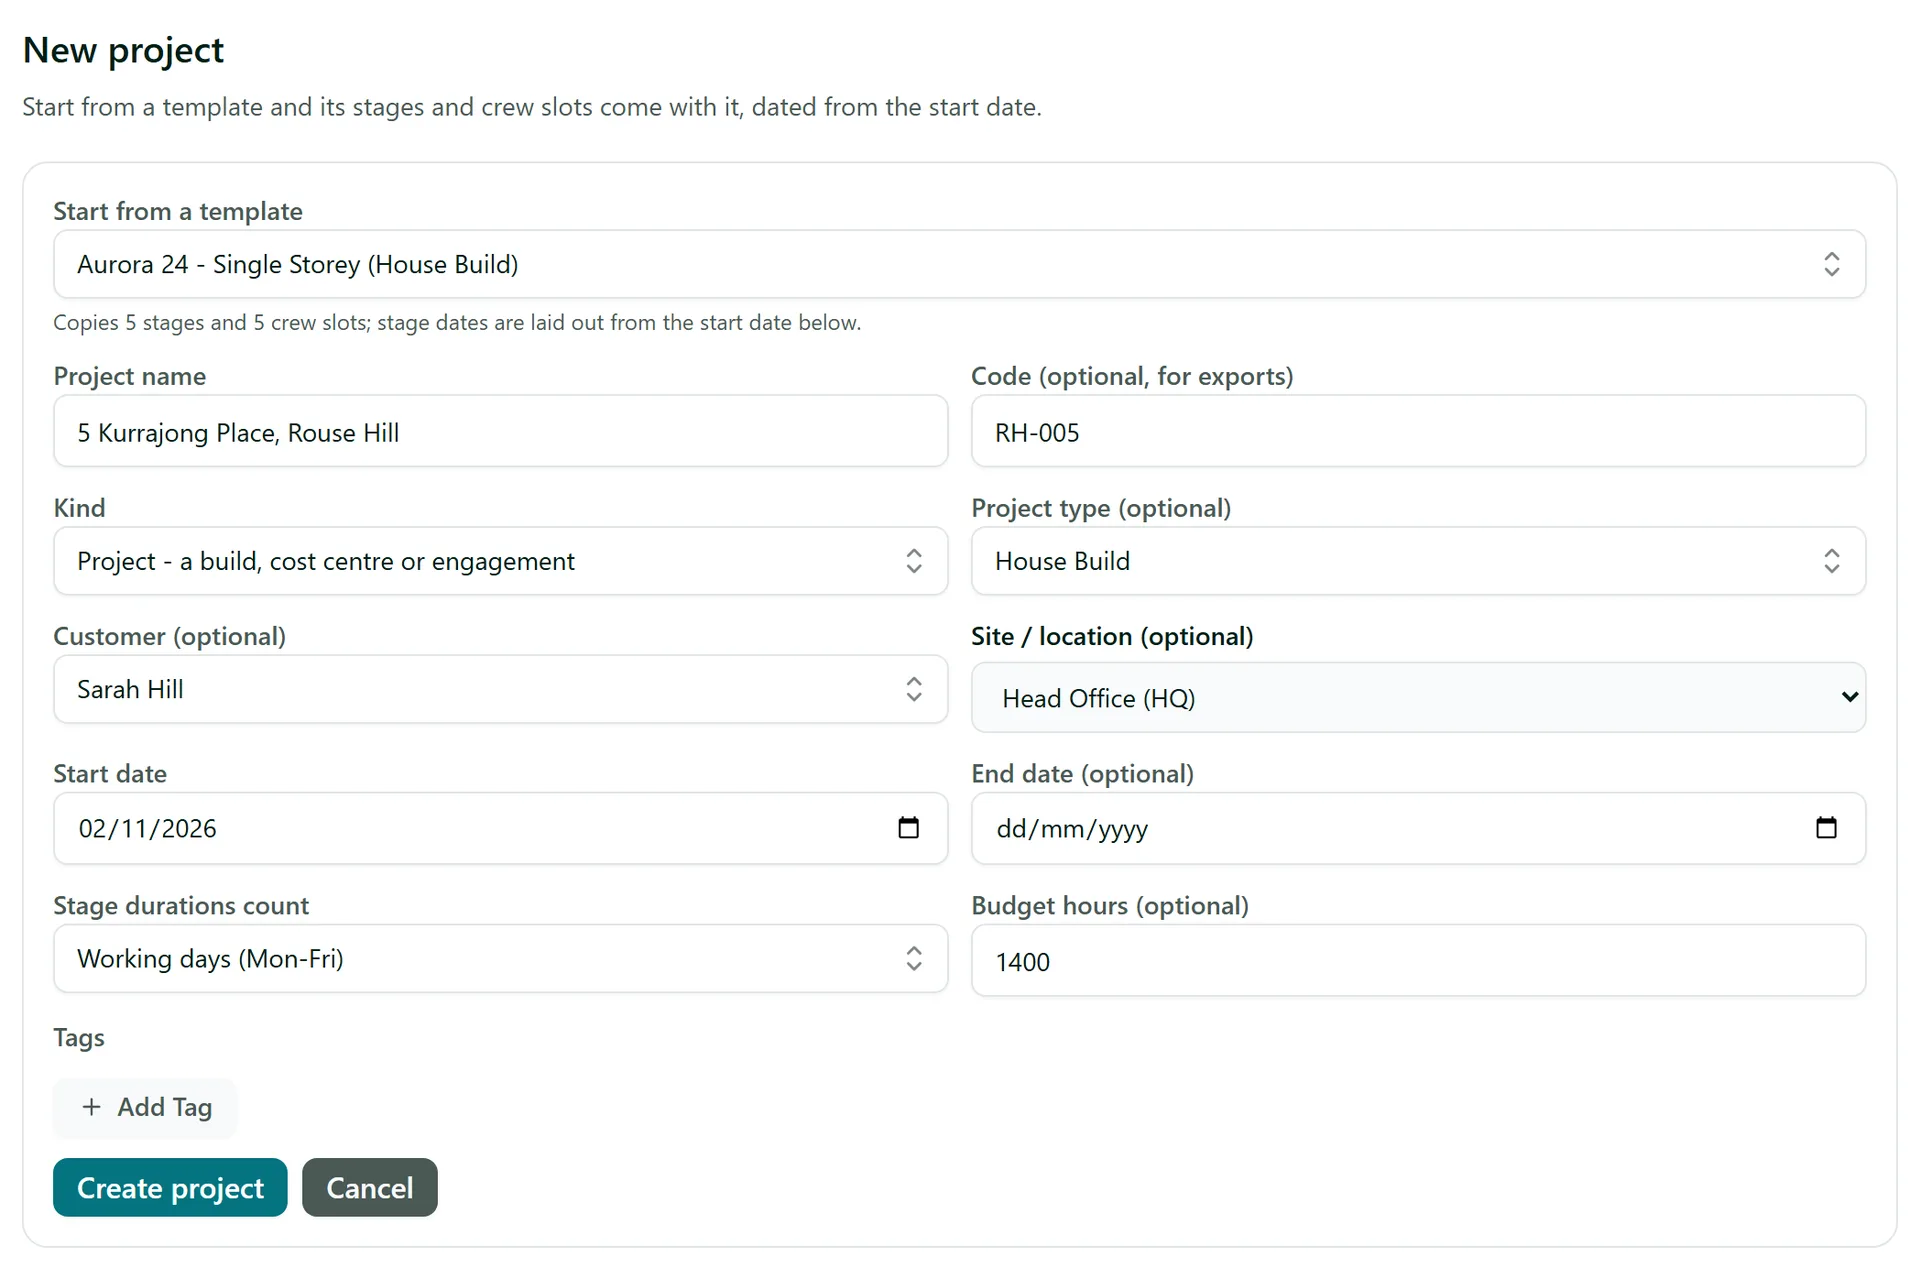
Click New project. In Start from a template, pick the design you are building (for example a single storey house). The form fills in the kind, project type, budget hours and tags from the template, and tells you how many stages and crew slots it will copy. Choose Blank - no stages or crew slots if you would rather build it up by hand. Only active templates are offered.
Step 3: Fill in the details
Complete the rest of the form:
- Project name and an optional Code for exports (for example the street address and a job number).
- Kind - a Project (a build, cost centre or engagement) or a Job (a unit of work for a customer at a site).
- Project type - what kind of build it is, such as a house build or a renovation. Requirements can be set up per type.
- Customer - who it is for. Leave it as No customer for an internal project like office time.
- Site / location - the site from your organisation's locations.
- Start date - stage dates are laid out from here.
- Stage durations count - Working days (Mon-Fri) for a build, or Calendar days (every day) when weekends count.
- Budget hours and Tags (both optional).
Click Create project. AirSign copies the template's stages and crew slots onto the new project and lays the stage dates out from the start date. The project opens straight away.
Step 4: Find your way around the project
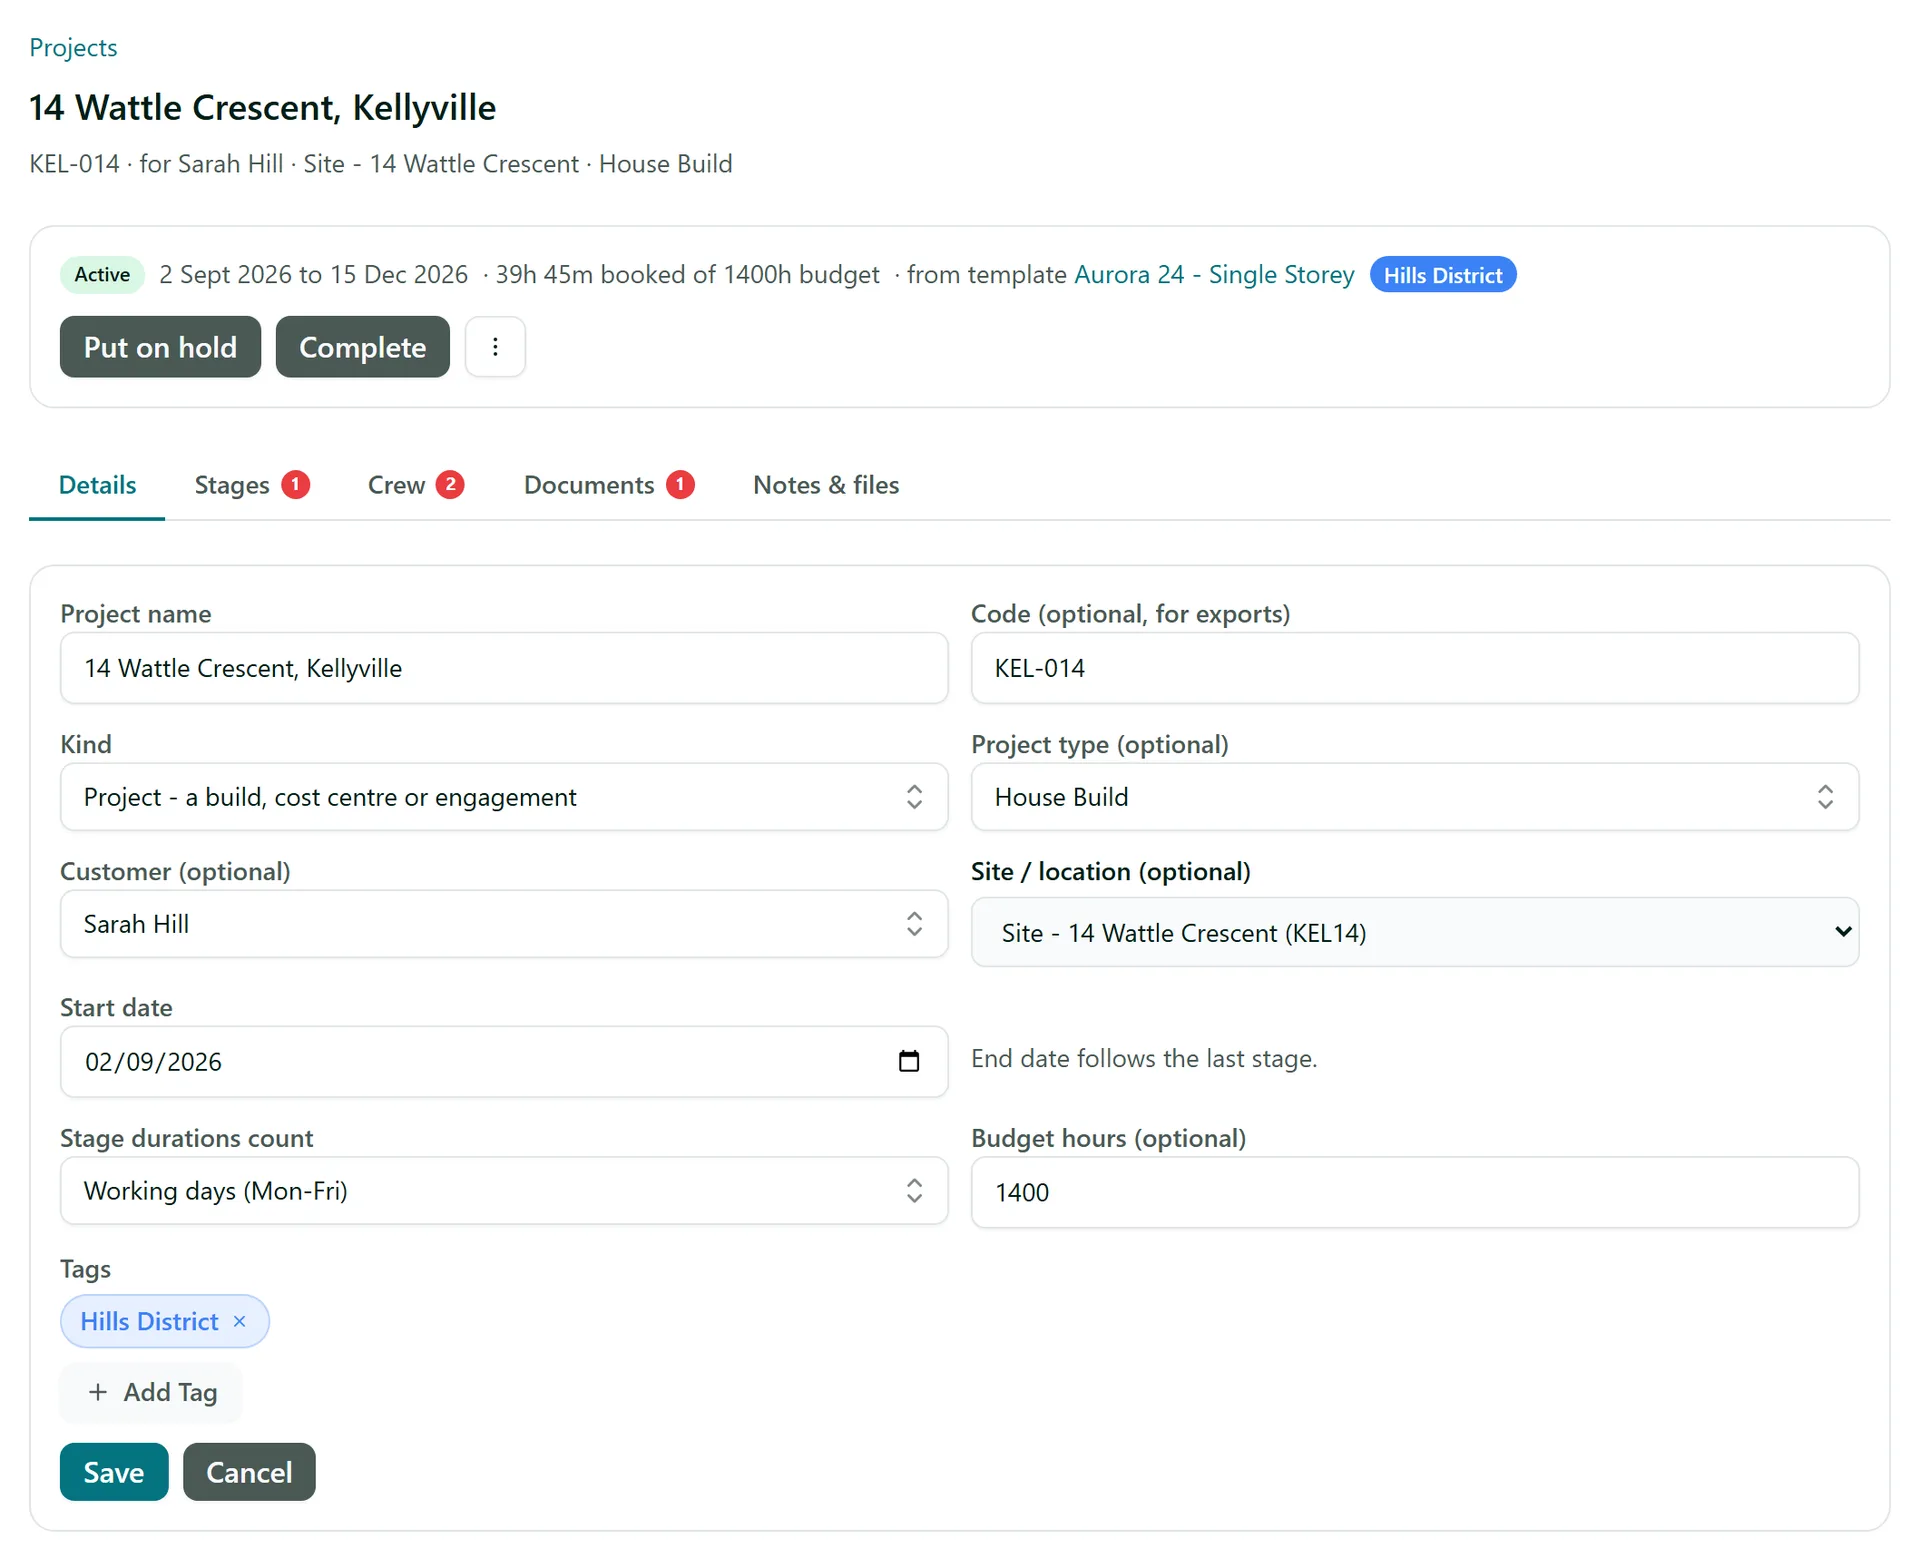
The header shows the status, the dates, the hours booked against the budget and the template it came from. Below it are five tabs: Details (the form above, so you can change anything and click Save), Stages, Crew, Documents and Notes & files. A red number on a tab means something there needs you, such as open crew seats or missing documents.
Step 5: Move the project through its statuses
Use the buttons in the header to change the status: Start a planned project, Put on hold and Resume, Complete it when the work is done, and Reopen or Restore if needed. The ellipsis menu beside them holds Save as template, Archive (offered on planned and completed projects) and Delete. Only an unused project can be deleted - once it has booked hours, rostered shifts, documents or stored files, archive it instead.
Tips
- Planned, active and on hold projects are the ones staff can book time to and be rostered on. Completed projects stop chasing paperwork.
- Editing a template later never changes projects already created from it, so it is safe to improve your templates as you go.
- With stages in place, the end date follows the last stage, so you only set the start date.
- When you create a project with a customer, any documents its requirements need signed are sent to the customer's primary contact automatically.
Need More Help?
Related guides: Running Stages and Crew, Project Templates, Project Documents and Hours. See our FAQ section or email support at [email protected].