Adding People
AirSign People is the register of everyone on your books - staff, students and the contacts who represent your customers. A person is added once and can hold several relationships with you at the same time, such as two roles, or being a staff member and a customer contact. This guide covers adding staff, giving them roles and employments, adding contacts, and recording extra details with custom fields.
Where to find it
Step 1: Set up your roles
Roles are your positions, such as "Support Worker" or "Team Leader". Go to Setup > Roles, select Add role, enter a Role name and an optional description, and save. Roles matter because requirements can be set per role - a First Aid certificate for every Support Worker, for example (see Setting Up Requirements).
Step 2: Add a staff member
Open All people or Staff in the left menu and select Add person. Enter their Name and Email, and optionally a phone number, tags and a Home location. Leave Also add an employment (they work for you) ticked, then:
- tick one or more Roles,
- choose the Engagement type - Employee, Contractor or Volunteer,
- set the Start date if you know it.
Select Add person. Their page opens straight away, and any documents, training or forms their roles require are sent to them automatically.
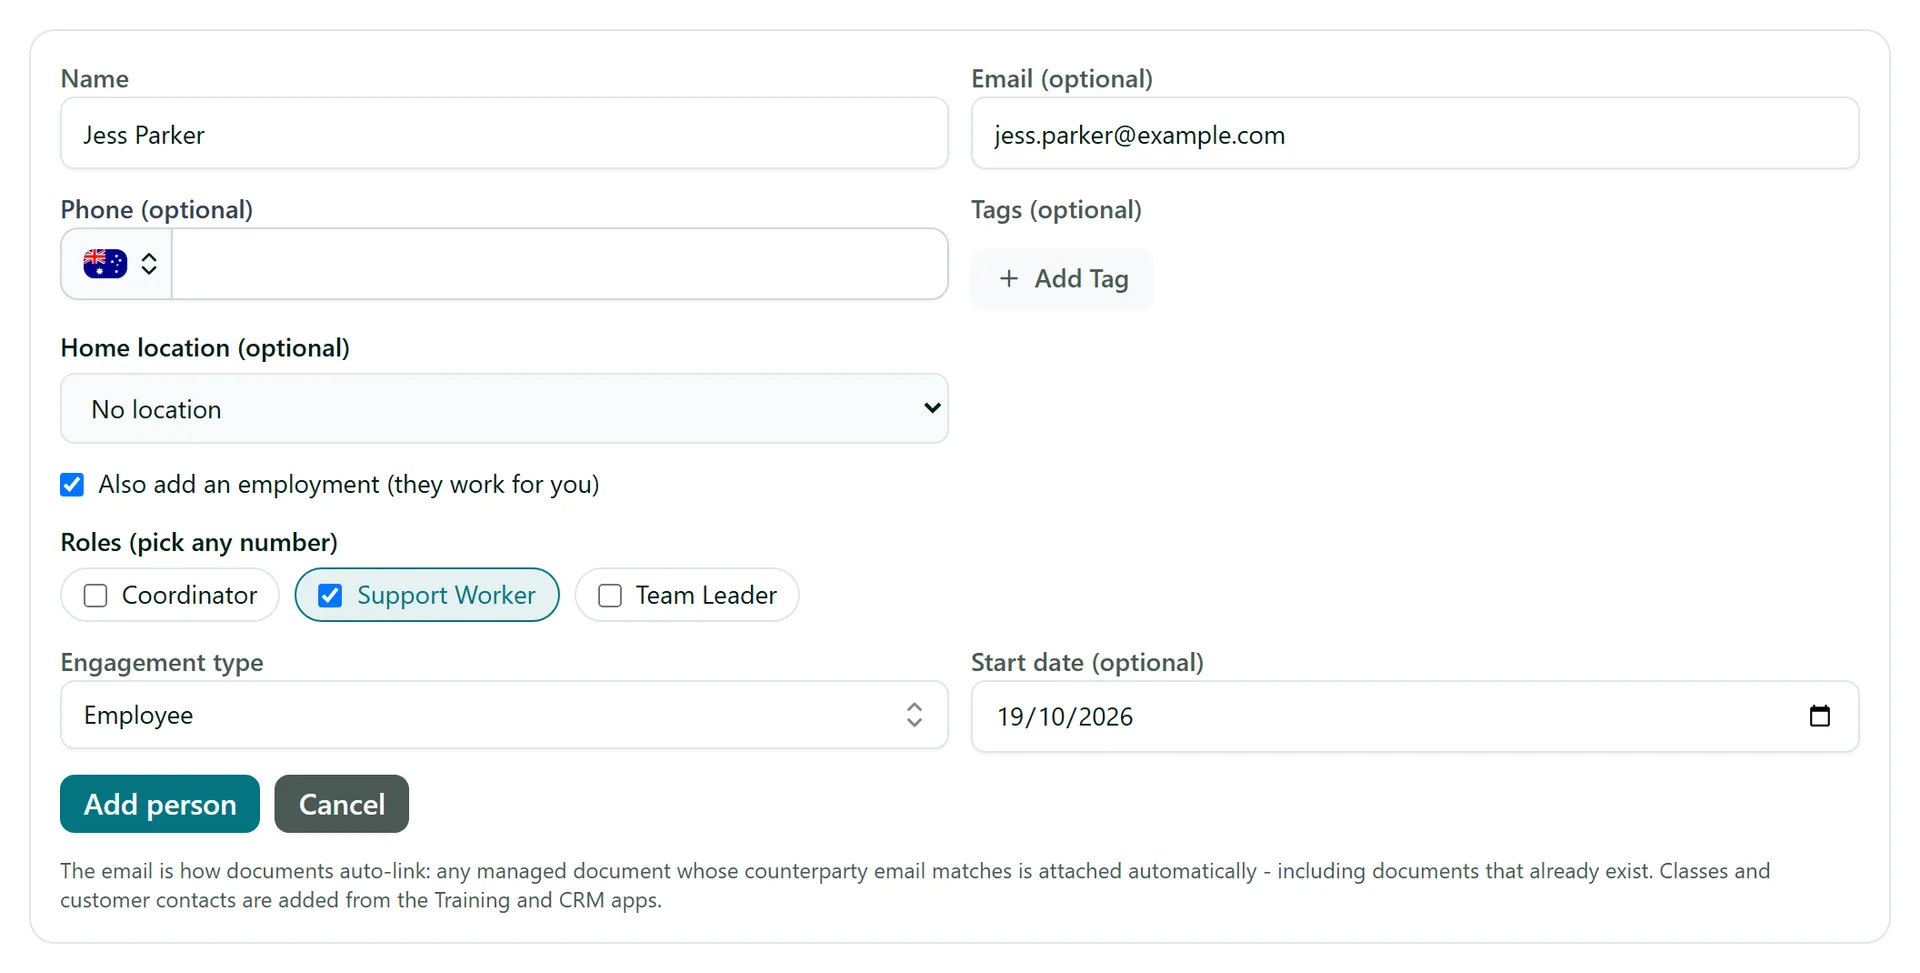
Always add an email if you can. It is where documents and training are sent, and any document in AirSign whose counterparty email matches is linked to the person automatically - including documents that already exist.
Step 3: Manage employments
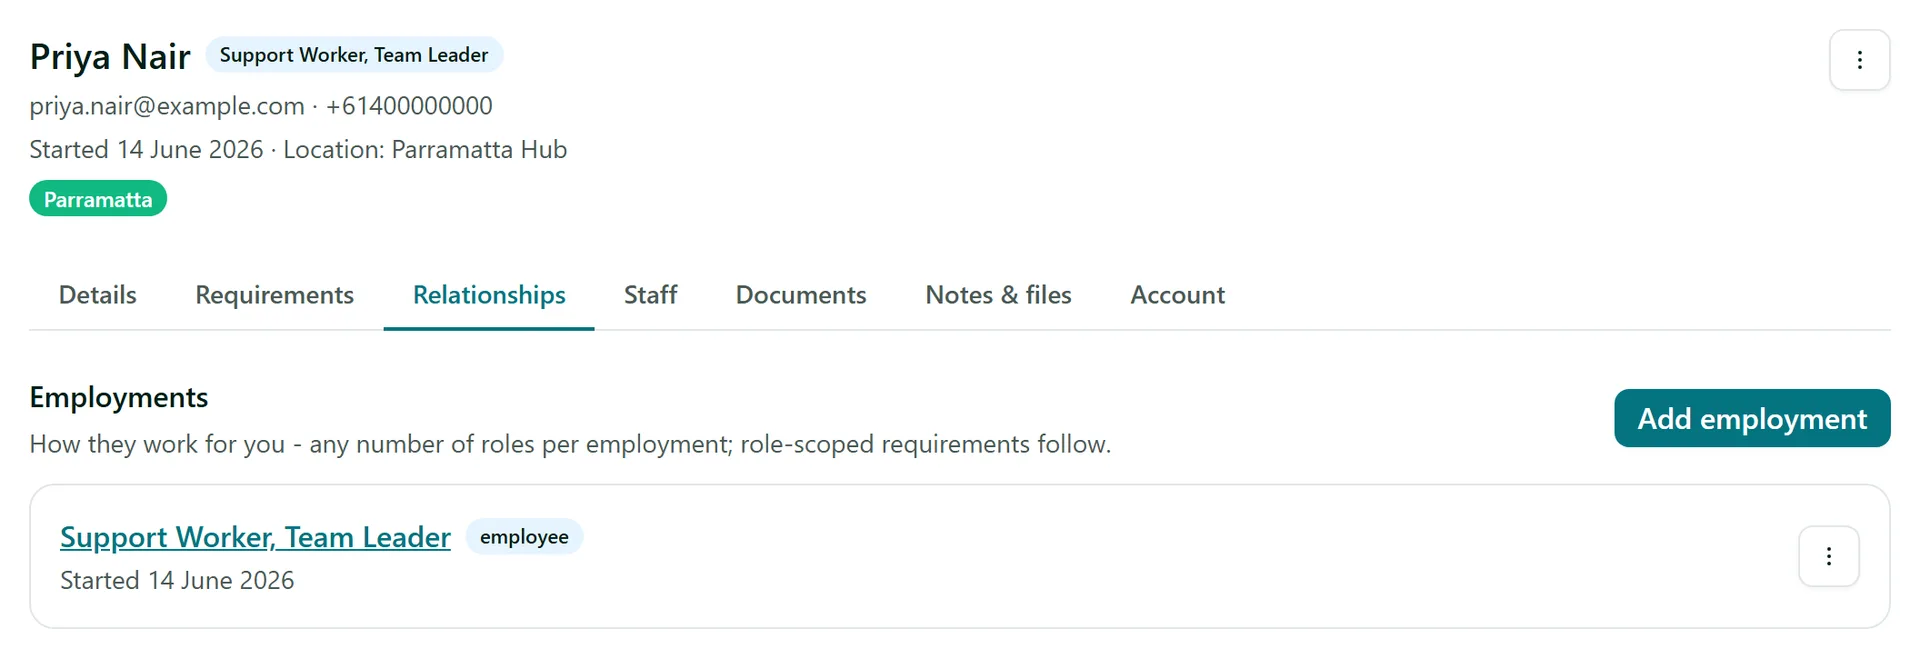
A person's Relationships tab shows how they work for you. One employment can carry several roles. Use Add employment for a second arrangement (for example a contractor who is re-engaged later), select an employment's title to edit it, or use its menu to End it when they finish - its history stays on the person and the requirements that only applied through it stop applying.
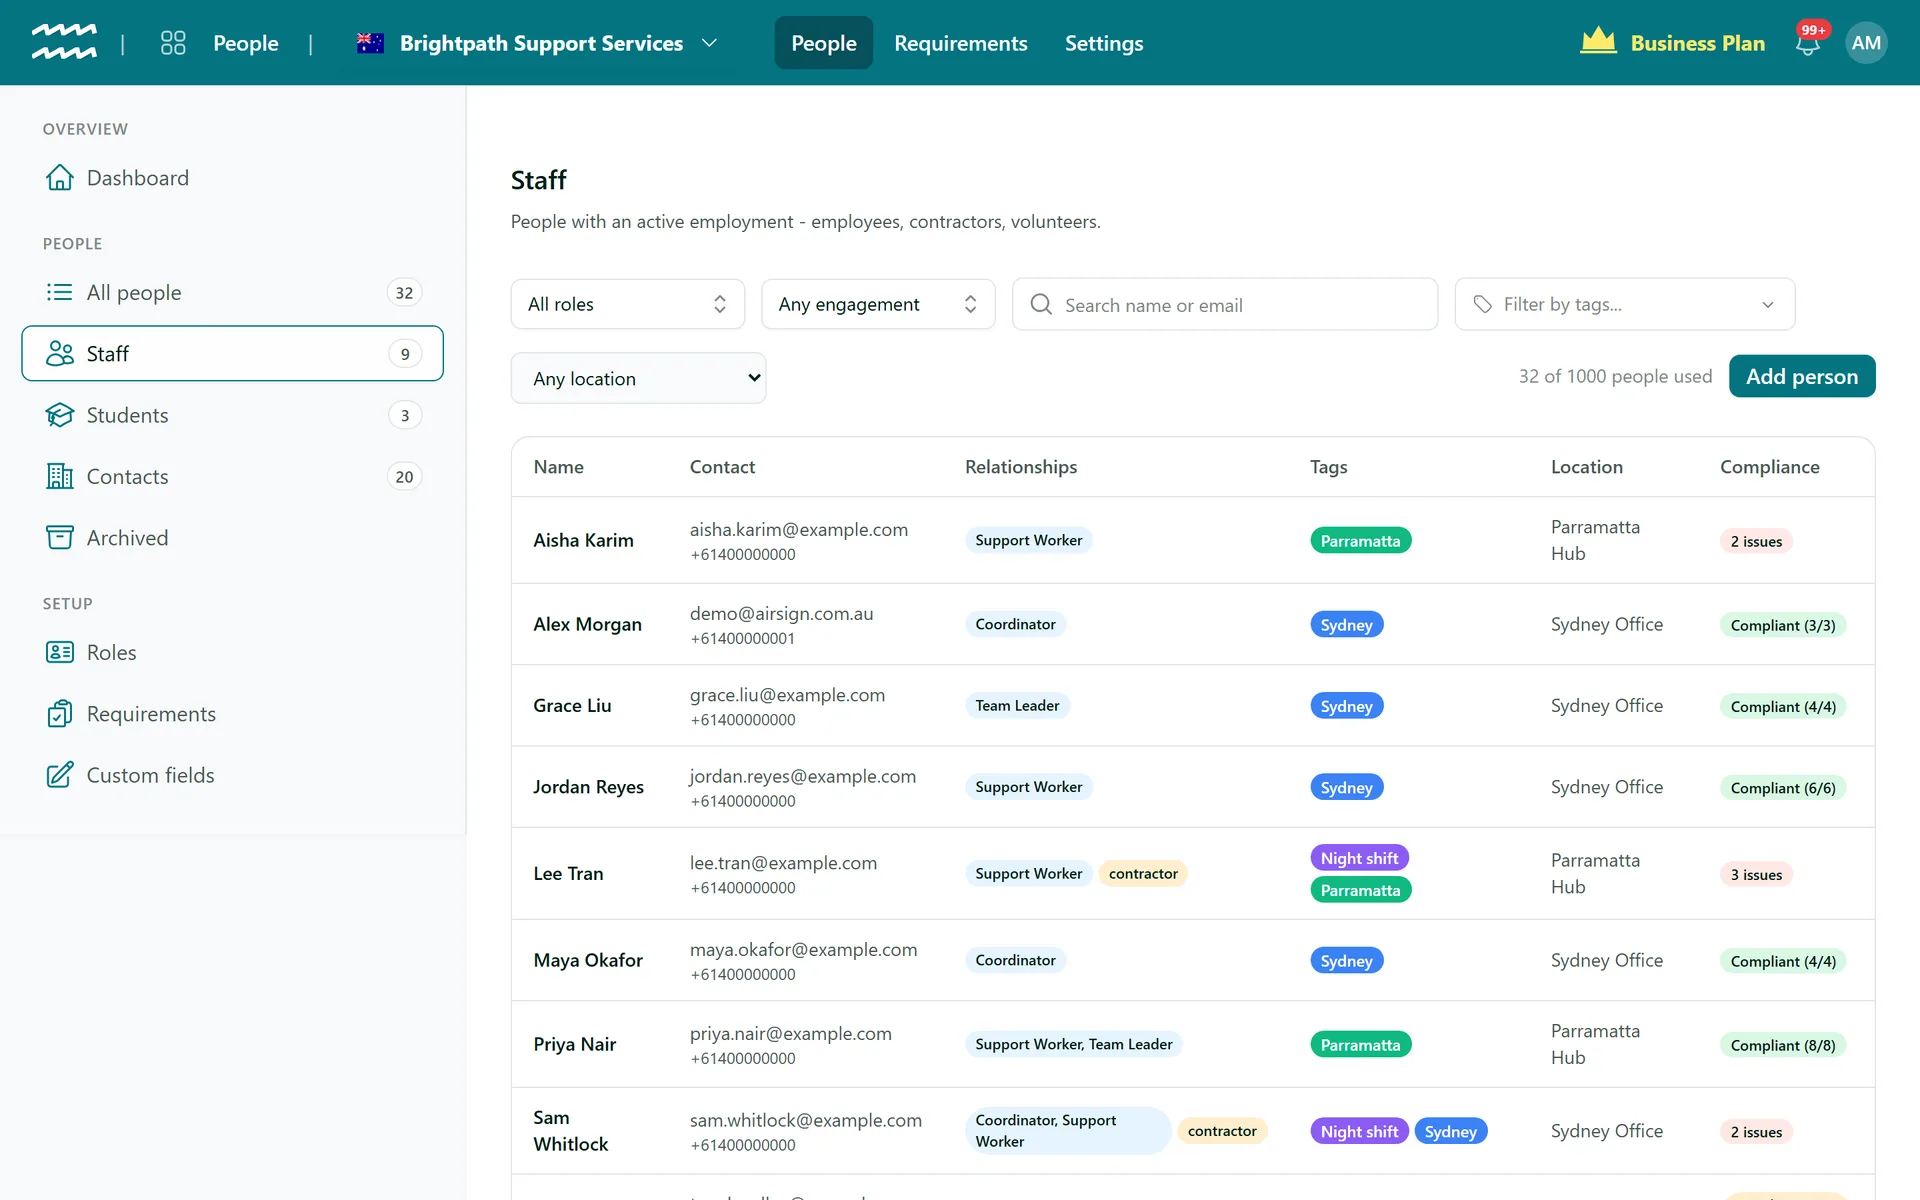
The Staff list shows everyone with an active employment, with their roles, tags, location and a compliance summary you can filter by role, engagement type, tag or location.
Step 4: Add customer contacts
Contacts are the people who represent your customers. They are added from the customer in AirSign CRM: open the customer, go to Overview and, under Contacts, select New contact (or Add existing person to pick someone already on your books). They then appear under Contacts in AirSign People. Students are added the same way from their class in AirSign Training.
Step 5: Record extra details with custom fields
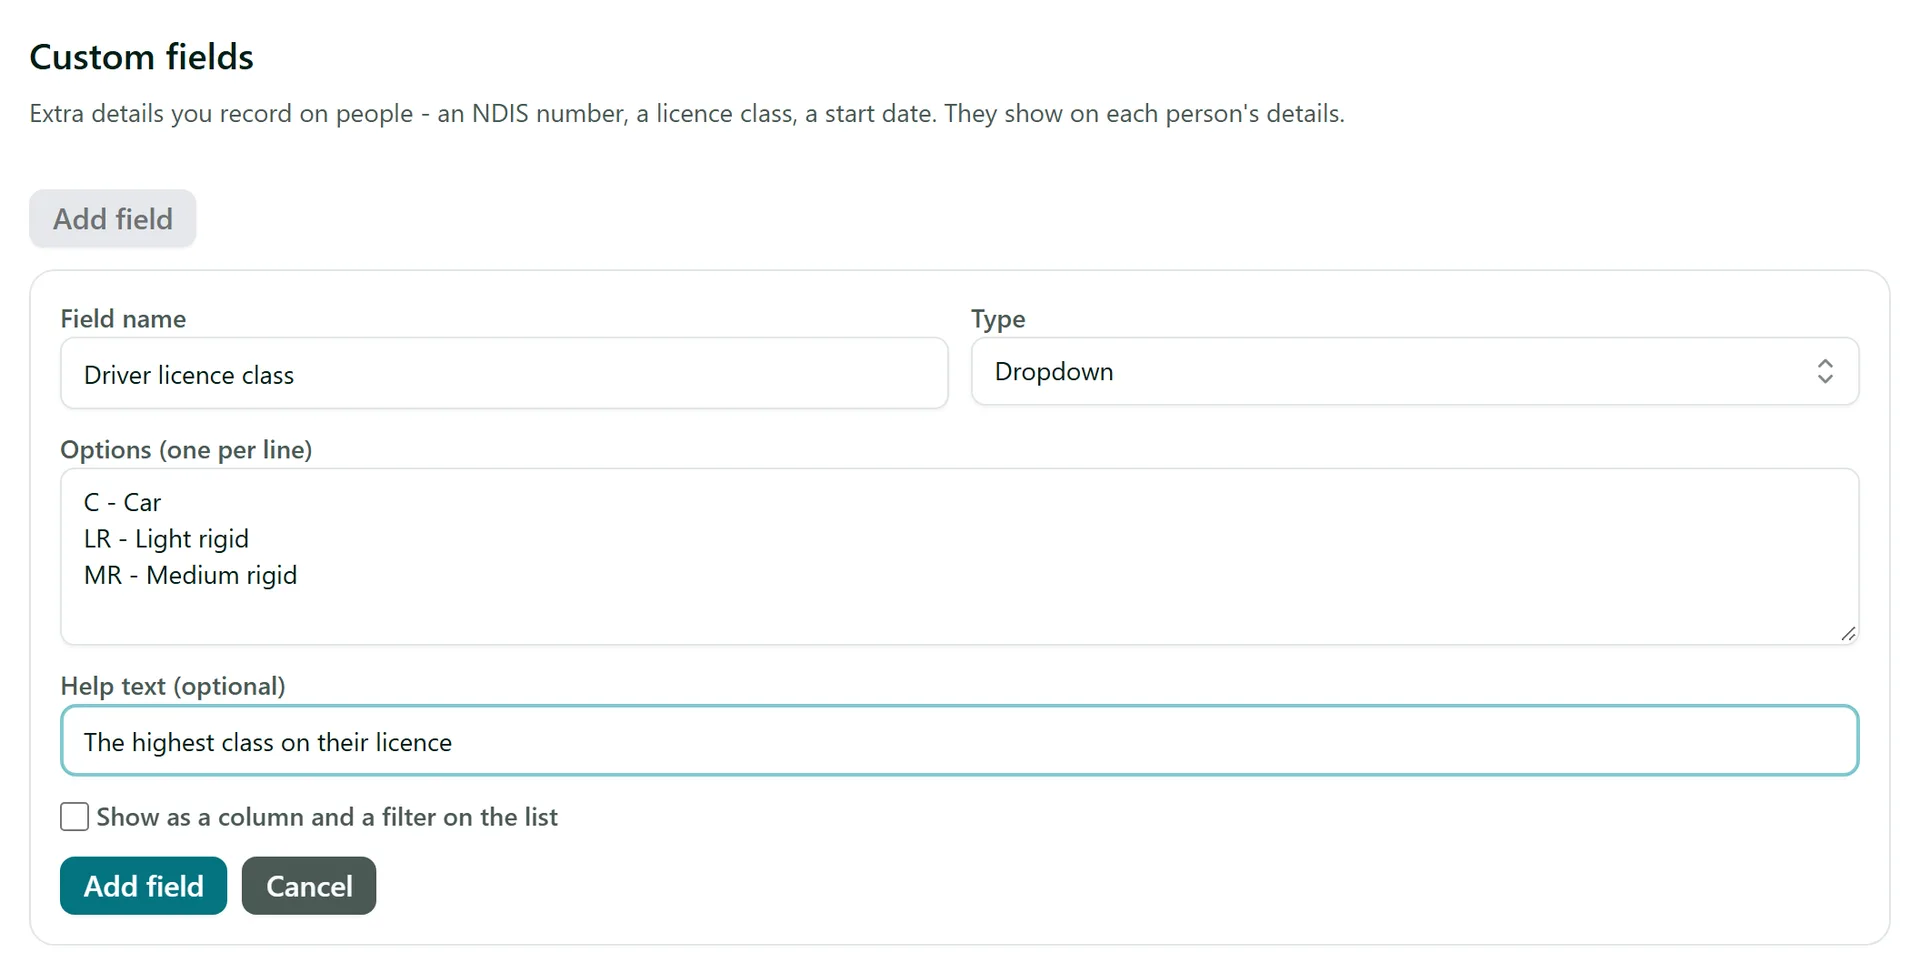
Need to record something AirSign does not ask for, like a licence class or a worker number? Go to Setup > Custom fields and select Add field. Give it a Field name, choose a Type (Text, Number, Date, Dropdown, Yes / no or Web address), add the options for a dropdown, and tick Show as a column on the list if you want it visible on the People list. The field then appears on every person's Details tab.
Tips
- Someone who has left? Use the person's menu to Archive them - their history stays, and they leave the day-to-day lists. Delete is only for typing mistakes.
- Your plan includes a number of active people, shown next to Add person. Archived people do not count.
- Tags (such as a site or "Night shift") can be used to filter lists and to target requirements.
Need More Help?
Related guides: Inviting Staff to AirSign, Person Records and Documents, Setting Up Requirements. See our FAQ section or email support at [email protected].