Wiki History, Comments and Read & Sign
Policies change, and people need to talk about them. AirSign Wiki keeps every saved version of a page so nothing is lost, lets readers comment on the exact words they mean, and can turn a policy page into a document your staff read and sign - tracked like any other required document.
Where to find it
Step 1: Look back through a page's history
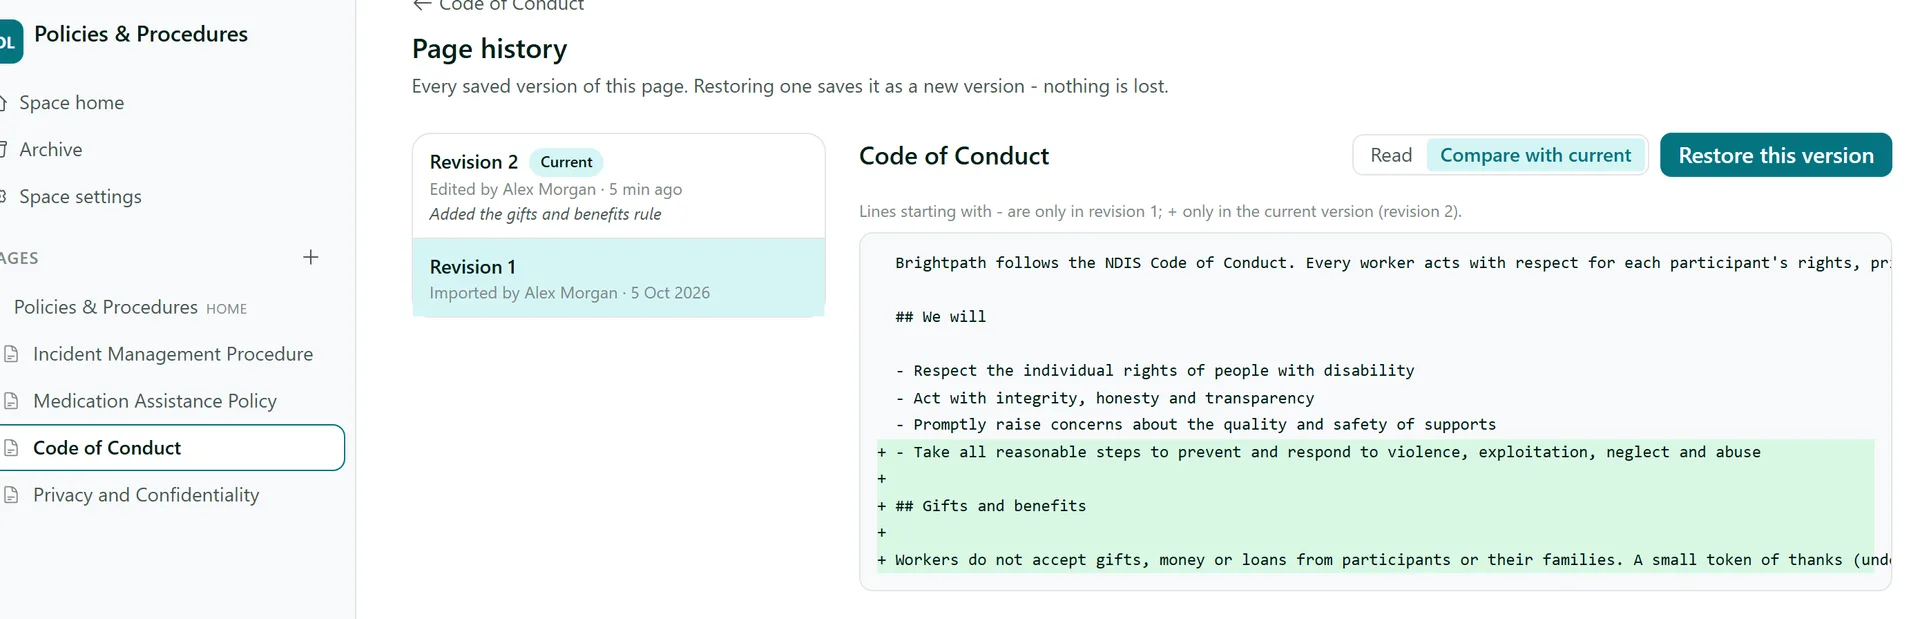
Choose History from the page's ... menu (or click the revision number under the page title). Every saved version is listed with who saved it, when, and the change note they left. Click a revision to Read it as it was, or switch to Compare with current to see what changed - added lines are marked +, removed lines -.
Step 2: Restore an earlier version
With an older revision selected, click Restore this version and confirm. The restore is saved as a new revision, so the version you replaced stays in the history too - you can always go back.
Step 3: Comment on a page
To comment on specific words, select them on the page and click the Comment button that appears. Your comment opens in the Comments panel with the quoted text above it; type it and click Comment. For a general comment, use the Comment on this page... box at the bottom of the panel.
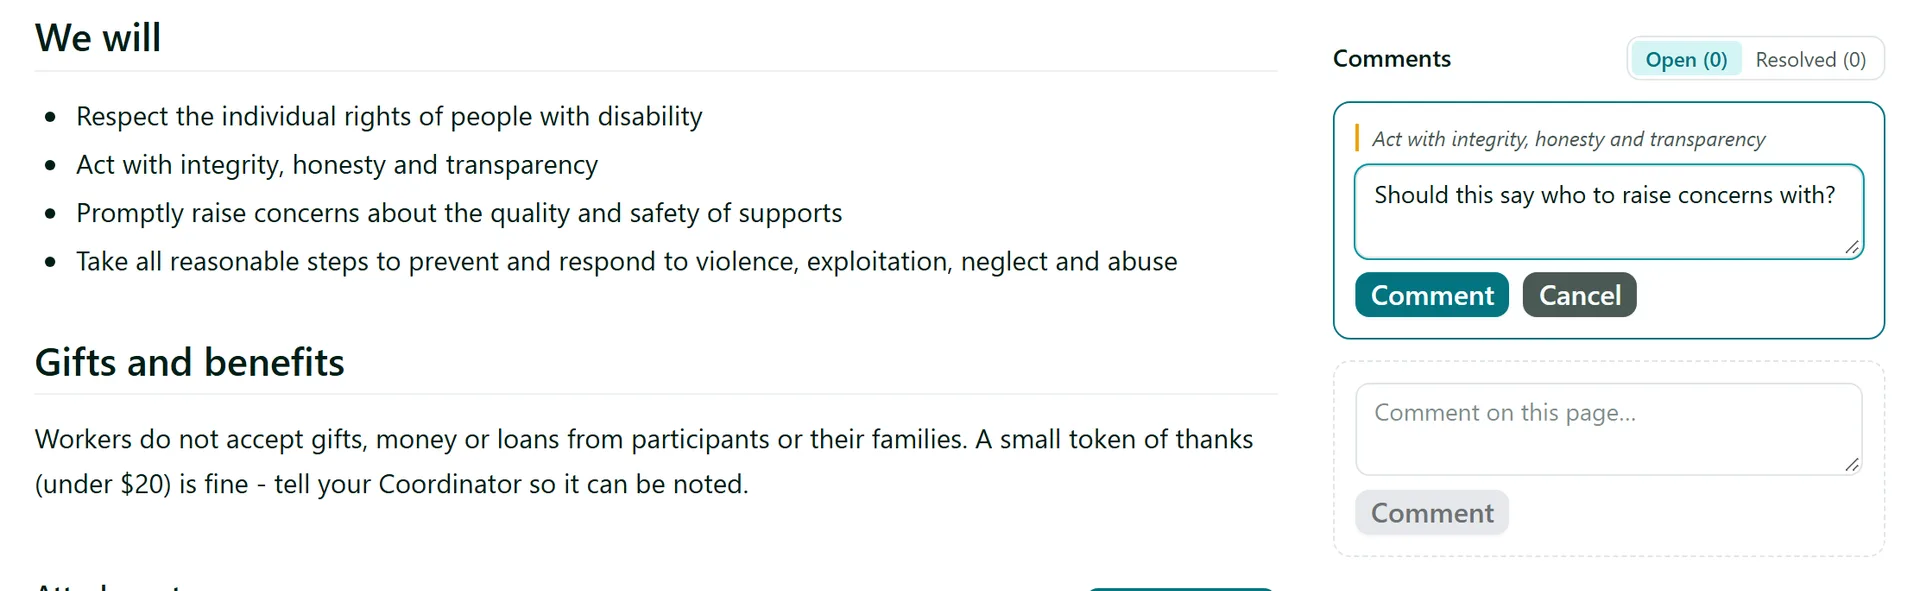
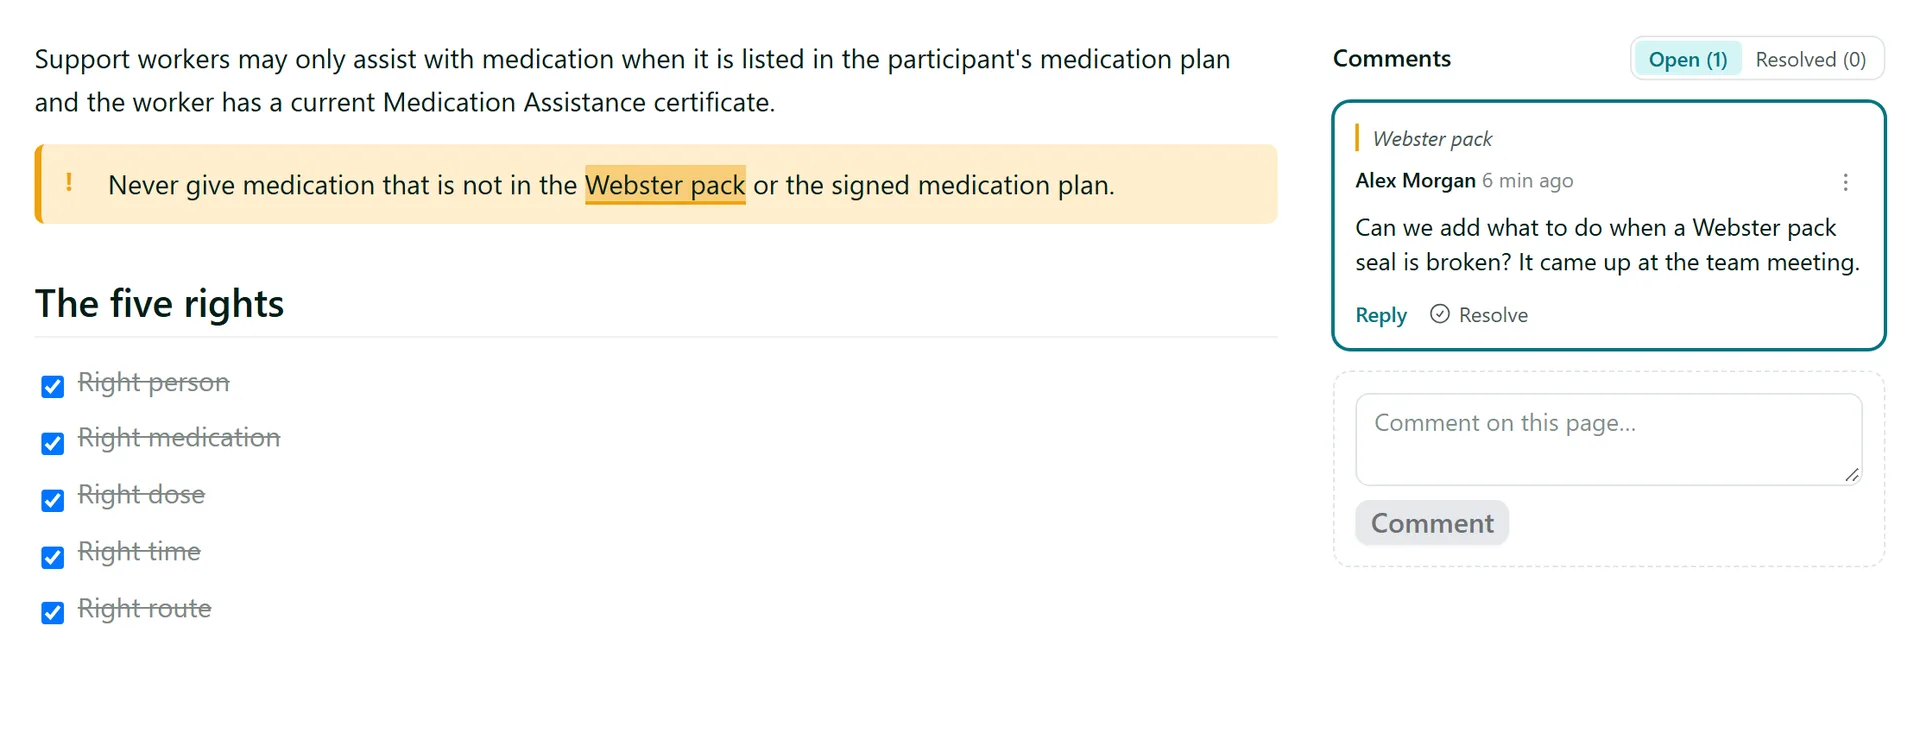
Commented text stays highlighted on the page - click it to jump to the thread. Anyone can Reply, and when the question is dealt with, click Resolve to move the thread to the Resolved tab (you can Reopen it later). The person who created the page and everyone in a thread are notified of new comments and replies. If the quoted words are later edited away, the thread stays listed with its quote struck through.
Step 4: Make a policy read & sign
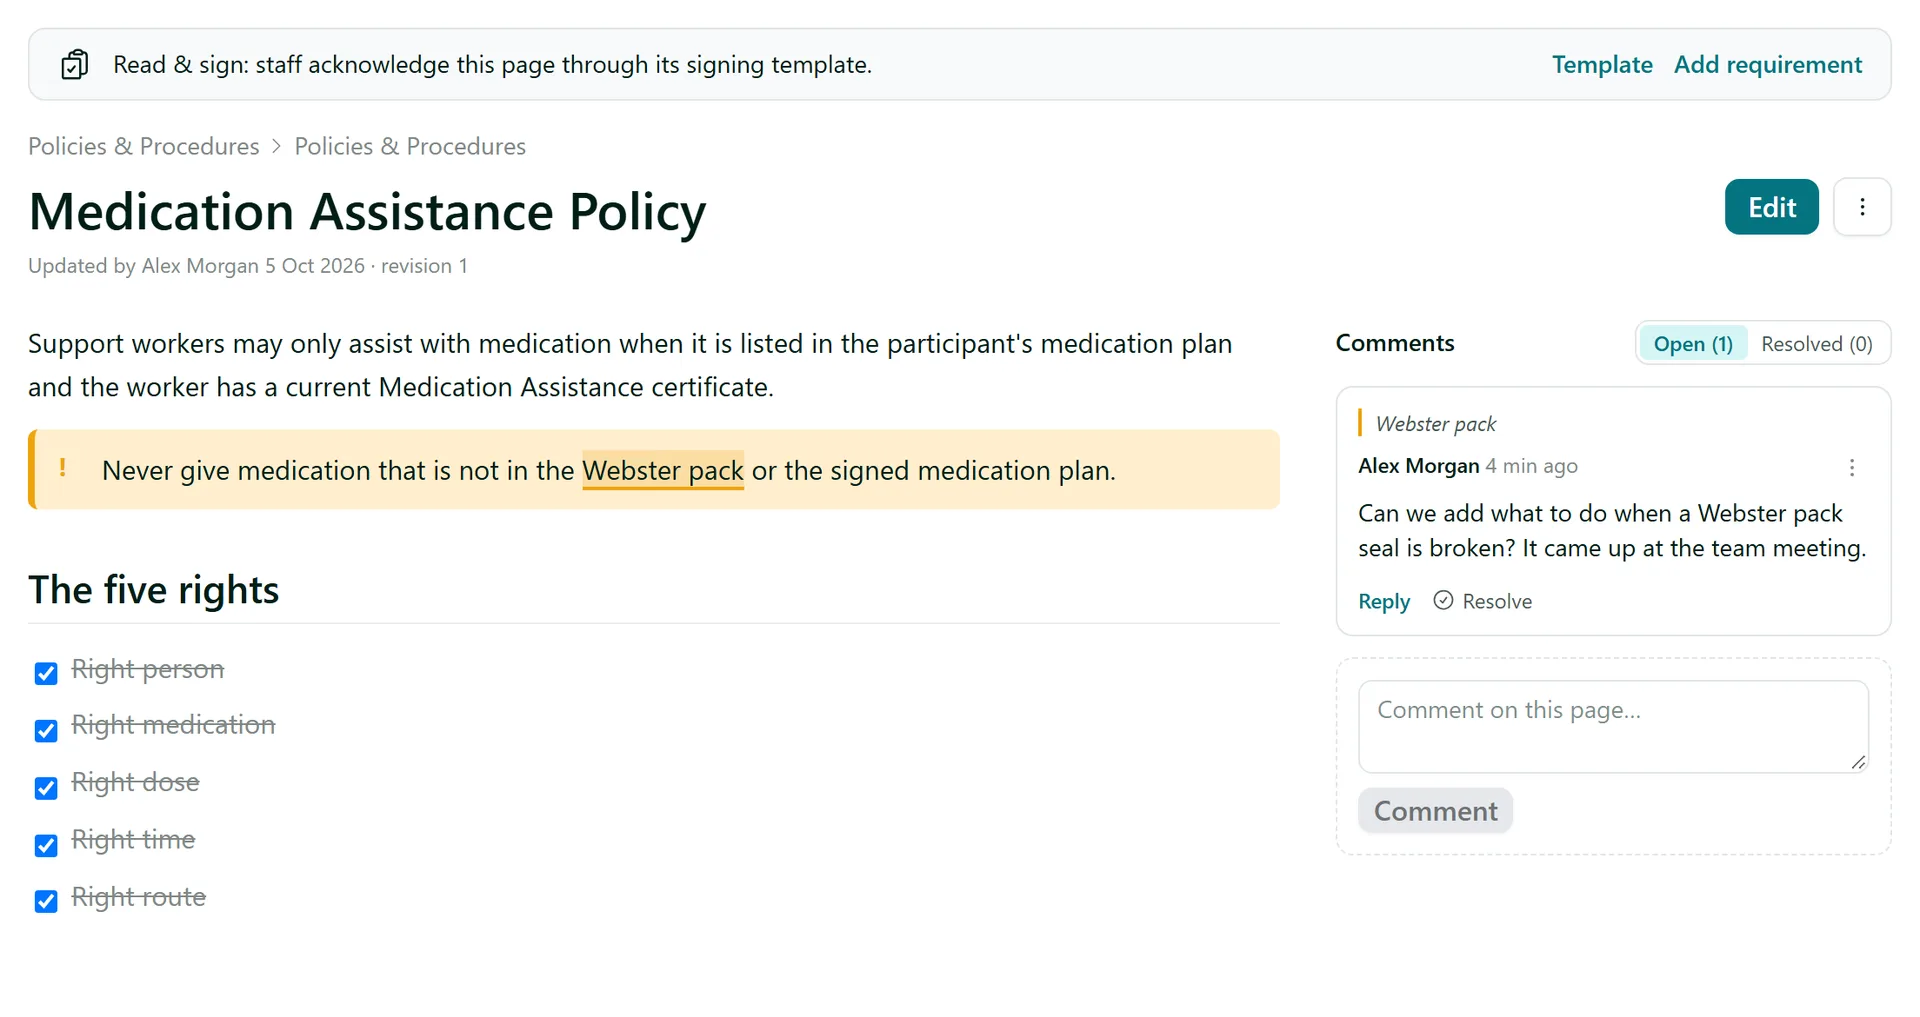
On a policy page, choose Read & sign (Compliance) from the ... menu and click Create. AirSign builds a signing template from the page's text with an "I have read and understood" statement and a signature for the reader. Nothing is sent yet. The page then shows a Read & sign banner with links to the Template and to Add requirement.
Step 5: Send it to your staff with a requirement
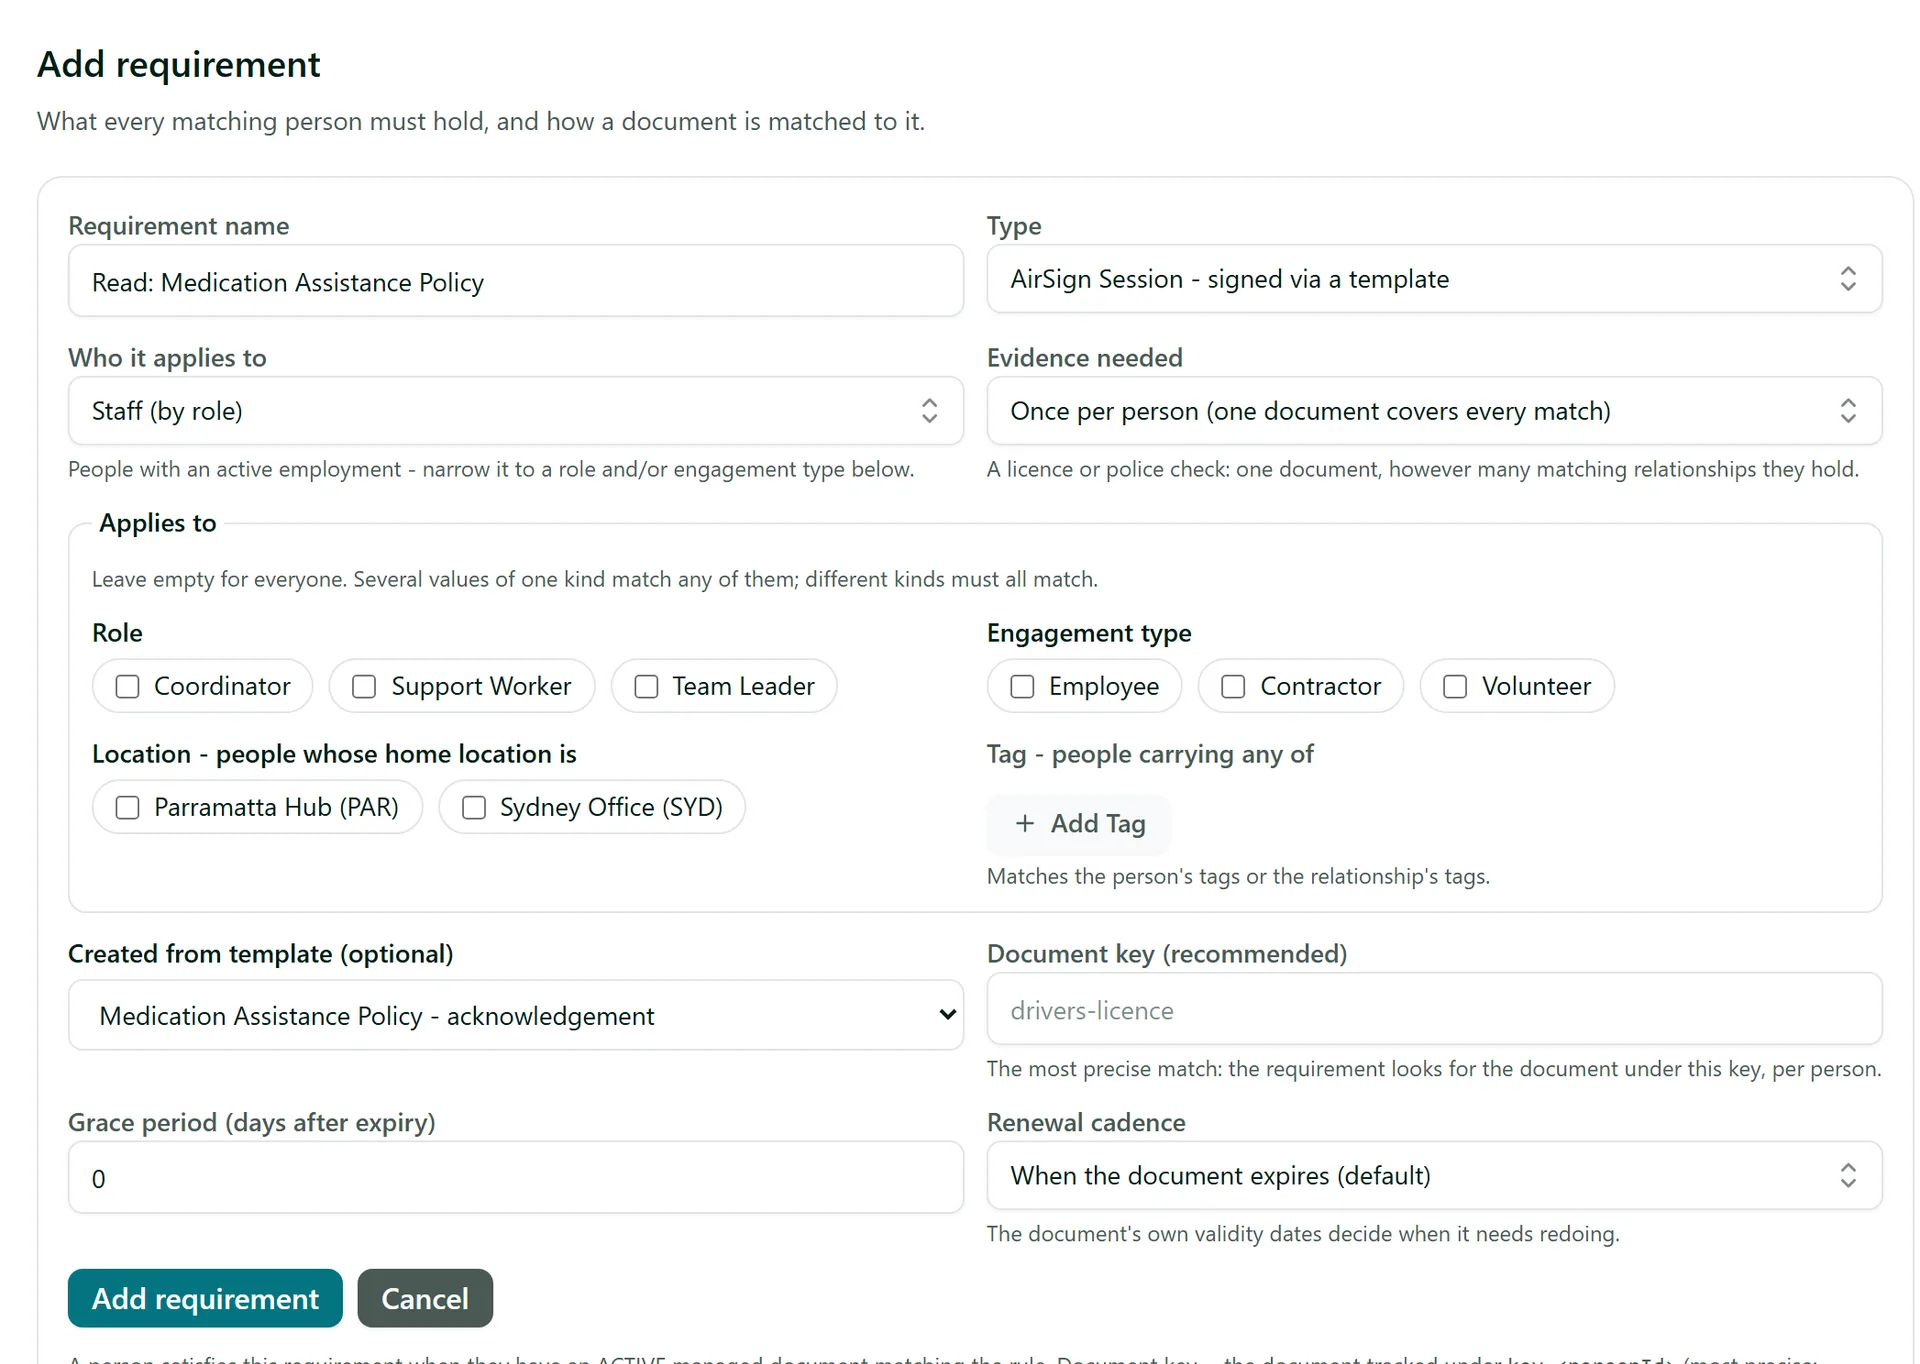
Click Add requirement. The People requirement form opens with the name ("Read: <page title>") and the template already filled in. Choose Who it applies to - for example staff in the Support Worker role - and click Add requirement. From then on the policy is sent, tracked, reminded and renewed like any other required document, and each signed acknowledgement is kept as a compliance record.
Step 6: Update it when the policy changes
When you edit a read & sign page, the banner turns amber and shows which revision staff signed. Click Update to build a new template from the current text. Requirements that sent the old one switch to the new version automatically; requirements without a document key ask everyone to sign the new version, while keyed ones keep existing acknowledgements until they expire.
Tips
- Leave a short change note every time you save - it makes the history much easier to read at audit time.
- Comments never change the page, so they do not create new revisions.
- Making a page read & sign needs permission to edit the page and to create templates.
- Tables, quotes and code on a page come through as plain paragraphs in the signing document, and images are left out - keep policy wording in normal text.
Need More Help?
Related guides: Wiki Spaces and Pages, Creating Your First Template, Sending Reminders. See our FAQ section or email support at [email protected].