Sending Forms and Reviewing Submissions
A form template becomes a job to do when a requirement assigns it: "every scaffold needs an inspection every 30 days", "every new starter completes the site induction". AirSign then knows who or what is missing the check, emails a fill link, and files each completed form as a compliance document with a PDF report.
Where to find it
Step 1: Assign the form with a requirement
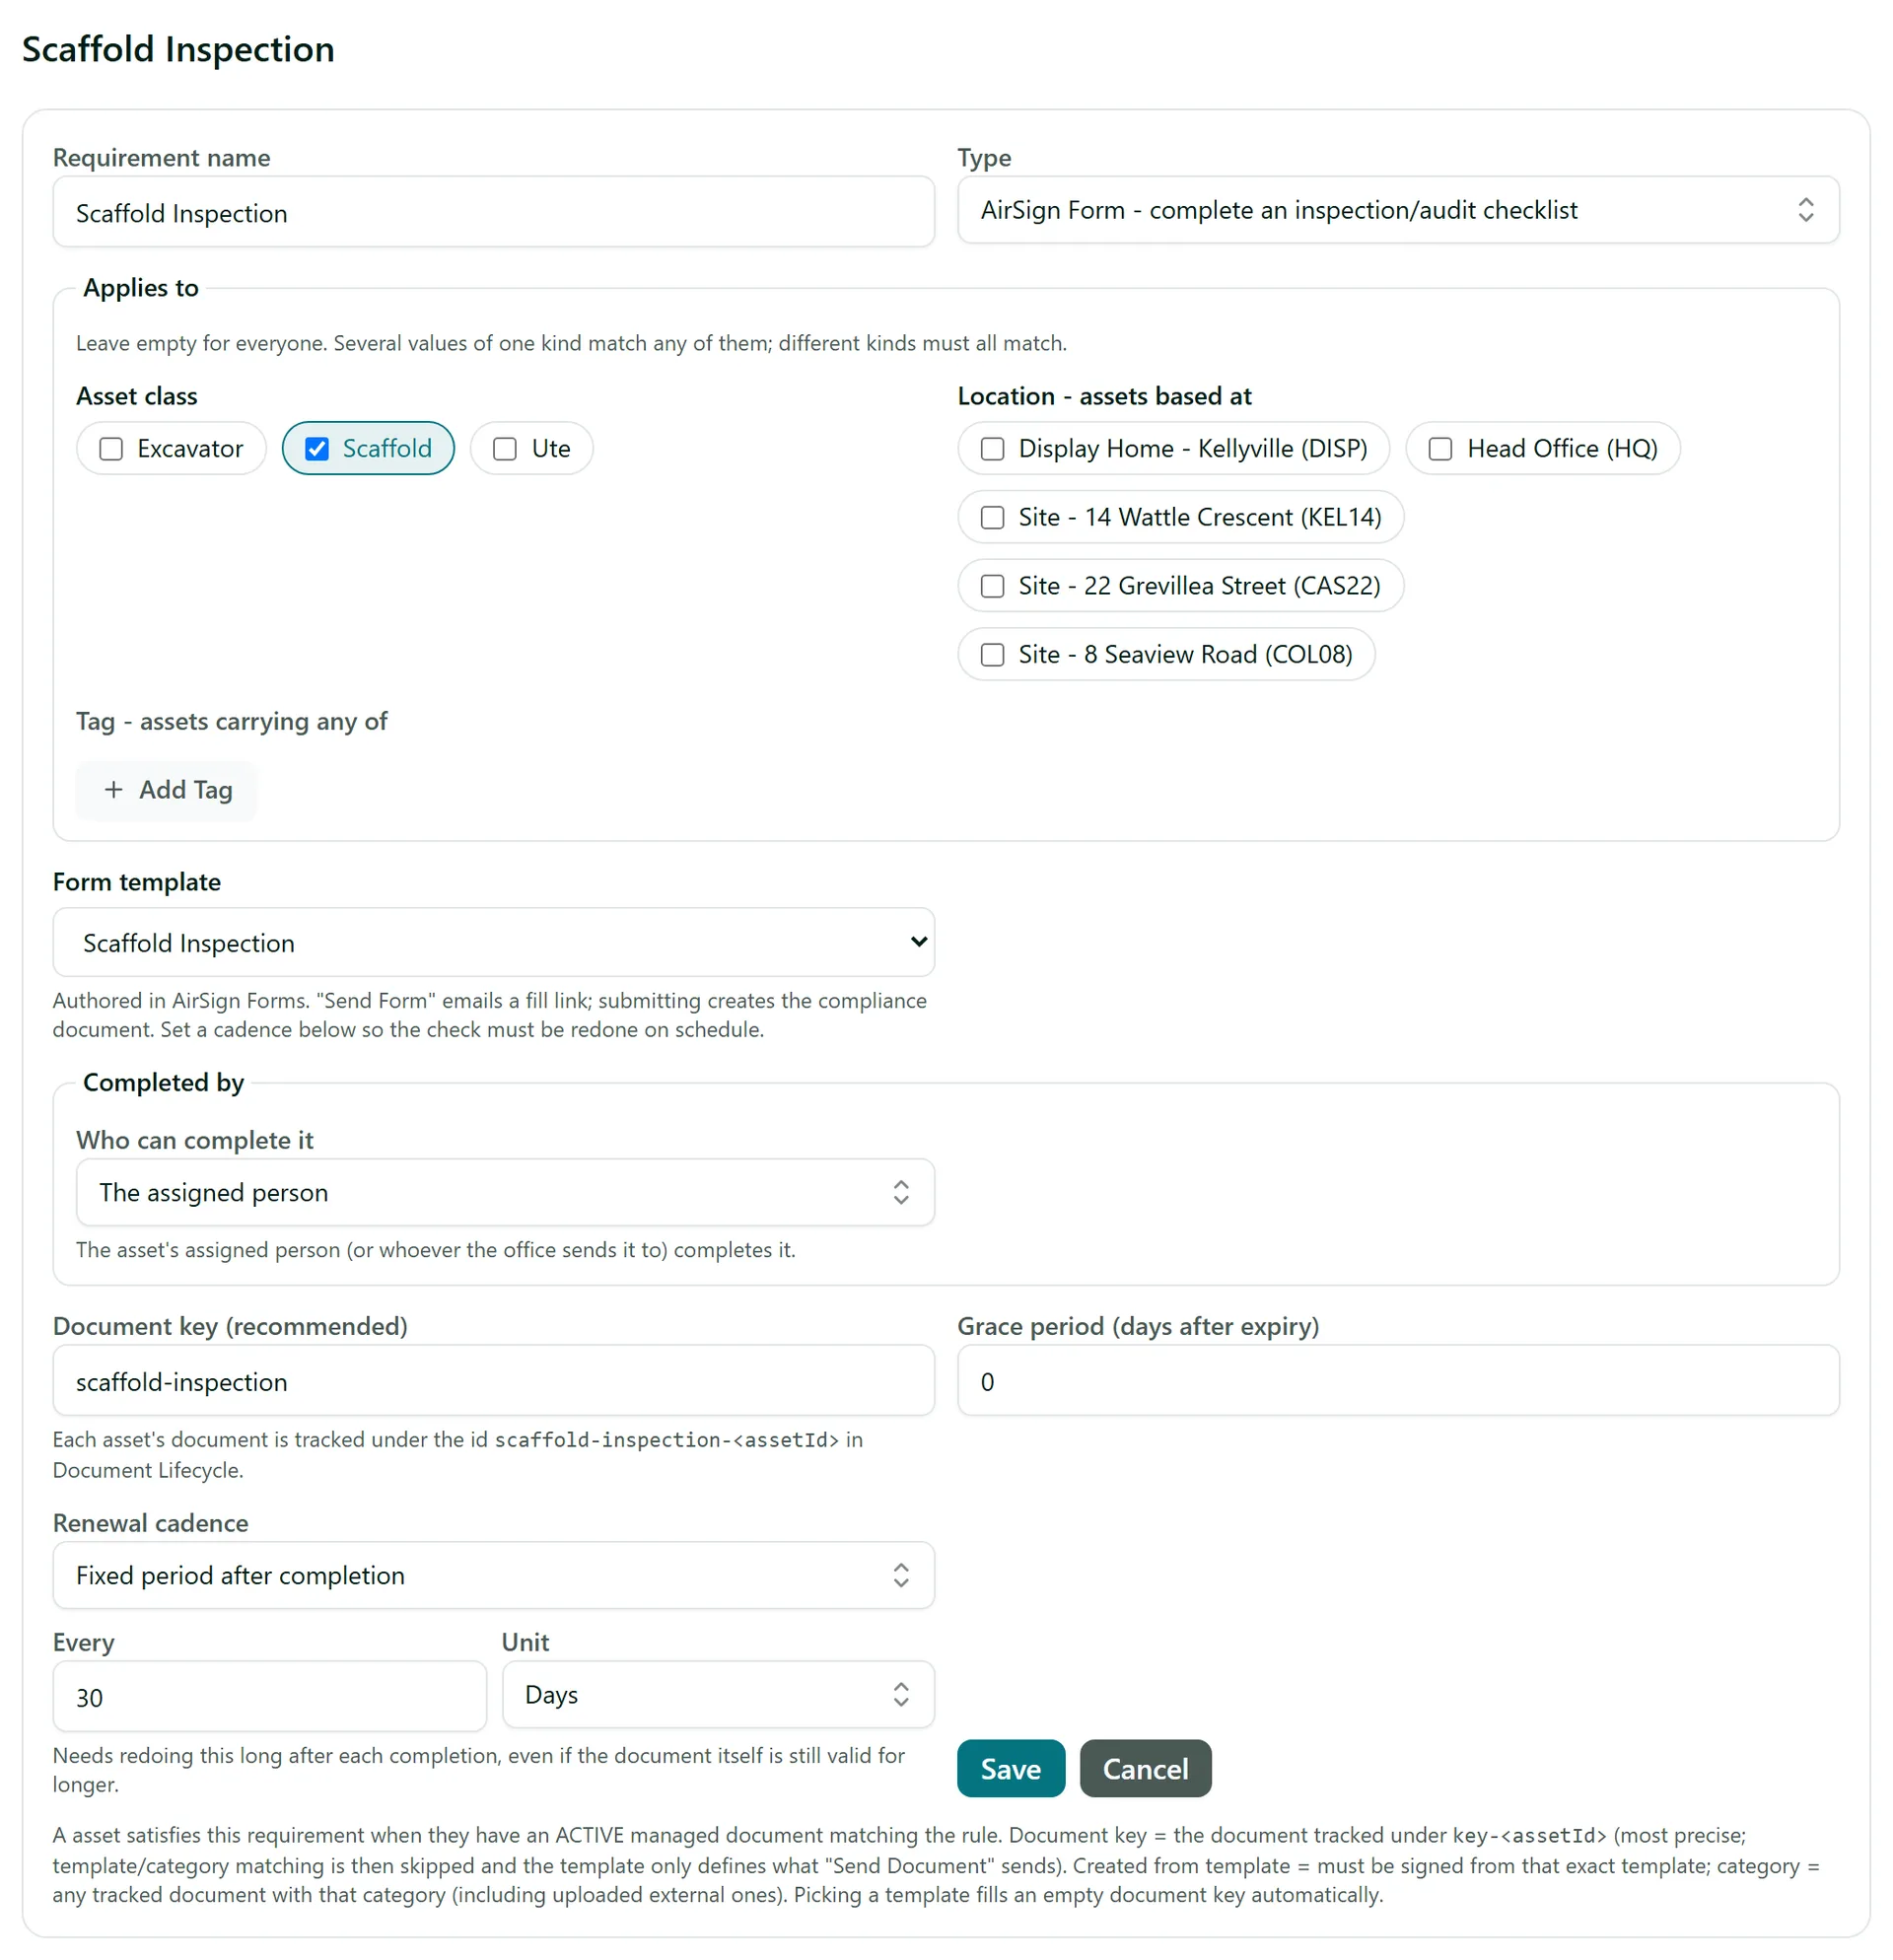
In the app that holds who or what gets checked, open Requirements and click Add requirement. Set the Type to AirSign Form - complete an inspection/audit checklist and pick the Form template. Under Applies to, narrow it down - for example to the Scaffold asset class, a role, or a location - or leave it empty for everyone.
Then set how often the check must be redone with Renewal cadence:
- Fixed period after completion - for example every 30 days, or every 1 day for a daily pre-start.
- Calendar period - due again at the end of each calendar week, month, quarter or year, whenever in the period it was done.
- When the document expires (default) - a one-off form, such as an induction, that only needs doing once.
For equipment, Completed by chooses whether the asset's assigned person does it or anyone with a given role. Click Add requirement (or Save when editing).
Step 2: Send the form
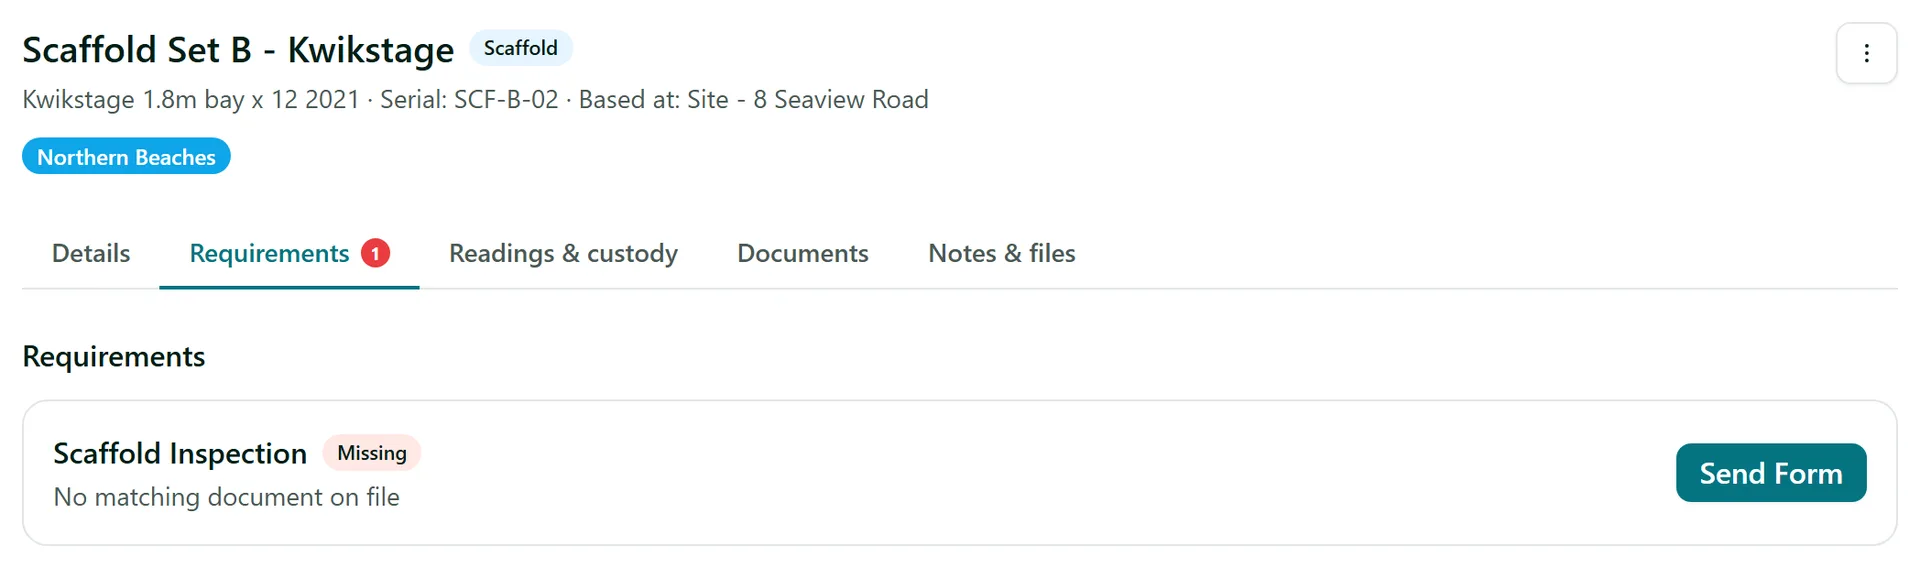
Open the person, customer or asset and go to its requirements. A form requirement that is missing, lapsed or due soon has a Send Form button.
Check the Send to email - it is filled from the person, the customer's primary contact or the asset's assigned person, and you can change it, for example to send an inspection to a contractor. Leave Allow completion via the emailed link without signing in ticked for anyone with the link to fill it in, or untick it to require a signed-in AirSign account whose verified email matches, for audits that must stand up to scrutiny. Your own staff always fill in forms signed in, and can also start them from their Home. Click Send form.
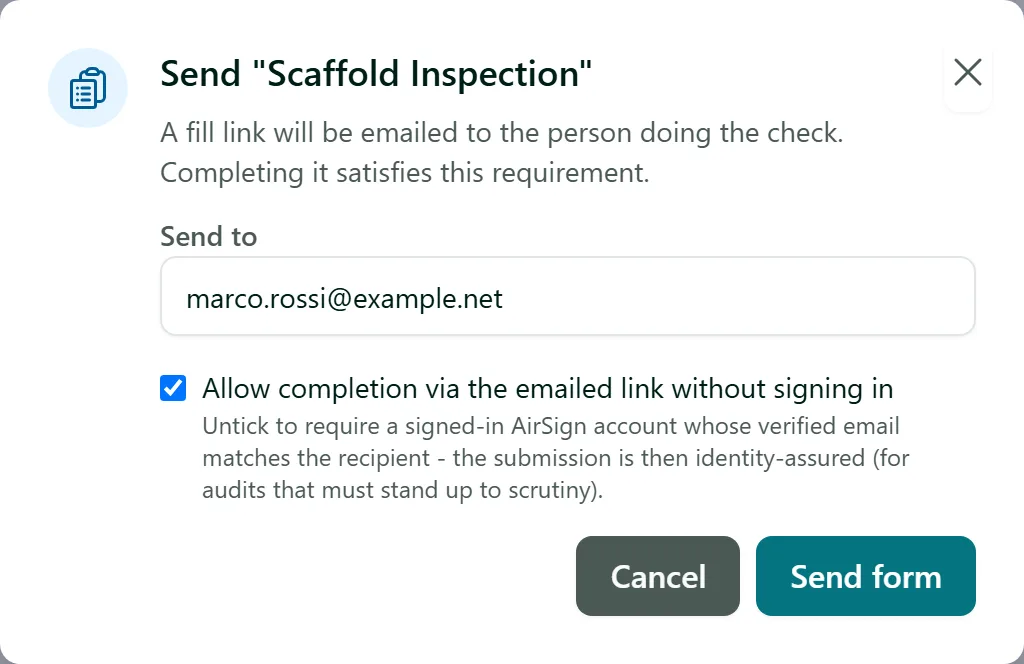
Sending again to the same person re-sends the same link as a reminder. Sending to someone else moves the form to them and the old link stops working.
Step 3: Review submissions
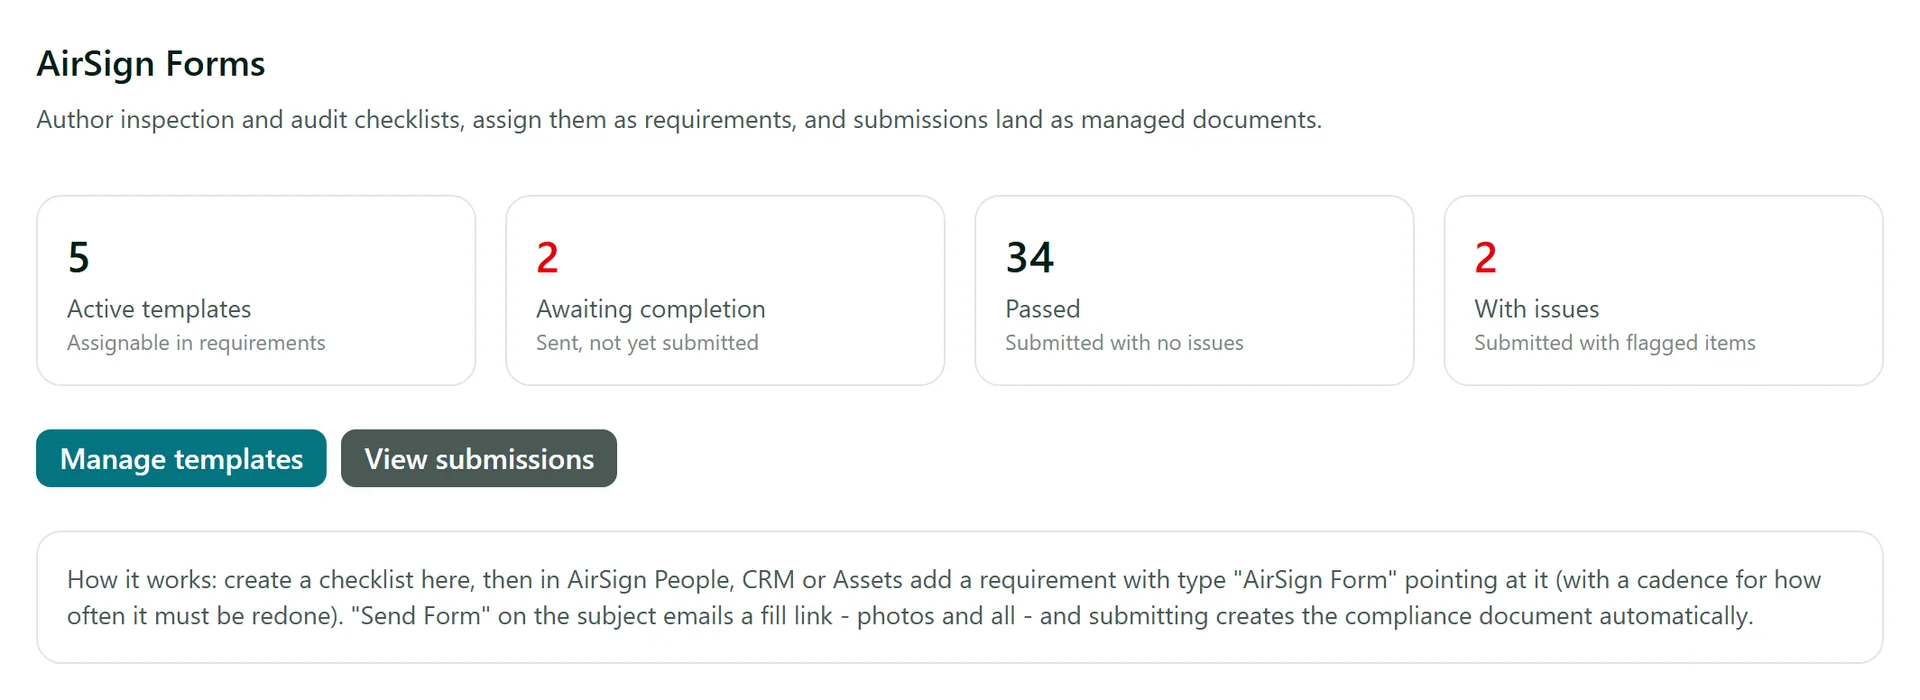
In AirSign Forms, open Submissions to see every form sent and its outcome: awaiting completion, passed, the number of issues, or critical issues. Use the Status filter to show, for example, Completed - with issues. Each row links to the person, customer or asset it was for.
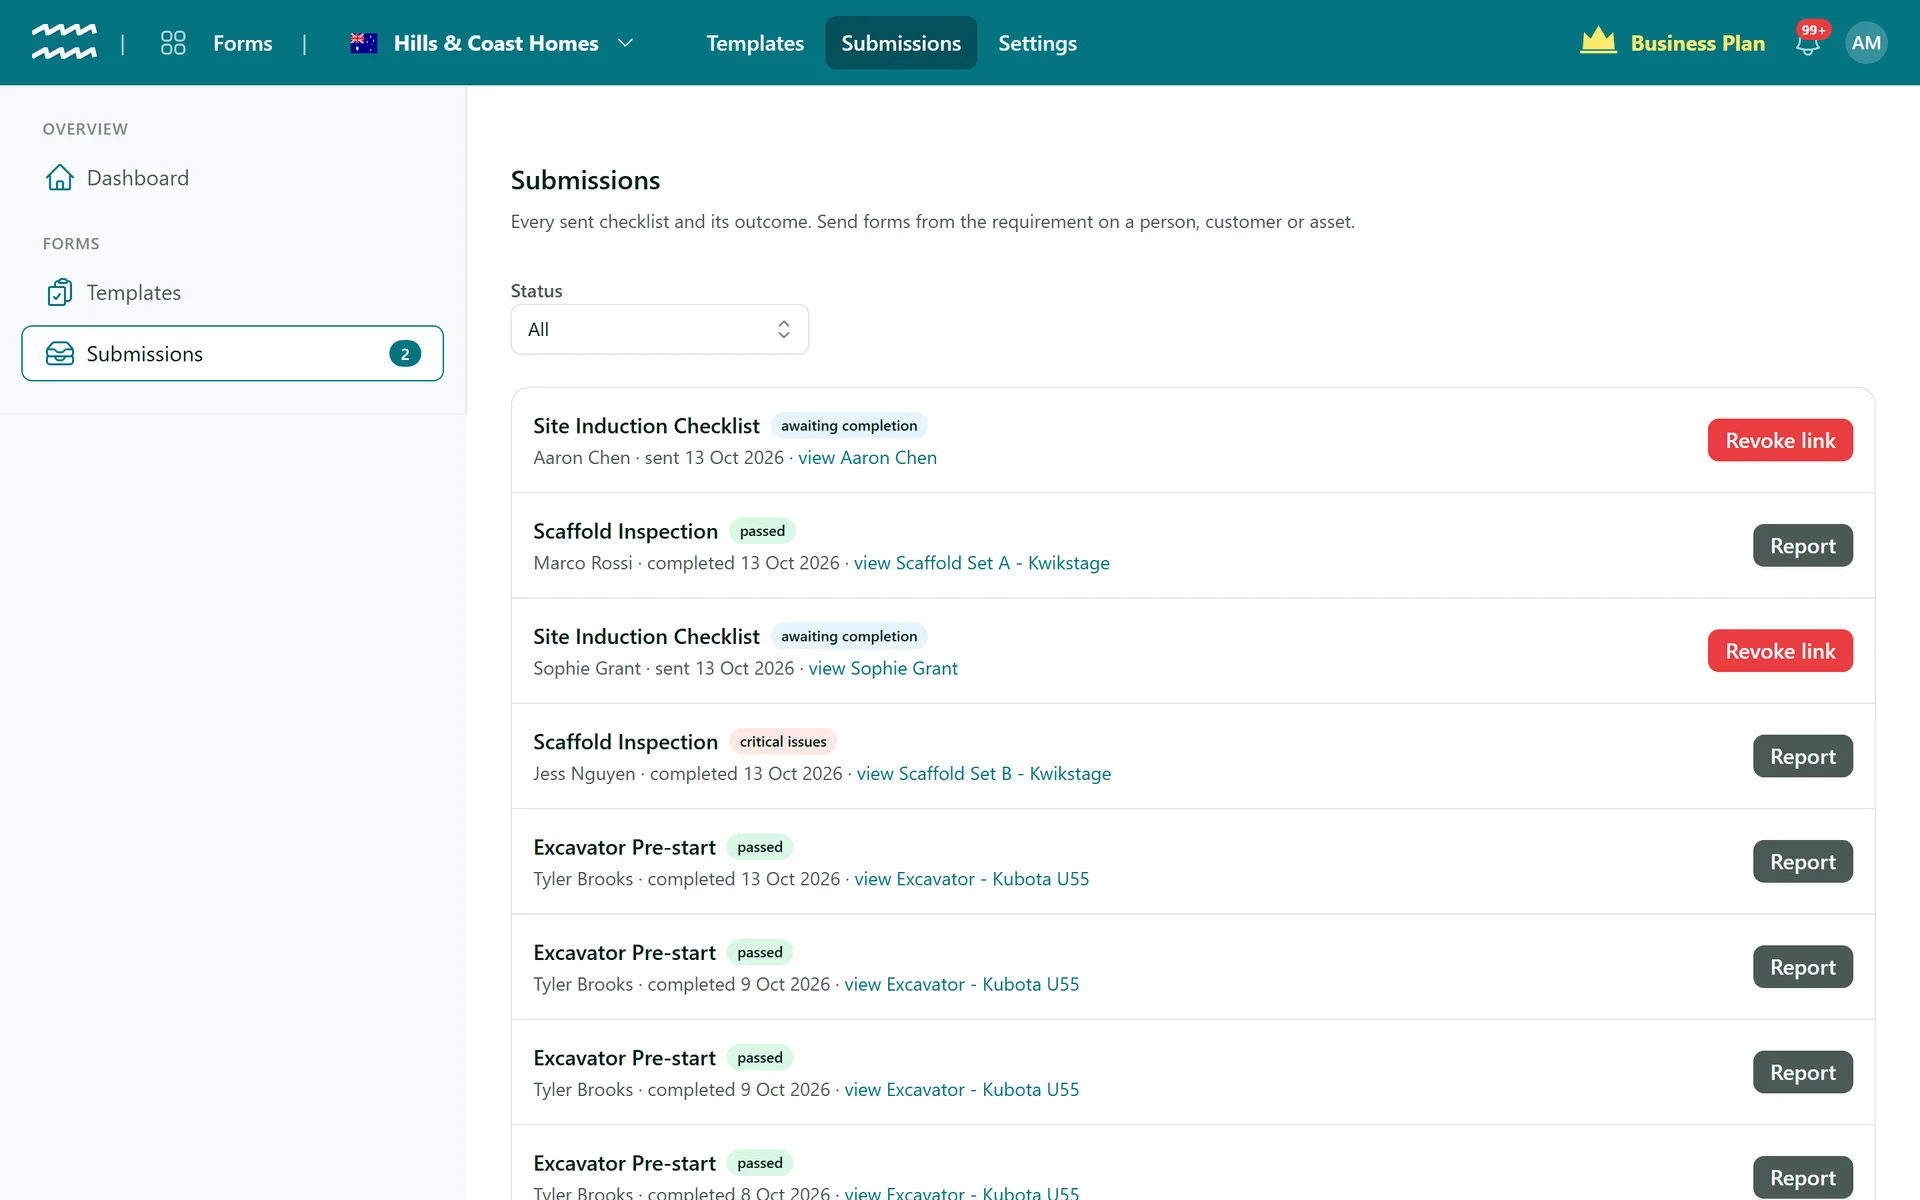
Click Report to download the PDF: the outcome, who completed it and when, every answer with failures called out in red, the notes and the photos. Revoke link cancels a form that has not been completed yet.
Step 4: Follow up failed checks
The Dashboard and the badge on Submissions count forms submitted with issues. What happens next depends on the template's When items fail setting. With Flag them, the check still counts and the failures are highlighted for you to act on. With Critical fails block compliance, a failed critical item means the requirement is still not met - in the example above, Scaffold Set B failed its tag check, so it still shows the inspection as Missing. Once the problem is fixed, click Send Form again for a clean inspection.
Tips
- Forms are also sent automatically - for example when a new staff member is added or an asset is assigned - to anyone a form requirement applies to.
- When a cadence runs out, AirSign sends the form again to whoever last completed it, so recurring checks keep themselves going.
- Every completed form is filed as a document in AirSign Compliance, so it appears in compliance reports alongside licences and certificates.
- Forms cannot be assigned to projects yet. To check equipment on a build, assign the form to the asset instead.
Need More Help?
Related guides: Building a Form, Tracking and Completed Documents. See our FAQ section or email support at [email protected].