Building a Form
AirSign Forms turns your paper checklists into forms people fill in on their phone - a scaffold inspection, a plant pre-start, a site induction, a handover walk-through. You build the checklist once as a template: sections of pass/fail checks, readings and photo evidence, with rules for what happens when something fails.
Where to find it
Step 1: Start a template
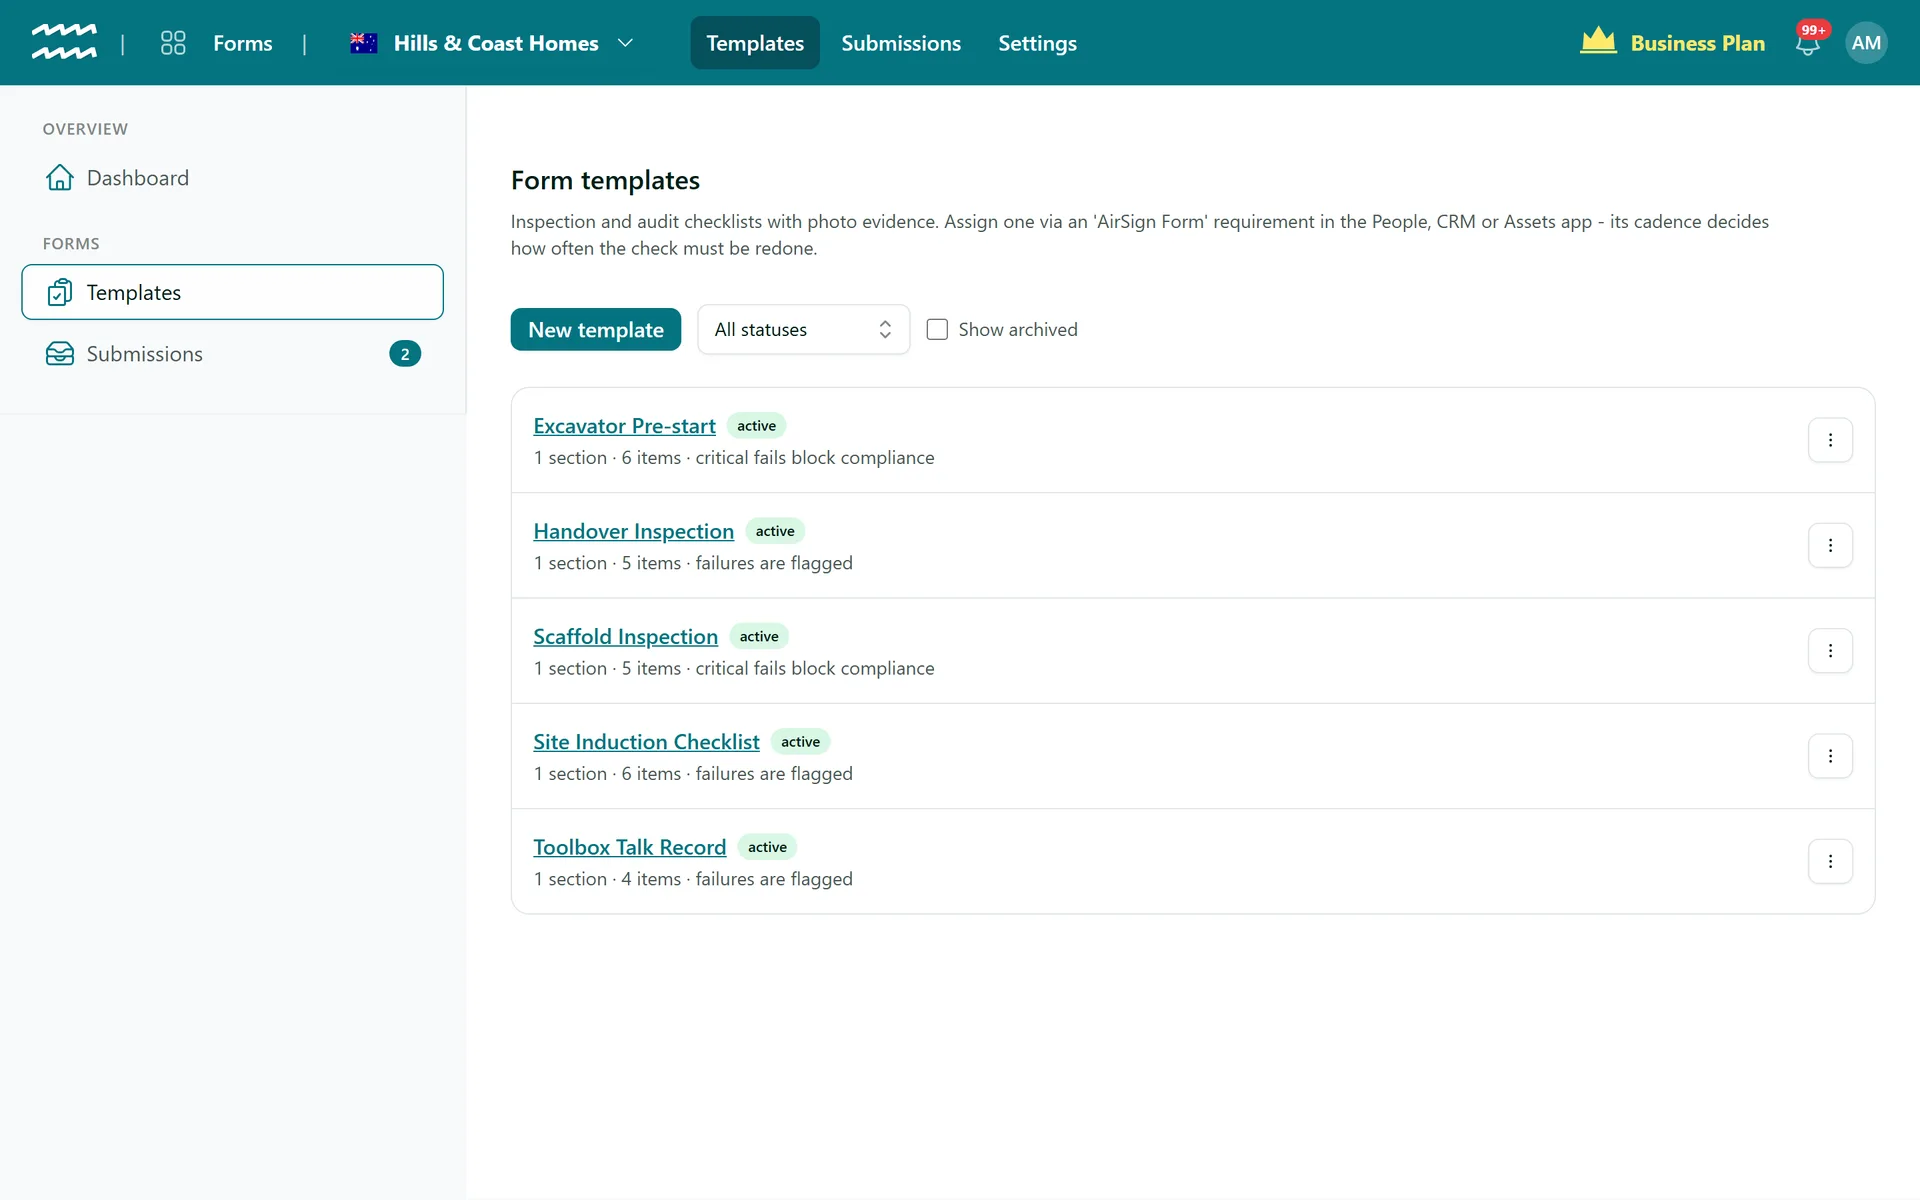
The Form templates page lists your checklists with how many sections and items each has, and whether failures are flagged or block compliance. Click New template, or use a template's menu to Edit or Duplicate it (a duplicate starts as a draft).
Step 2: Name it and decide what a fail means
Give the template a Name and a Description (the person filling it in sees this before they start). Then choose When items fail:
- Flag them - the check still counts: the form is recorded as done, with the failures highlighted for you to follow up.
- Critical fails block compliance: if an item marked critical fails, the submission is kept as evidence but the check does not count, so the person or equipment stays non-compliant until a clean form comes in. Use this for things like a scaffold tag or a machine pre-start.
Leave Status as Draft while you build. Only Active templates can be assigned and sent.
Step 3: Add sections and items
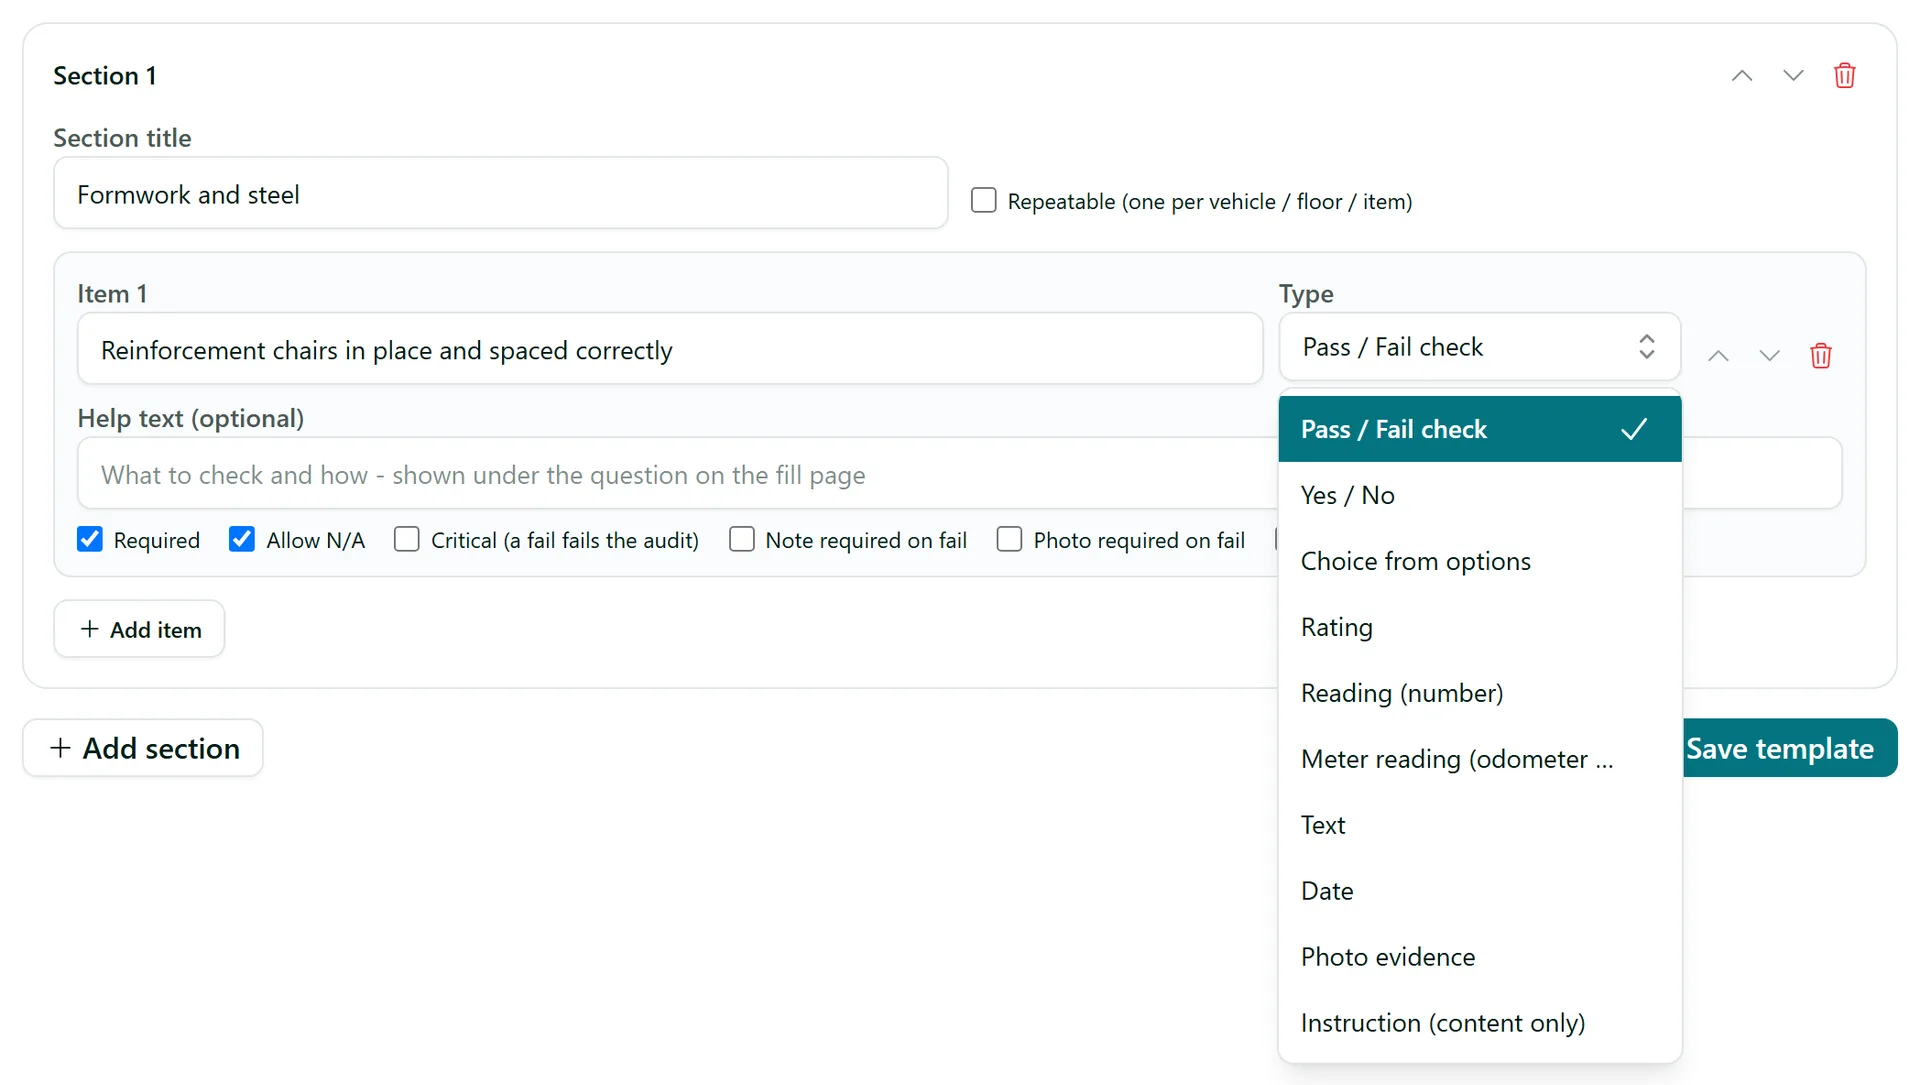
Give each section a Section title. Tick Repeatable when the same checks apply to several things, such as one per vehicle or per floor - the person filling it in adds the section again for each one. Click Add item for each question and choose its Type:
- Pass / Fail check - the main inspection item.
- Yes / No, Choice from options, Rating, Text and Date - for information. A yes / no answer never fails the form on its own.
- Reading (number) - set Min OK and Max OK and a reading outside the range fails.
- Meter reading (odometer / hours / fuel) - when the form is for an asset, the reading is also recorded on that asset.
- Photo evidence - the photo is the answer.
- Instruction (content only) - formatted guidance between questions, such as what PPE to wear.
Step 4: Set the rules for each item
Add Help text to explain what to check and how - it appears under the question. Then tick the options you need:
- Required and Allow N/A.
- Critical (a fail fails the audit) - marks the item as one that matters most. Fillers do not see which items are critical.
- Note required on fail and Photo required on fail - the moment the item fails, the filler must explain or photograph it.
- Photo always required - a photo every time, pass or fail.
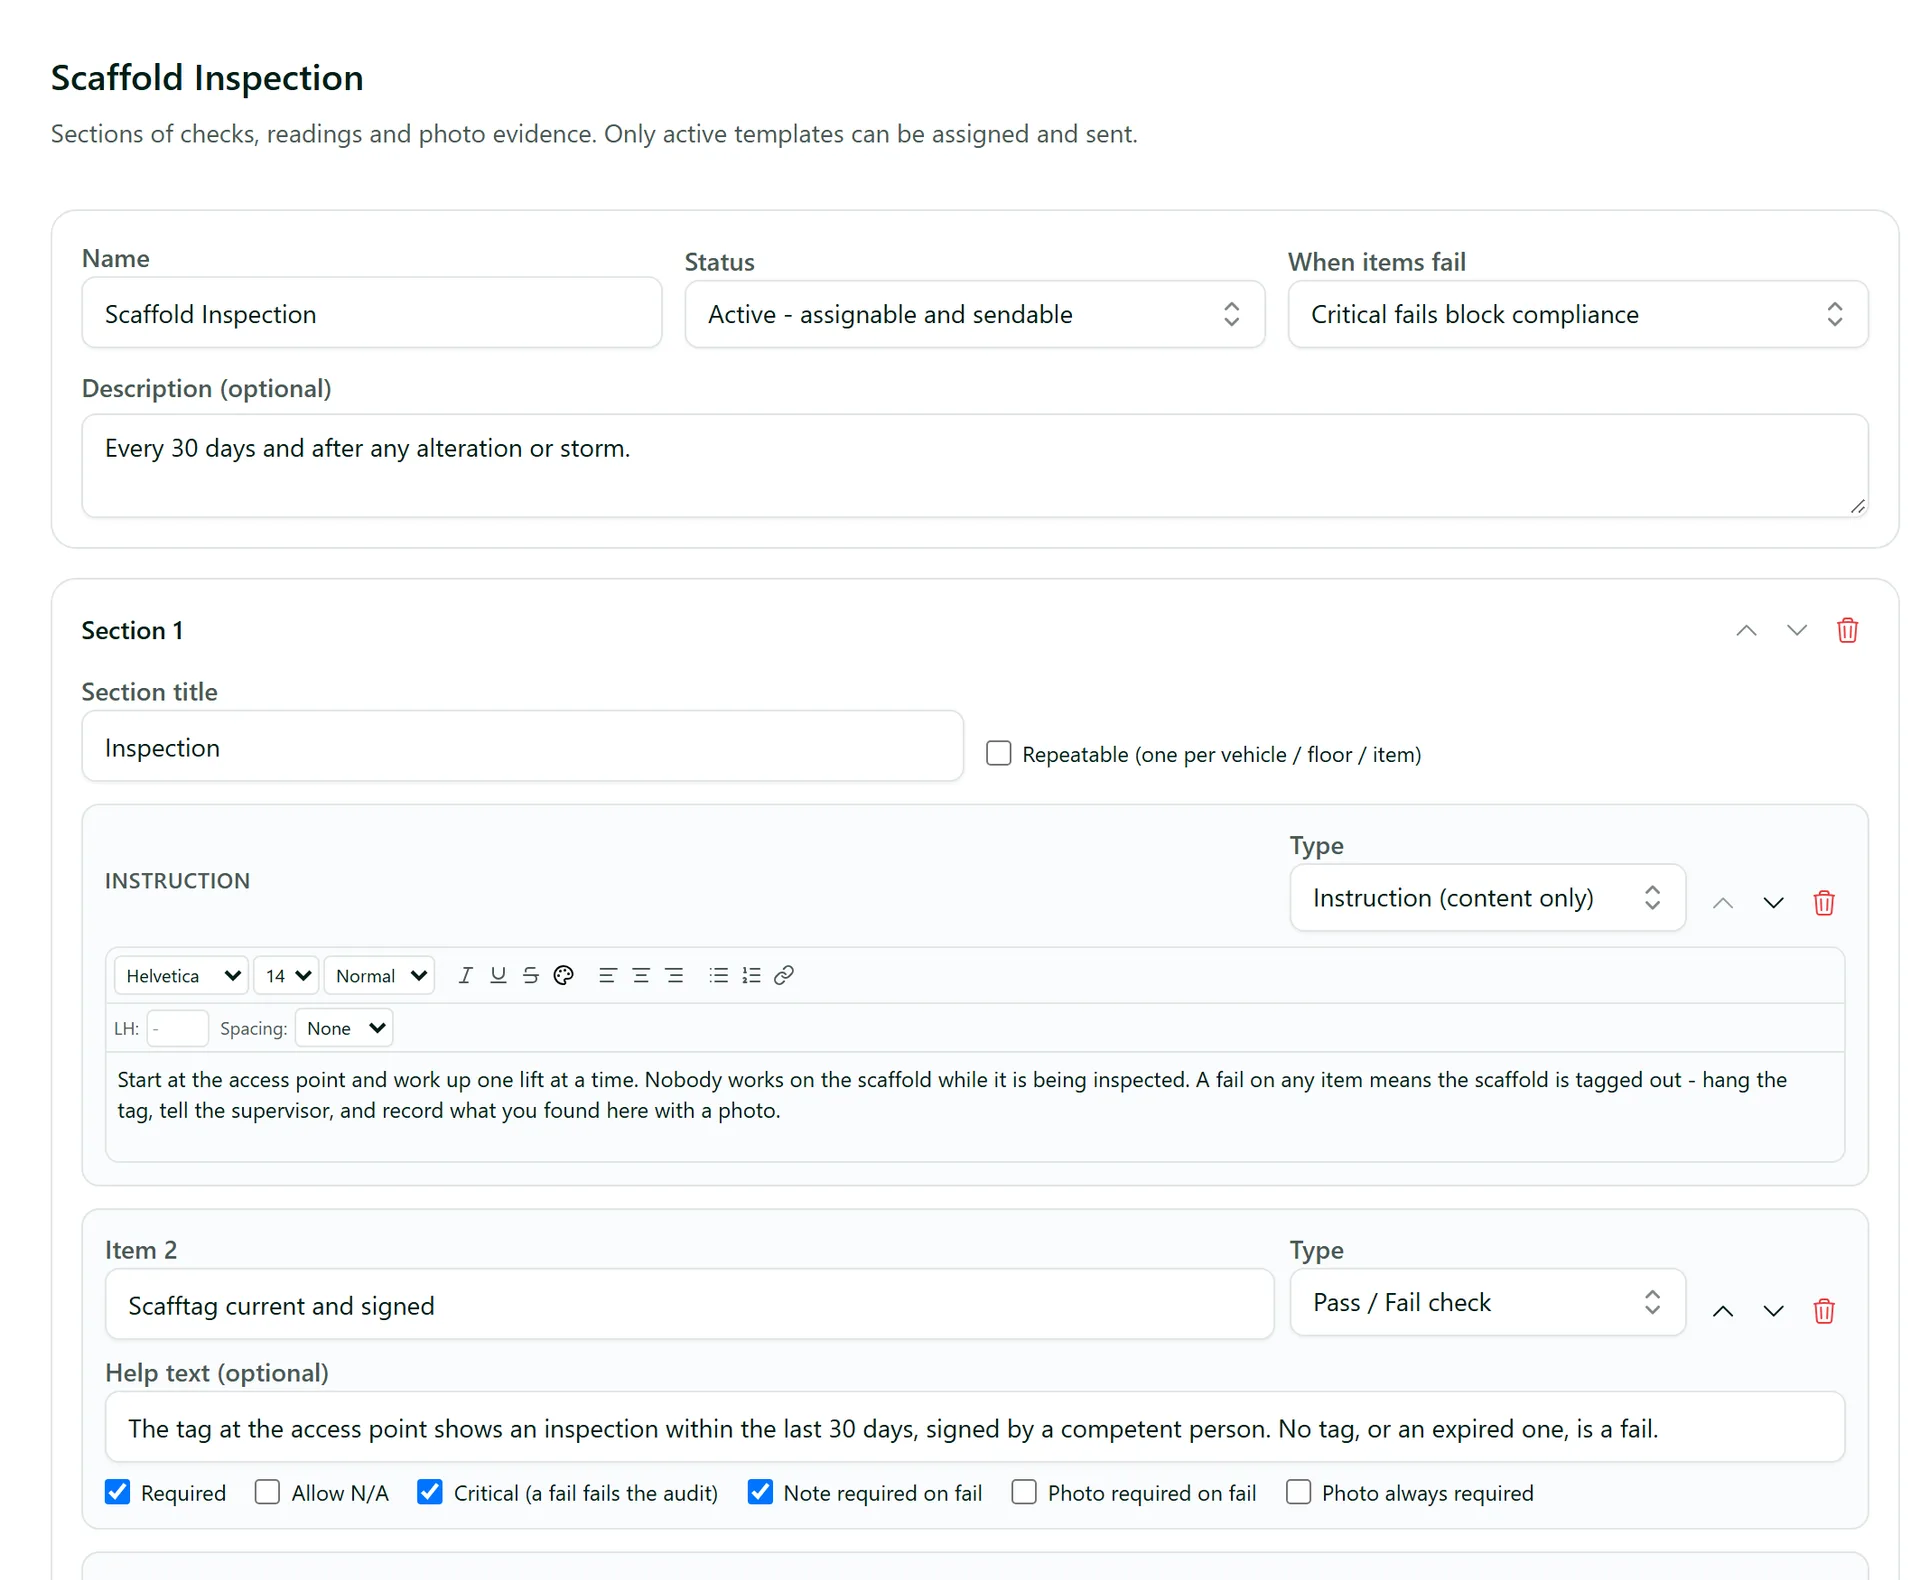
Use the arrows to reorder items and sections and the bin to remove them. Click Add section for the next part of the checklist, then Save template.
Step 5: See how checks are going
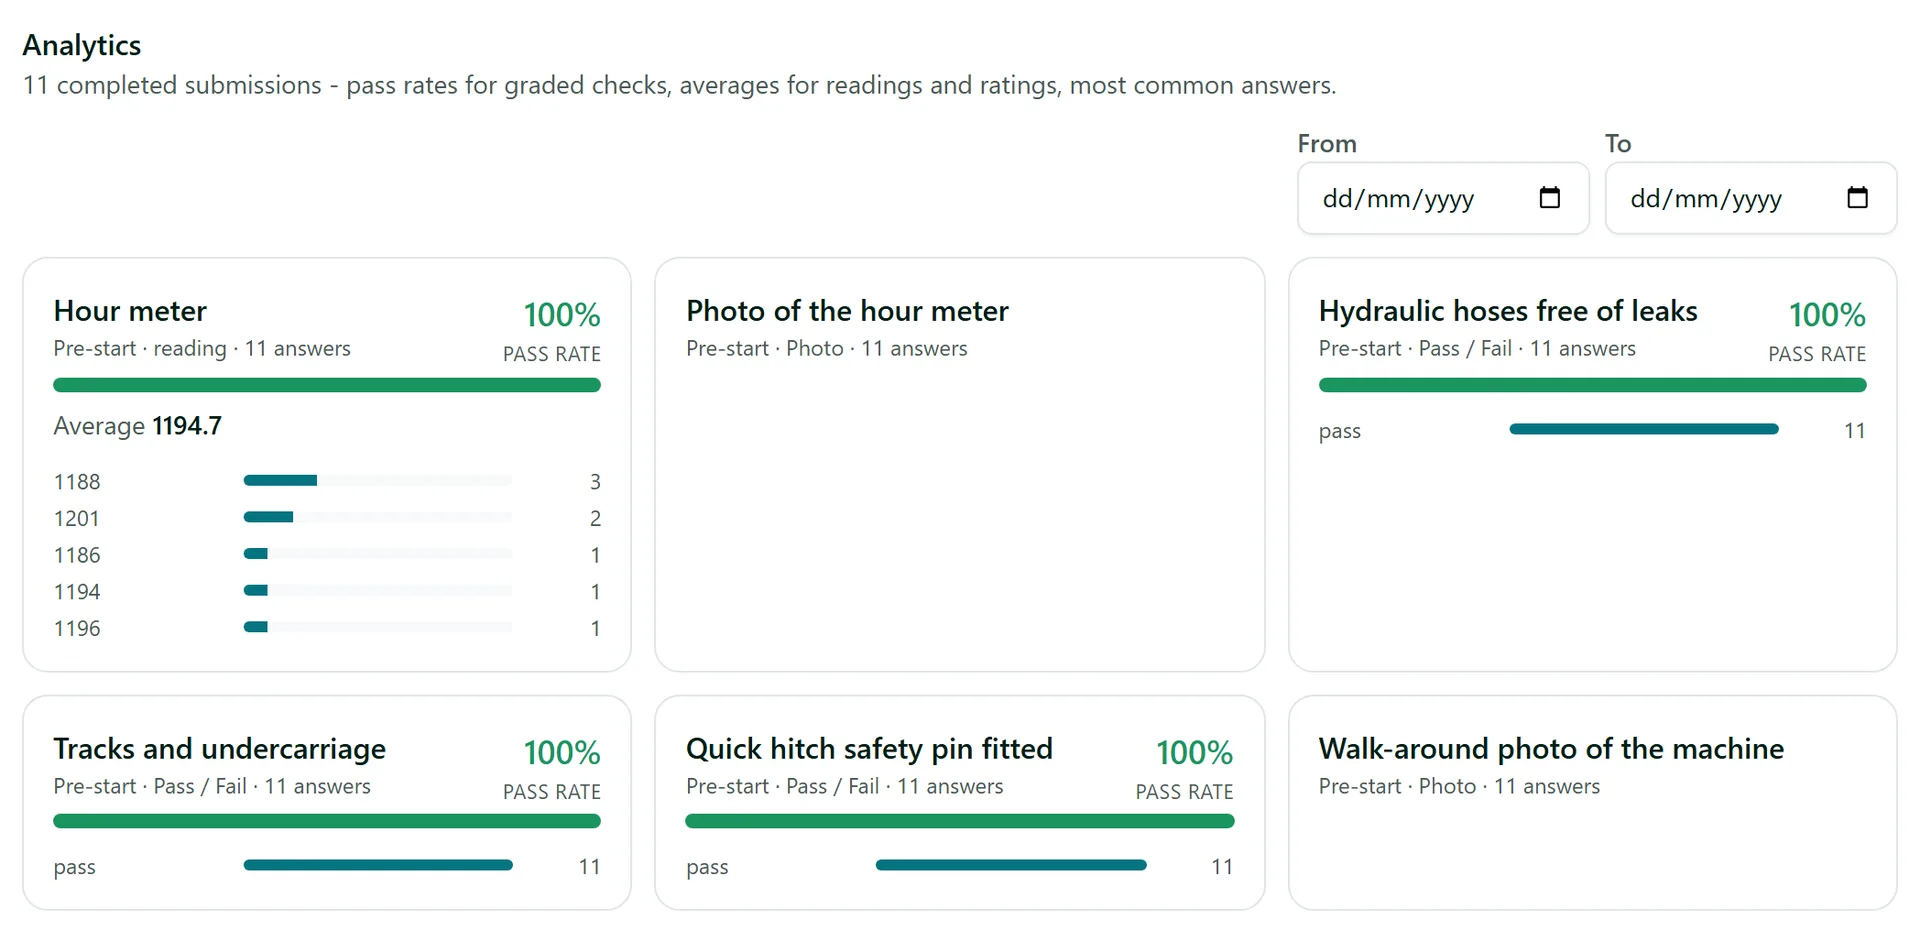
Once submissions come in, the template page shows Analytics under the builder: the pass rate of each check, averages for readings and ratings, and the most common answers. Set From and To to look at a period, such as last month's pre-starts.
Tips
- On a phone, a photo item opens the rear camera directly. Photos are resized before upload, so forms work on patchy site reception.
- Progress saves as the form is filled in, so someone who gets interrupted can pick up where they left off.
- A form does not set how often it must be redone - that is set on the requirement that assigns it. See Sending Forms and Reviewing Submissions.
- A template used by requirements or submissions cannot be deleted - set its status to Archived instead.
Need More Help?
Related guides: Sending Forms and Reviewing Submissions, Tracking and Completed Documents. See our FAQ section or email support at [email protected].