Posting to Social Media
AirSign Social lets you write a post once and send it to several social accounts at the same time - now, or at a time you choose. Before anything goes out you can see how the post will look on each network and tailor the wording for any of them. This guide covers connecting your accounts, then writing, previewing and scheduling a post.
Where to find it
Step 1: Connect your social accounts
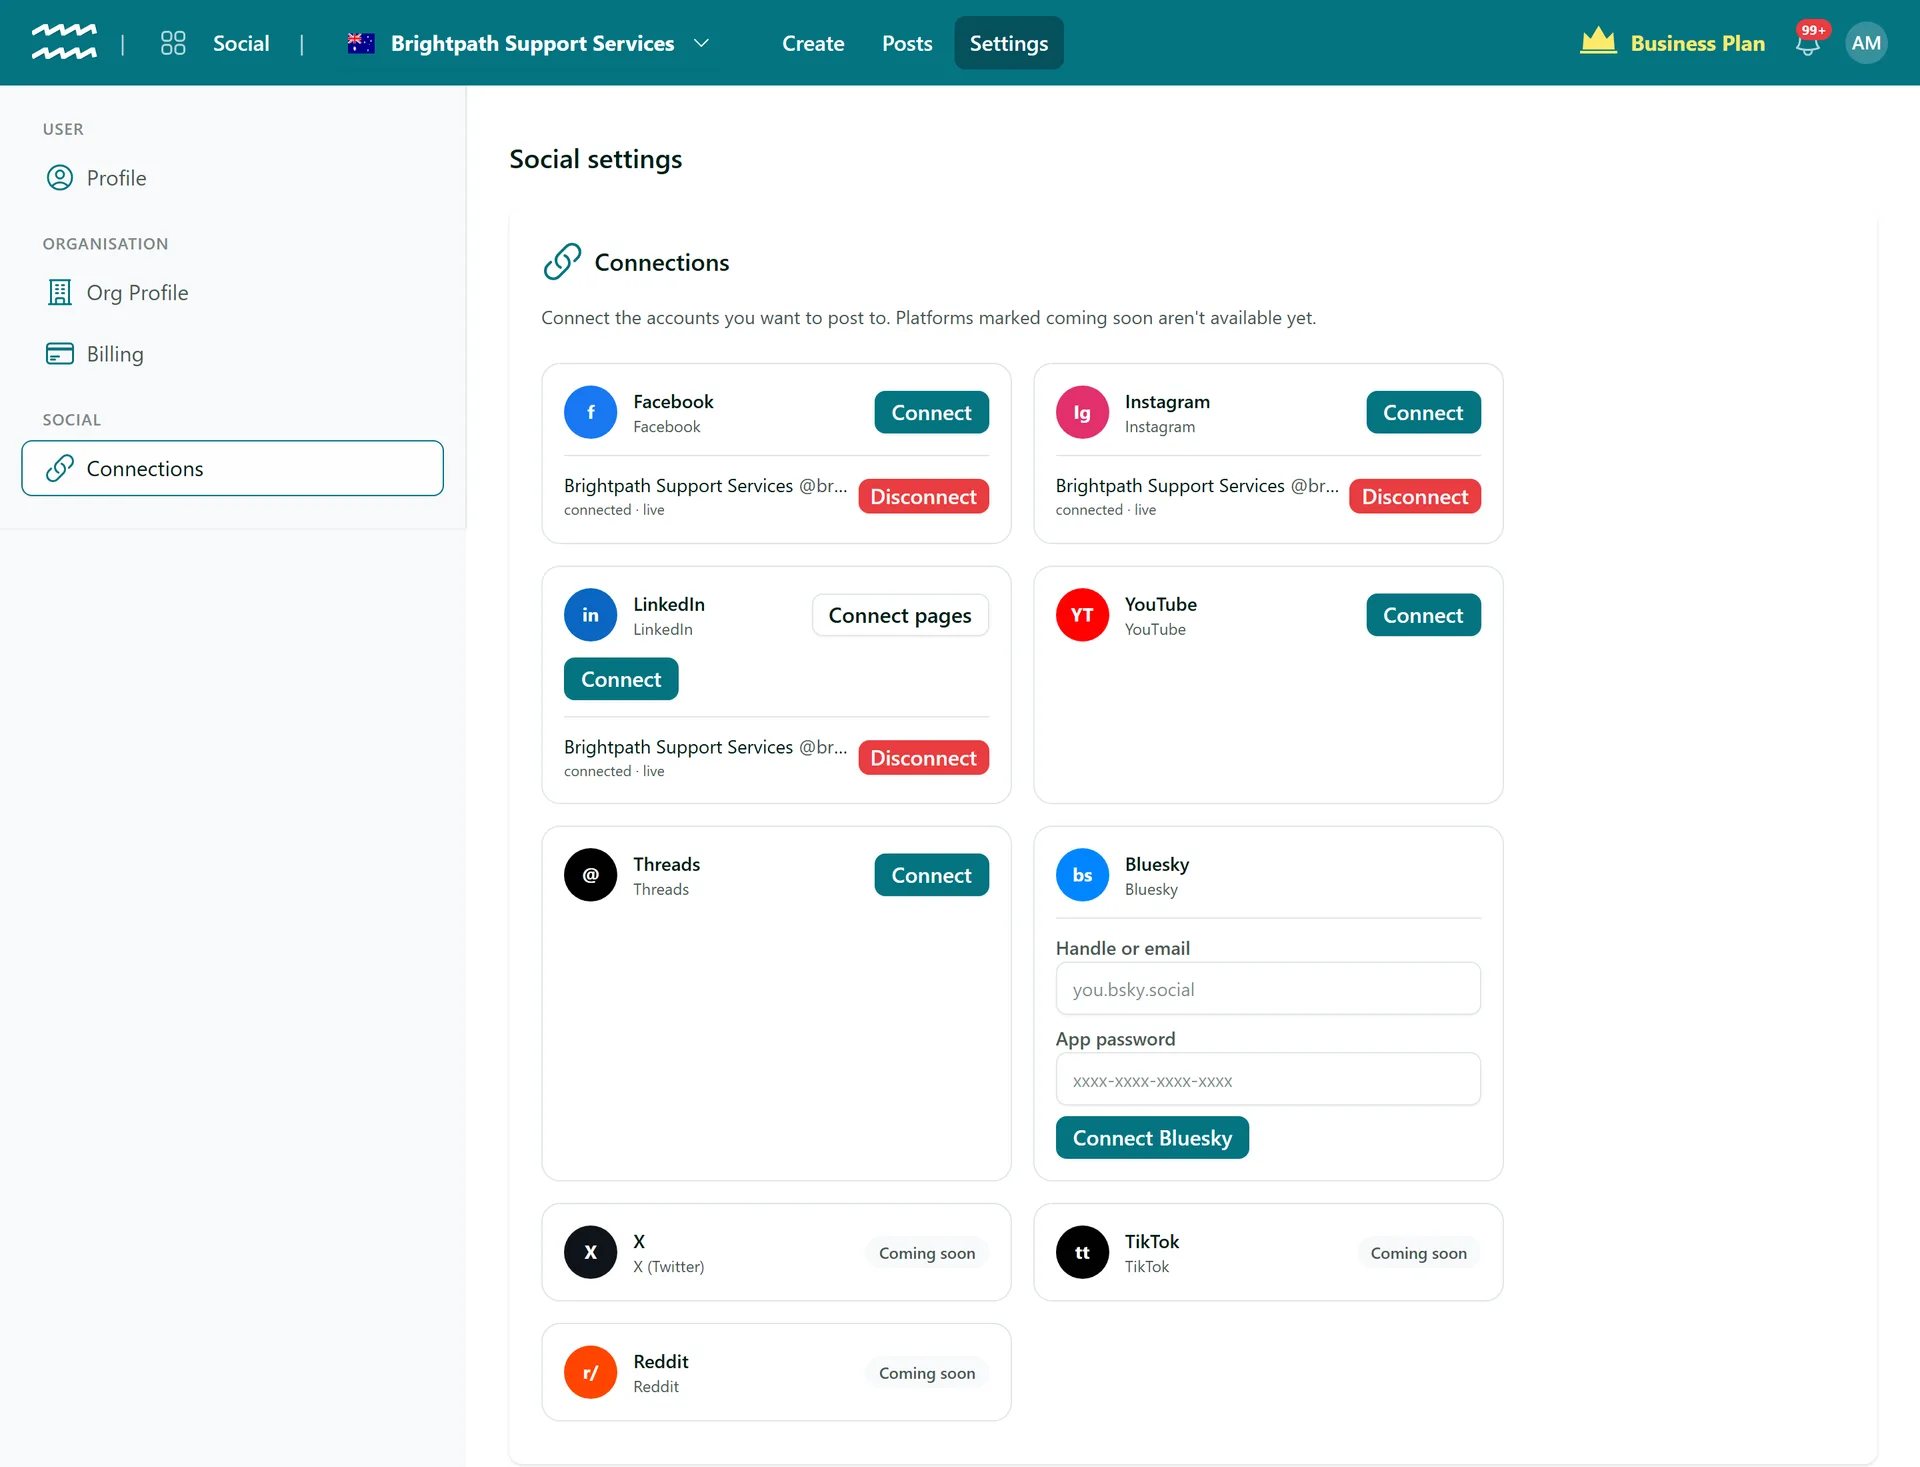
Go to Settings > Connections. Each network has a card:
- Facebook, Instagram, LinkedIn, Threads and YouTube - click Connect and sign in to the network to give AirSign permission to post. Your account's name and handle are filled in for you.
- LinkedIn company pages - click Connect pages to post as a company page you administer. Any other pages you manage are listed under "Company pages you manage", each with an Add button.
- Bluesky - enter your handle and an app password, then click Connect Bluesky.
- Networks marked Coming soon cannot be connected yet.
Connected accounts show as connected · live. If a network ever ends the login, the account shows login expired - press Connect again with the same account and it picks up where it left off, scheduled posts included. Disconnect removes an account.
Step 2: Write your post
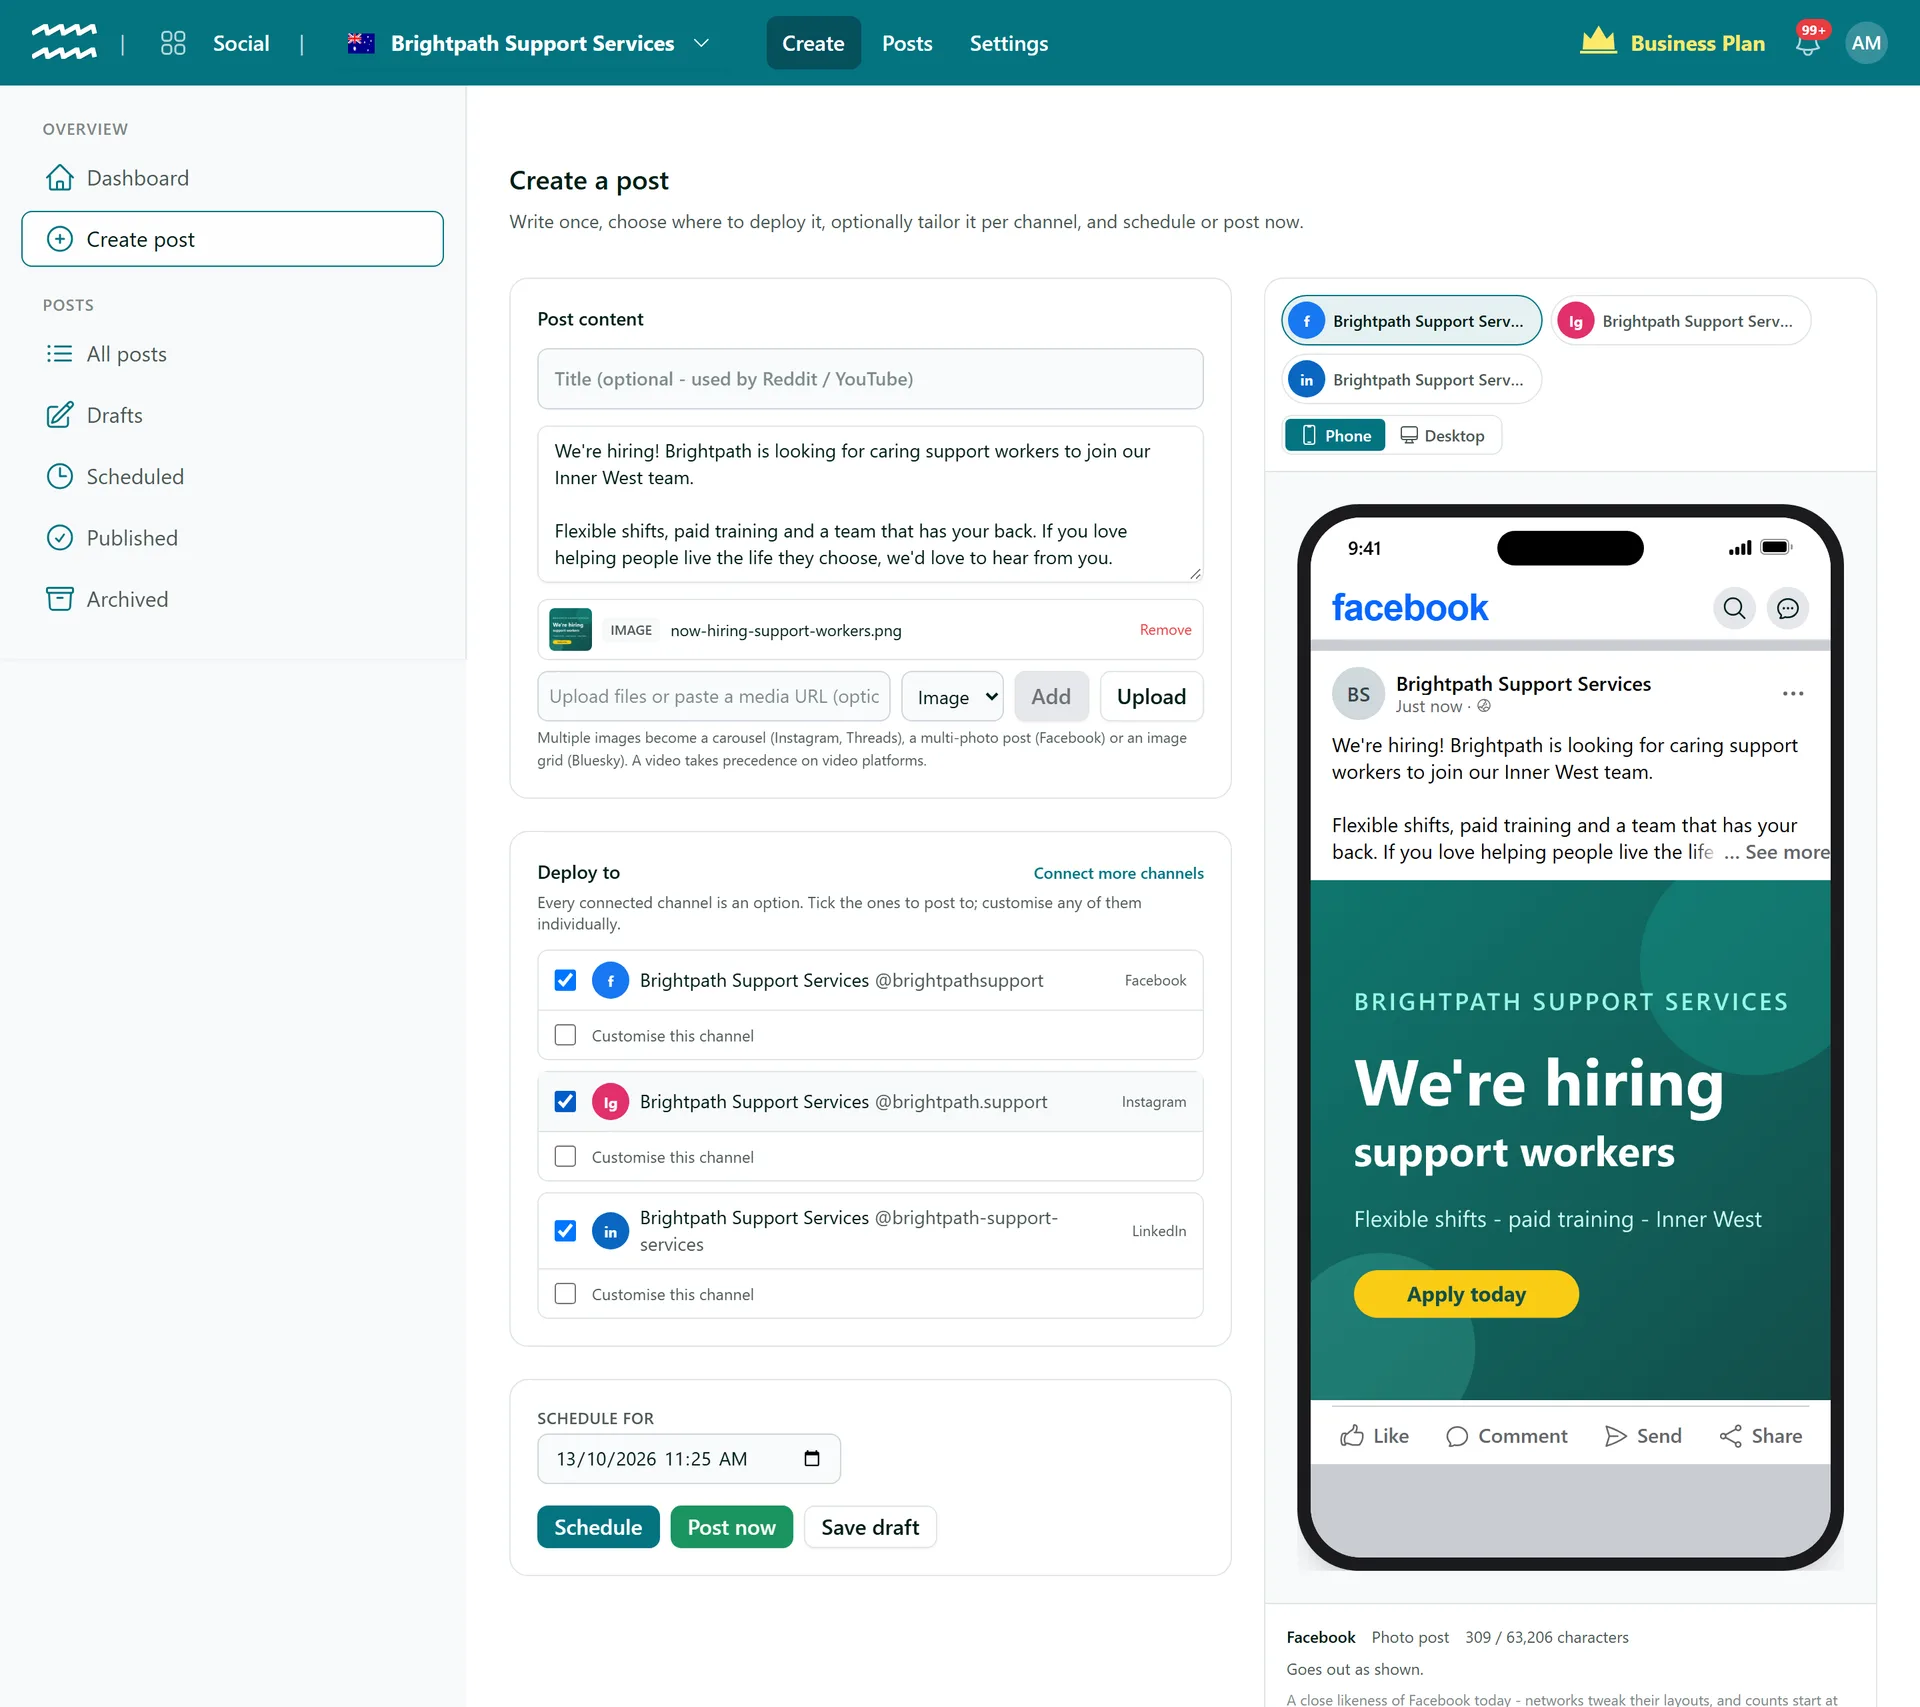
Click Create. Under Post content, write the text in What do you want to post?. A Title is optional and only used by Reddit and YouTube. Add images or a video with Upload, or paste a media link and click Add. Several images become a carousel or multi-photo post where the network supports it.
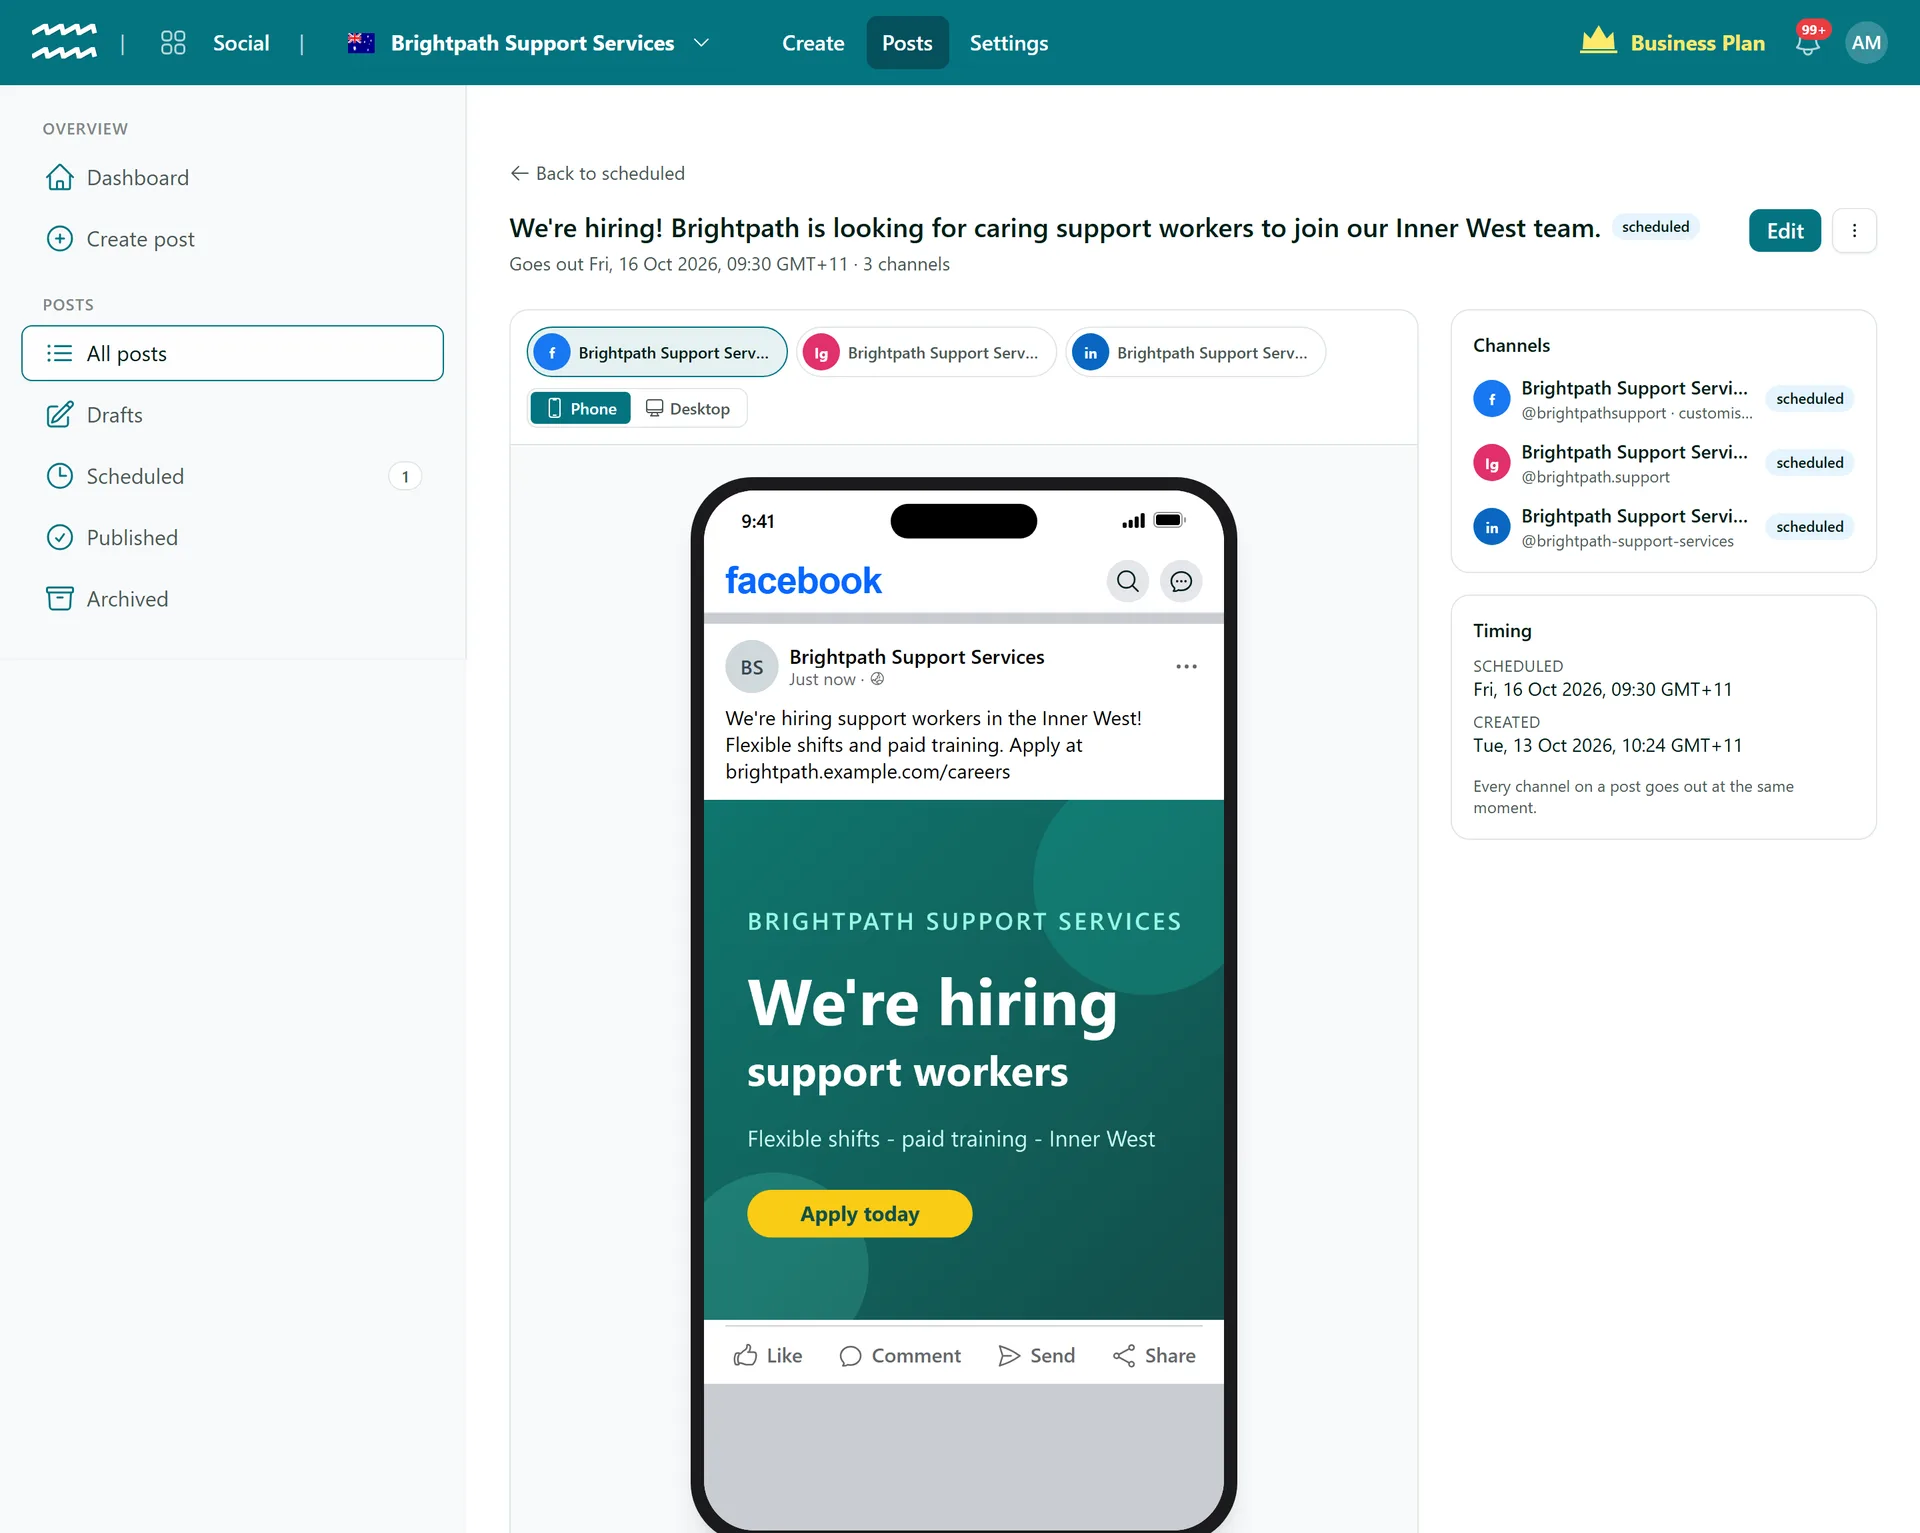
Under Deploy to, tick every account the post should go to. The preview on the right shows the post as it will appear on each ticked account - switch accounts with the tabs at the top and flip between Phone and Desktop. Notes under the preview warn you if a network will cut, drop or refuse something (for example, Instagram needs an image or video).
Step 3: Tailor it for a network (optional)
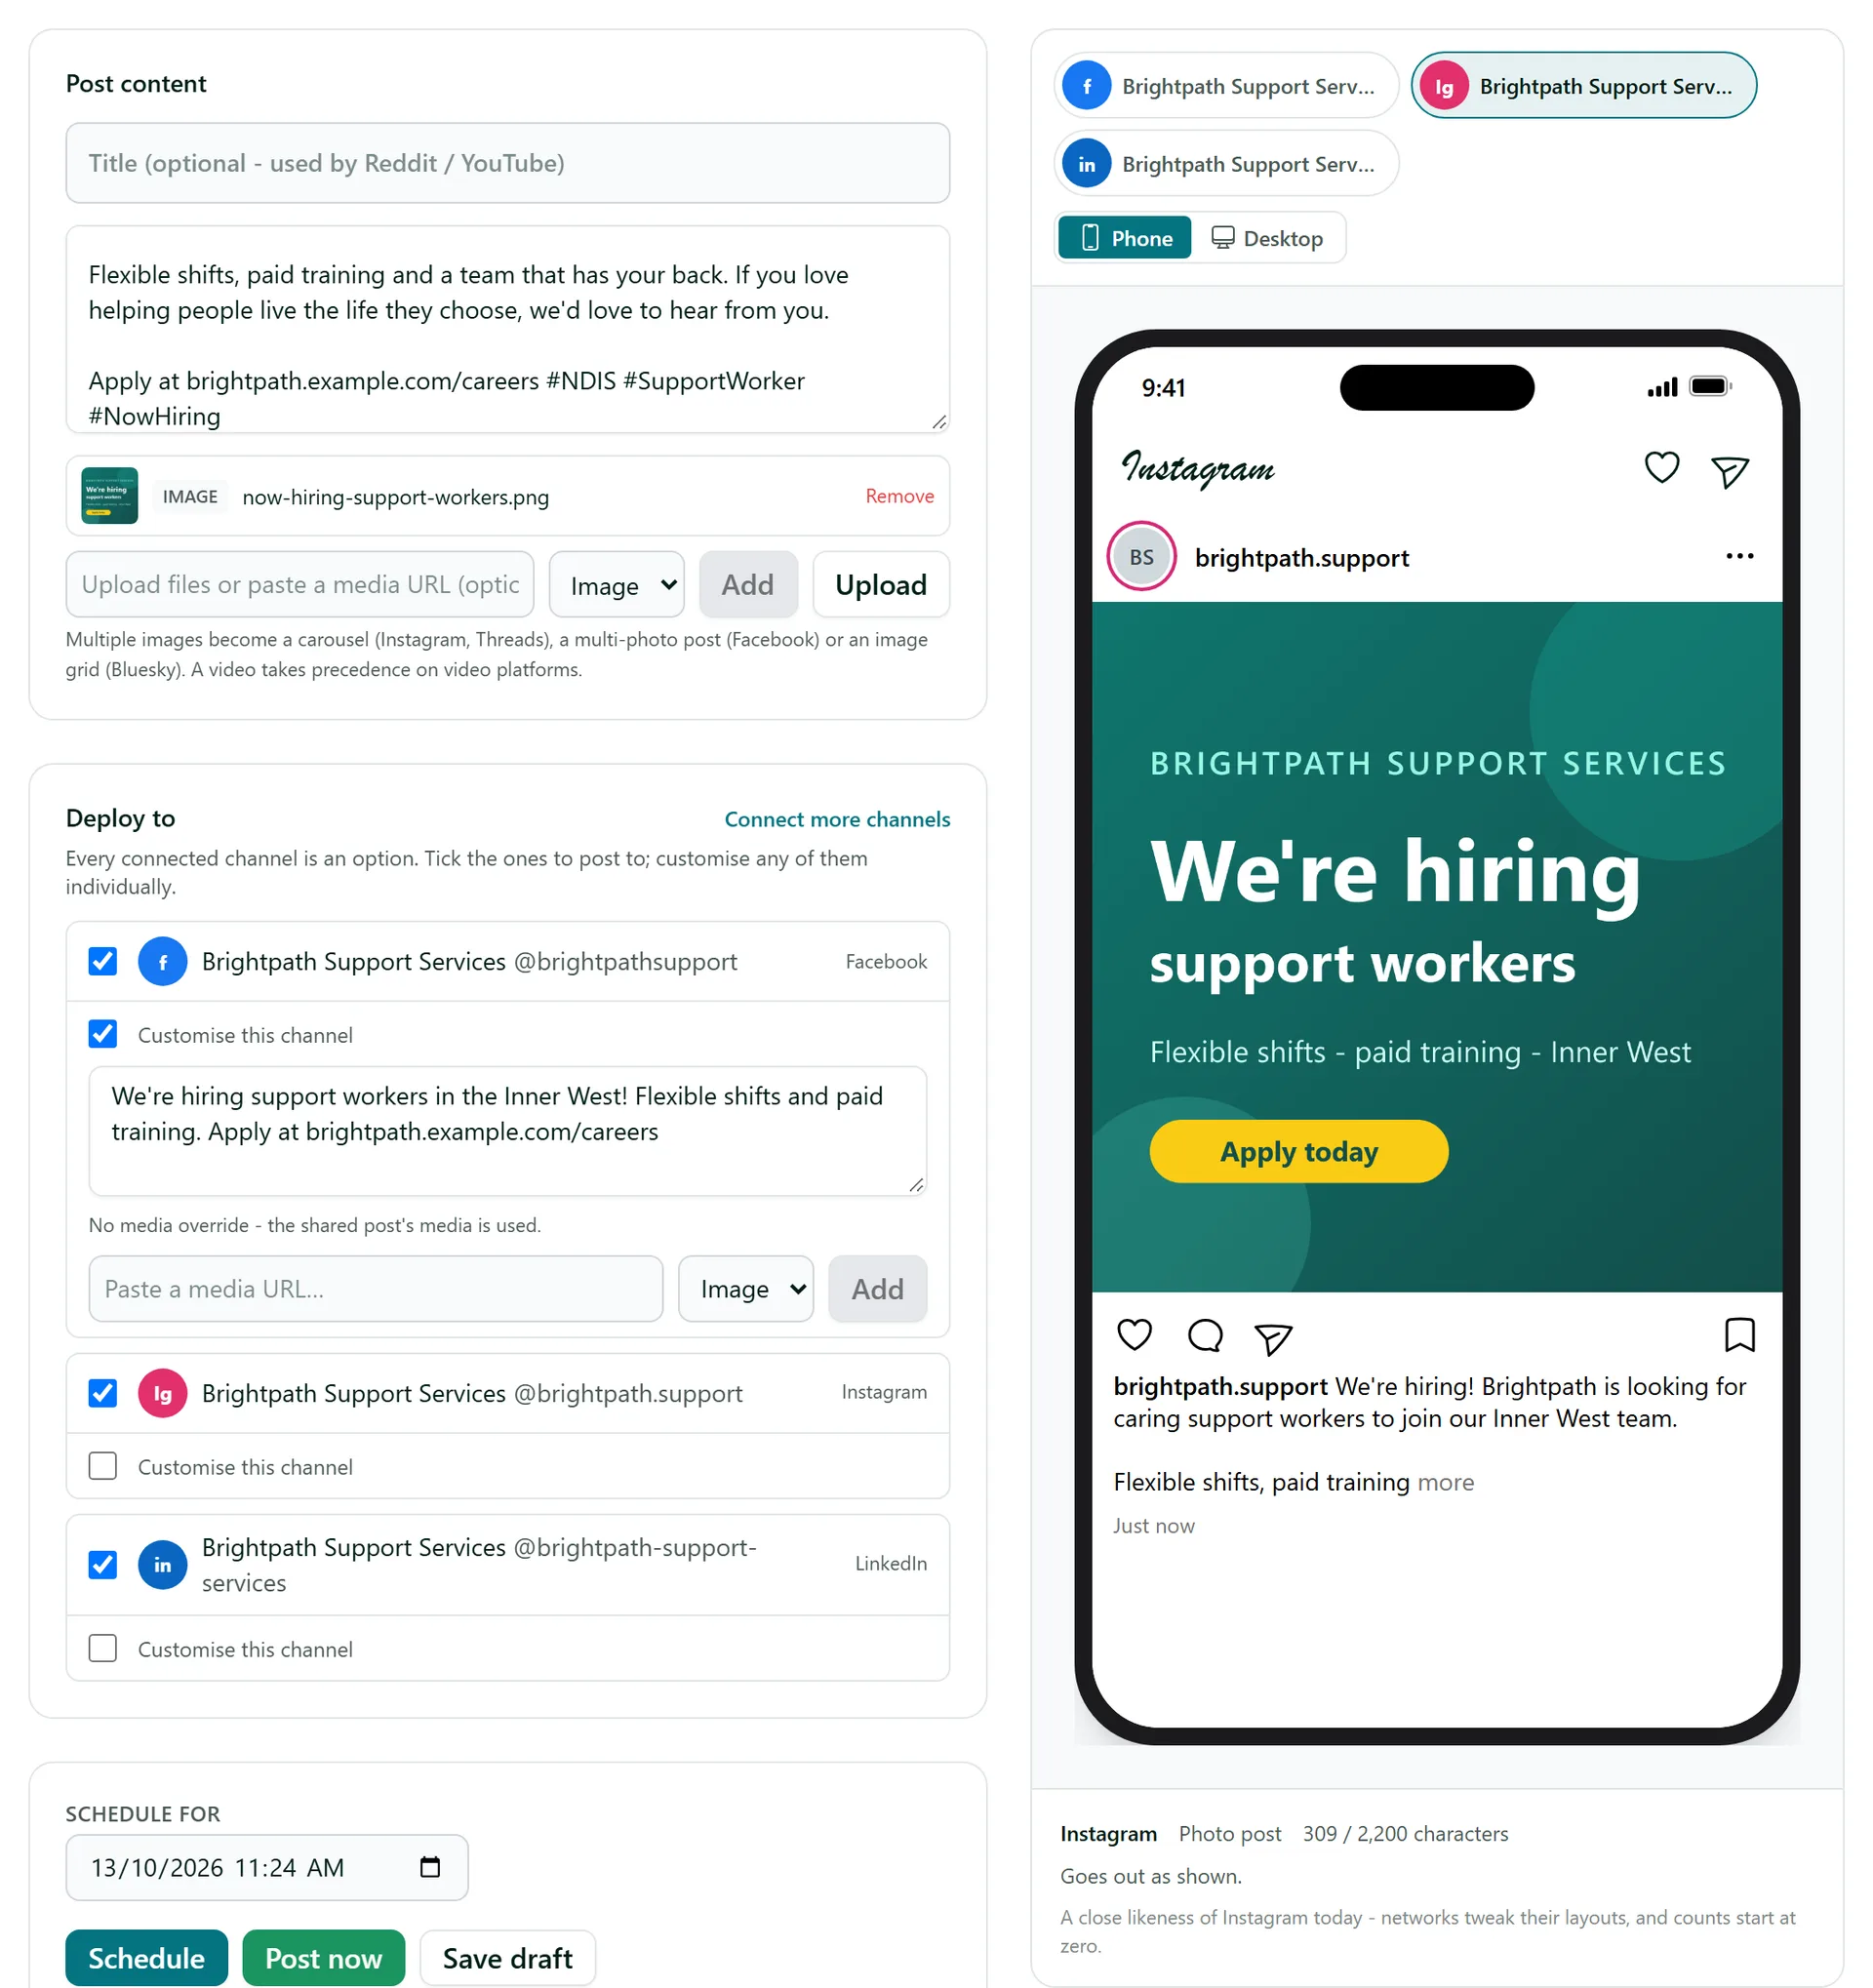
Tick Customise this channel under any account to give it its own text or media - for example a shorter version for Facebook. Leave a field blank to use the shared post. For YouTube you can also choose the video's Visibility (Public, Unlisted or Private).
Step 4: Schedule it, post it now or save a draft
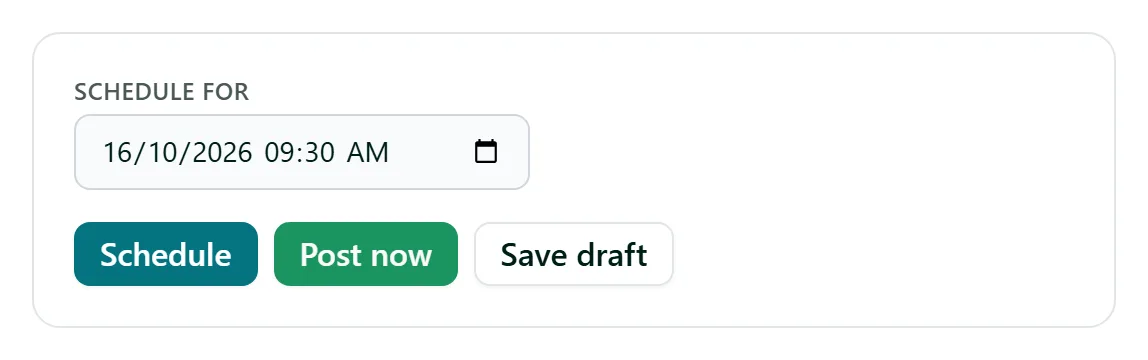
Pick a date and time in Schedule for and click Schedule. Every account on the post goes out at that moment. Or click Post now to publish straight away, or Save draft to come back to it later.
Step 5: Keep track of your posts
The left menu sorts posts into Drafts, Scheduled, Published and Archived. Click a post to open it: you see each account's preview, where each one is up to and when it goes out. Use Edit to change a draft or scheduled post, and the ... menu to Post now, archive or delete it. Once a post is out, each account links to where it landed; if one network failed, Retry failed channels sends it again to just those.
Tips
- If you can save drafts but not schedule, your permission group lets you write posts but not publish them - someone with publish permission can send your draft.
- Each network has its own rules: YouTube needs a video and a title, Instagram needs media, and X and Reddit posts are text only for now. The preview notes tell you before you send.
- Want a different time per network? Make a separate post for each time - all the accounts on one post go out together.
- Automations can draft posts for you, for example when a big project is signed off - see Building a Workflow.
Need More Help?
Related guides: Building a Workflow, Team Access and SSO. See our FAQ section or email support at [email protected].