Building a Workflow
Workflows do the follow-up for you: when something happens in one AirSign app, do something in another. For example, when a risk assessment comes back with issues, send it out again; when a service agreement is signed, send the details to your own system. This guide walks you through building, testing and switching on a workflow.
Where to find it
Step 1: Start a workflow
The Workflows page lists your workflows with their Status - active ones are running, draft ones still need setting up. Click New Workflow, or click a workflow's name to open it.

Step 2: Add a trigger and actions
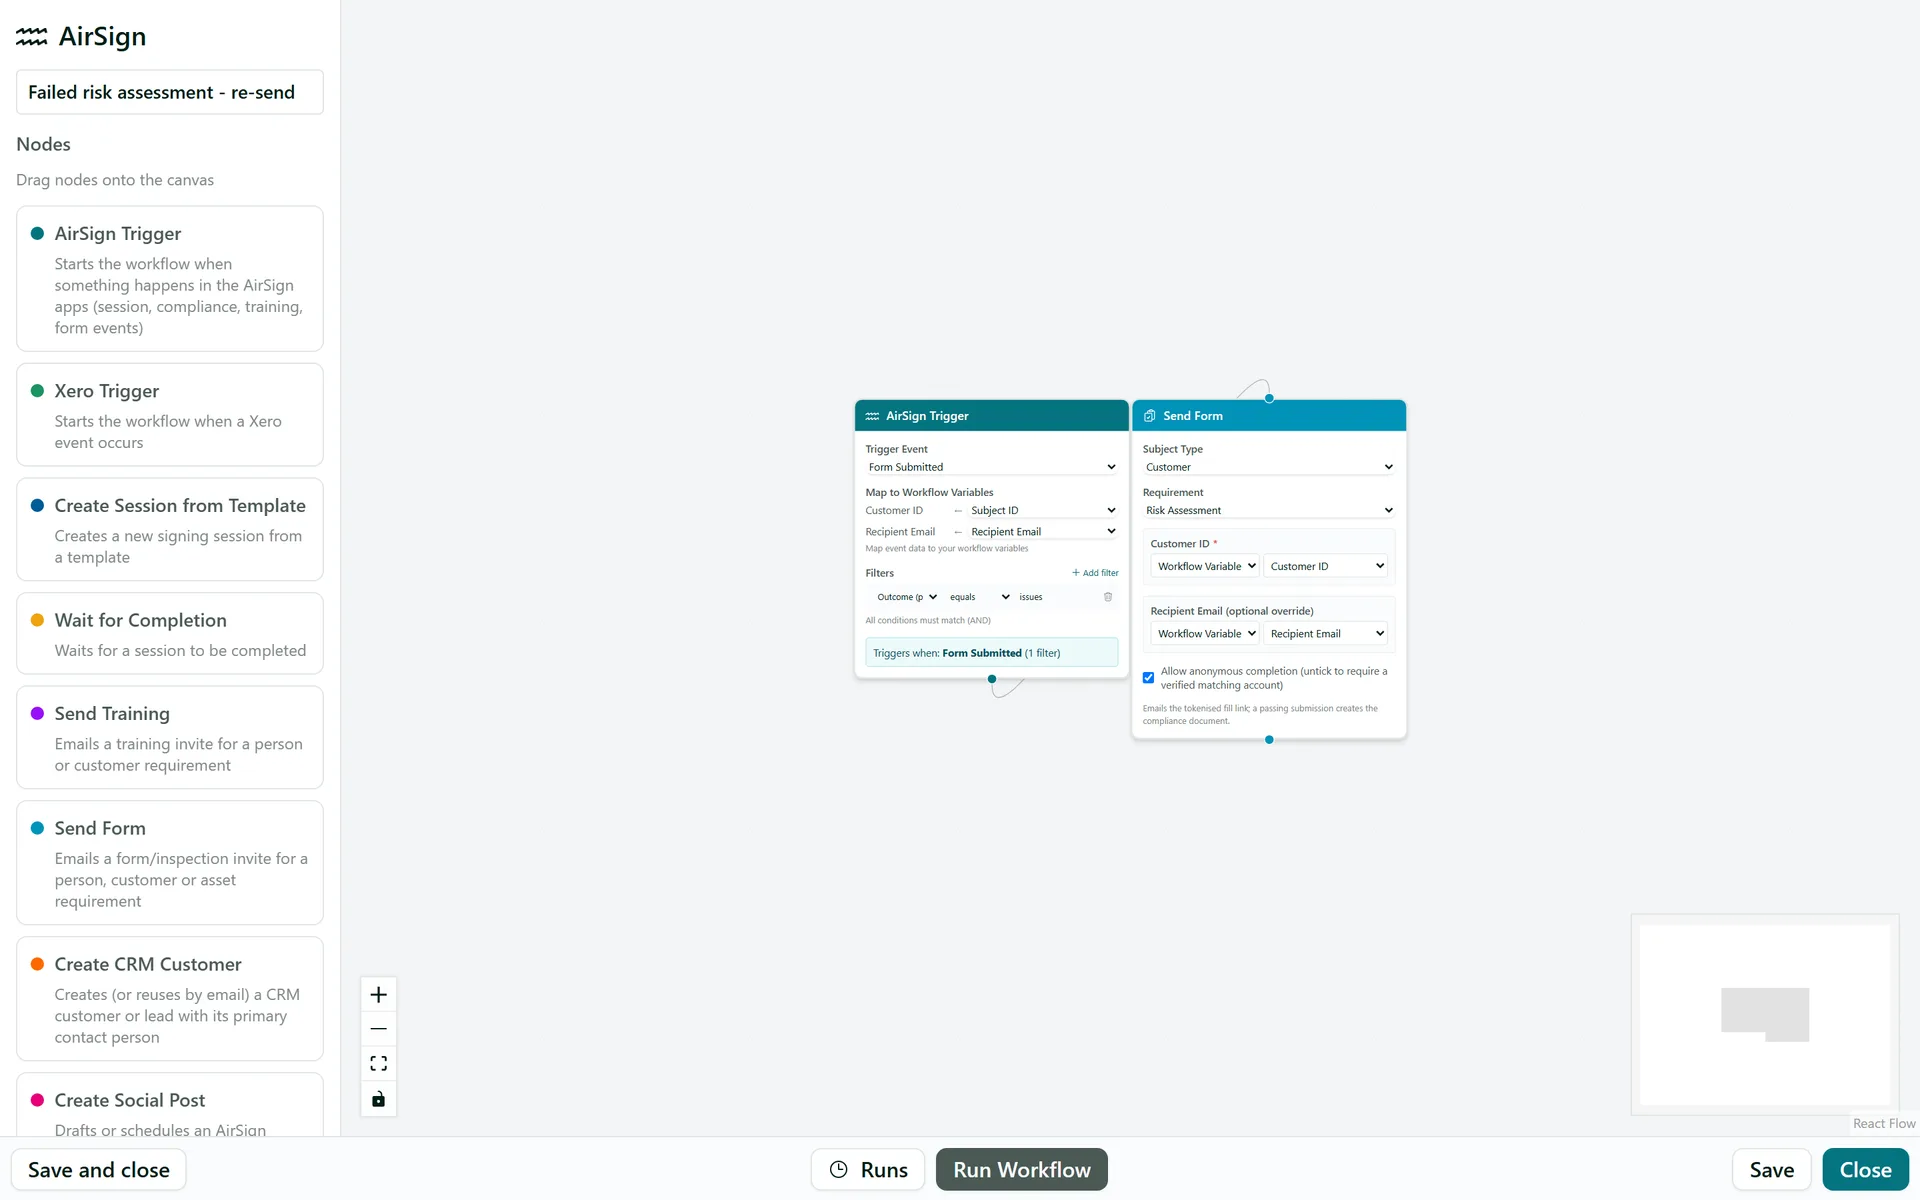
The editor opens with the Nodes list on the left and the canvas on the right. Give the workflow a name at the top, then drag nodes onto the canvas:
- Triggers start the workflow: AirSign Trigger (something happens in the AirSign apps - a session is completed, a form is submitted, training is completed, a document is about to expire, a customer is created, a shift needs cover, an invoice is sent and more) or Xero Trigger.
- Actions do the work: Create Session from Template, Wait for Completion, Send Training, Send Form, Create CRM Customer, Create Social Post, HTTP Request, Xero Upload and SharePoint Upload.
Join the nodes by dragging from the dot at the bottom of one node to the dot at the top of the next. To remove a node, click it and press Delete.
Step 3: Set up the trigger and its filters
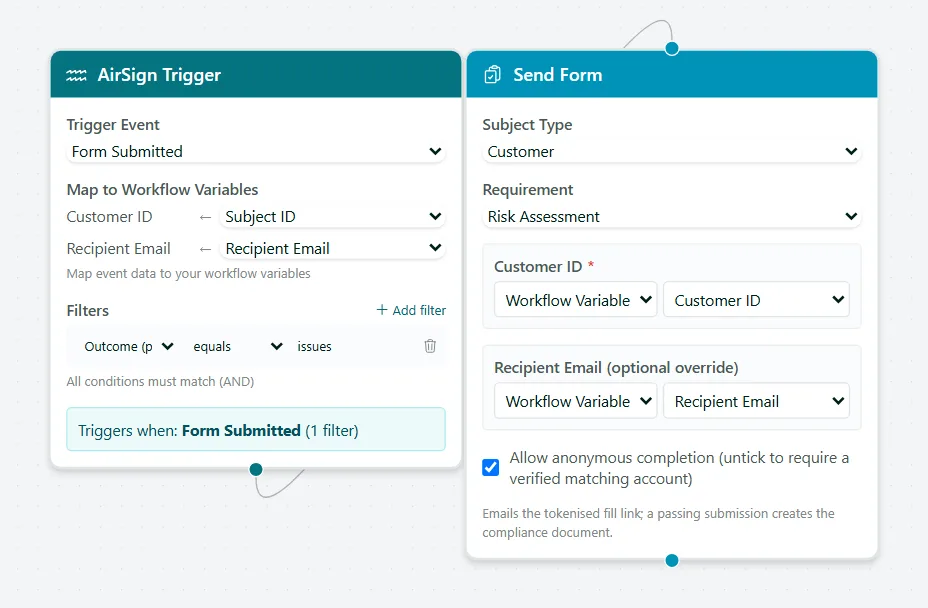
In the AirSign Trigger, choose the Trigger Event. Click Add filter to fire only for the events you care about - for example Outcome equals issues for a form that found problems. When you add several filters, all of them must match.
To pass event details to later steps, add Workflow Variables in the left panel (click Add), then pick which piece of the event fills each one under Map to Workflow Variables. Action nodes can then use a Workflow Variable - such as the customer who submitted the form - wherever they ask for a value.
Step 4: Send data to another system with an HTTP Request
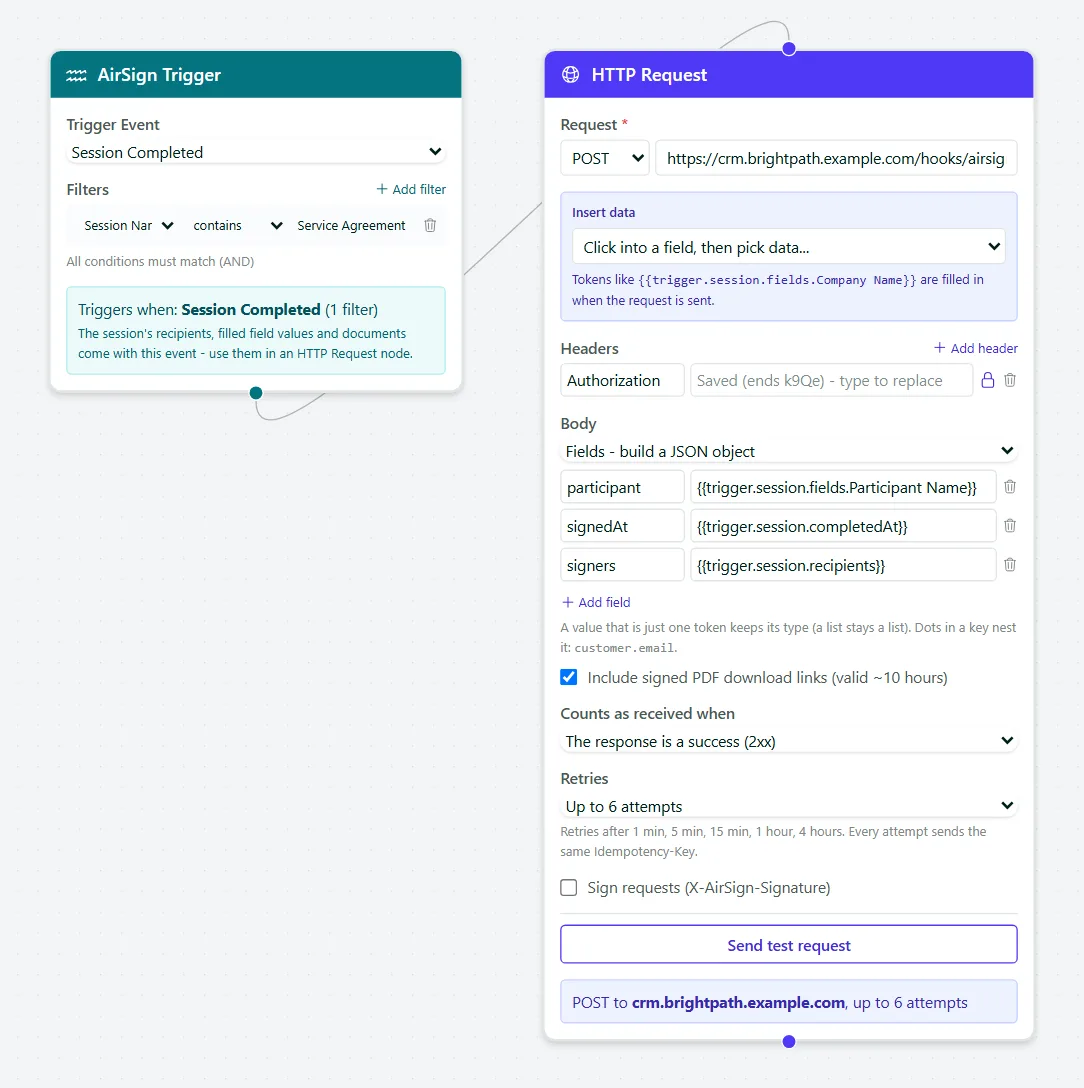
The HTTP Request node sends the workflow's data to any system with a web address (https only). Choose the method and enter the address, then:
- Insert data - click into a field, then pick from the list to insert details such as a filled field from the signed document or the list of signers. They are filled in when the request is sent.
- Headers - add an API key or Authorization header. Click the padlock to mark a value secret: it is stored encrypted and never shown again.
- Body - Everything sends all the event and workflow data, Fields builds a JSON object from the rows you add, and Raw lets you write the body yourself. Tick Include signed PDF download links to add links to the signed documents (valid about 10 hours).
- Counts as received when and Retries - the step only goes green when the other system acknowledges it. Otherwise AirSign tries again after 1 min, 5 min, 15 min, 1 hour and 4 hours, up to the number of attempts you choose.
Click Send test request to send one real request now, filled from this workflow's latest run or a sample event, and see exactly what was sent and what came back.
Step 5: Save and switch it on
Click Save (or Save and close). A workflow with a name and every node filled in is saved as active and starts responding to its trigger straight away; if something is missing it is saved as a draft until you finish it.
Step 6: Test it and check its runs
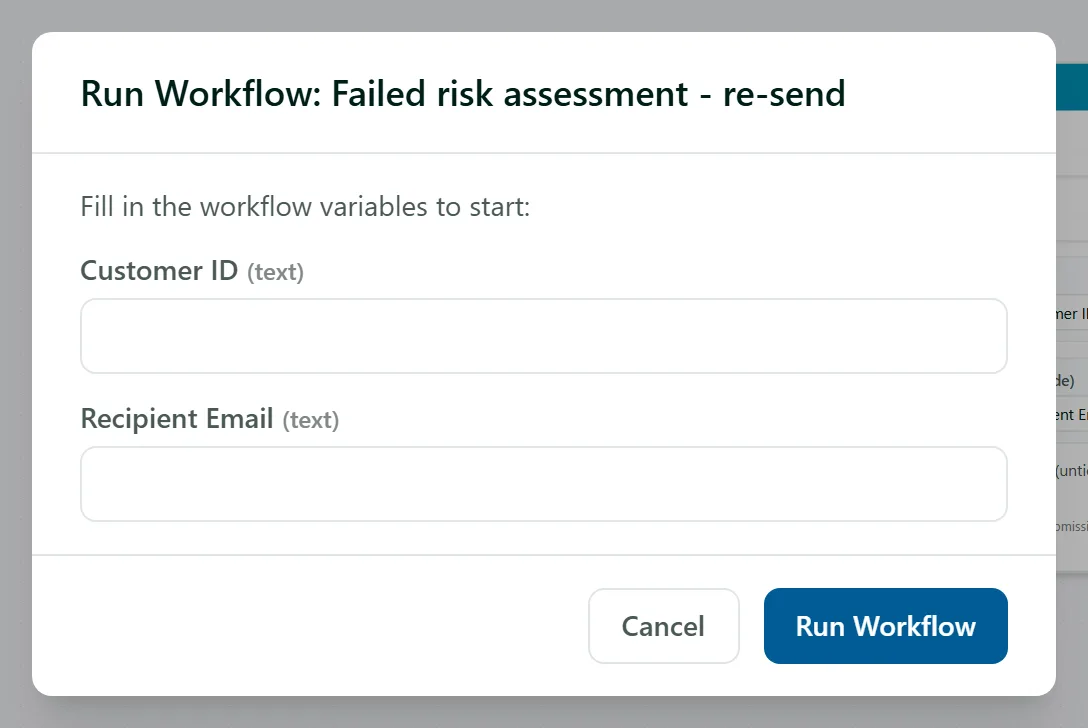
Click Run Workflow to start a run by hand: fill in the workflow variables and click Run Workflow. This really runs the actions, so use test details. Click Runs to see this workflow's run history and open any run to see how far each step got. Every run, from any workflow, is also listed under Runs in the left menu.
Tips
- Use filters to keep a workflow focused - a trigger with no filters fires on every event of that type.
- Create Social Post saves a draft by default, so a person checks the wording before it goes out.
- Create CRM Customer reuses an existing customer with the same email, so a trigger that fires twice does not make duplicates.
- Deleting a workflow moves it to Archived in the left menu, where you can still view it.
Need More Help?
Related guides: Posting to Social Media, Creating Your First Template. See our FAQ section or email support at [email protected].